
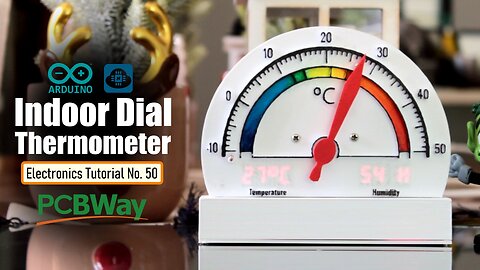
Indoor Dial Thermometer
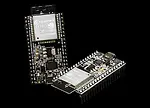
Had some time this weekend and a desire to create something new and interesting, so went ahead and created an Arduino/NodeMCU based indoor dial thermometer. This device displays the temperature in degree centigrade on a D-Shaped Gauge as well as on a 7-Segment display.
In addition to that, it also saves the temperature and humidity readings in a MySQL DataBase hosted on a home based Raspberry Pi Server. The data is then displayed using the "Our Smart Home" app.
17
views

Rechargeable Gothic Lantern
Rechargeable Gothic Lantern
------
A Gothic Lantern is a captivating piece of lighting that brings the allure of the Victorian Era into your home. The lantern is adorned with ornate top and bottom ornaments, reminiscent of the Gothic style that was prevalent during the Victorian Era.
My curiosity to create something new and interesting got me into this gothic style rechargeable lantern.
The design is both nostalgic and timeless, making the Gothic Lantern a perfect fit for homes that cherish a touch of historical charm.
Watch this video for detailed step by step instructions on how to build this lantern and for a complete instruction on how the electronic circuit works inside the lantern.
Video: https://www.youtube.com/watch?v=3Rp0QrV16nQ
31
views
1
comment

555 Adjustable Delay On Off Timer Circuit
PCBway: only $5 for 10 pcbs from https://www.pcbway.com/?from=CZcouple
The 555 timer IC is an integrated circuit (IC) that is used in a variety of timer, delay, pulse generator and oscillator circuits.
In this tutorial, I am going to show you guys how to make an "Adjustable Delay Timer Circuit" using the 555 timer IC. This circuit can automatically turn on/off any circuit after a fixed duration. This timer circuit is useful when you need to power On/Off any AC Appliances after a pre-defined duration. For example, you can use this circuit to automatically turn off a mobile charger after a certain period of time to avoid over charging, or you can turn on/off a light bulb after a certain period.
The time delay of this circuit can be adjusted by using various combinations of resistors and capacitors.
Watch this video for detailed step by step instructions on how to build this circuit and to know how this circuit works.
Thanks
------
Thanks again for checking my post. I hope it helps you.
If you want to support me subscribe to my YouTube Channel: https://www.youtube.com/user/tarantula3
PCBWay 6th Project Design Contest: https://www.pcbway.com/activity/6th-p...
Video: https://youtu.be/AB8XjBGvlPY
Full Blog Post:
DIY - Relay Module: https://youtu.be/3n69b4sdDjk
Schema:
Circuit:
Gerber Files:
Support My Work
BTC: 1Hrr83W2zu2hmDcmYqZMhgPQ71oLj5b7v5
LTC: LPh69qxUqaHKYuFPJVJsNQjpBHWK7hZ9TZ
DOGE: DEU2Wz3TK95119HMNZv2kpU7PkWbGNs9K3
ETH: 0xD64fb51C74E0206cB6702aB922C765c68B97dCD4
BAT: 0x9D9E77cA360b53cD89cc01dC37A5314C0113FFc3
LBC: bZ8ANEJFsd2MNFfpoxBhtFNPboh7PmD7M2
COS: bnb136ns6lfw4zs5hg4n85vdthaad7hq5m4gtkgf23 Memo: 572187879
BNB: 0xD64fb51C74E0206cB6702aB922C765c68B97dCD4
MATIC: 0xD64fb51C74E0206cB6702aB922C765c68B97dCD4
Thanks, ca gain in my next tutorial.
27
views

3D Printed Arduino Halloween Decoration
PCBway: only $5 for 10 pcbs from https://www.pcbway.com/?from=CZcouple
When the full moon is shining and the wolves are howling, it's time for Halloween's spooky spectacle. The snickering grins of jack-o'-lanterns glow from lit porches. Kids skip down the block in spooky costumes, carrying bags full of candy and shouting "Trick or Treat!". The Nightmare Before Christmas is almost here...
Do you see dead people???
Alright Enough of that, in this Spooktacular video I am going to create an Arduino based 3D printed Halloween Décor.
It's super easy, fun and spooky....
Thanks
------------
Thanks again for checking my post. I hope it helps you.
If you want to support me subscribe to my YouTube Channel: https://www.youtube.com/user/tarantula3
Video: https://youtu.be/Hxfhwr0Eoqk Visit
Full Blog Post: Visit
Code: https://github.com/tarantula3/Arduino-Halloween--Decor/blob/main/Code.zip
Schema: https://github.com/tarantula3/Arduino-Halloween--Decor/blob/main/Schema.fzz
STL Files:
Coffin: Download https://github.com/tarantula3/Arduino-Halloween--Decor/blob/main/Twist_Lock_Coffin.zip
RIP: Download https://github.com/tarantula3/Arduino-Halloween--Decor/blob/main/RIP.zip
Pumpkins: Download https://github.com/tarantula3/Arduino-Halloween--Decor/blob/main/Halloween_Pumpkins.zip
Pikachu: Download https://www.thingiverse.com/thing:4701289
Ghost: Download https://github.com/tarantula3/Arduino-Halloween--Decor/blob/main/Cute_Hug_Me_Ghost.zip
Support My Work
BTC: 1Hrr83W2zu2hmDcmYqZMhgPQ71oLj5b7v5
LTC: LPh69qxUqaHKYuFPJVJsNQjpBHWK7hZ9TZ
DOGE: DEU2Wz3TK95119HMNZv2kpU7PkWbGNs9K3
ETH: 0xD64fb51C74E0206cB6702aB922C765c68B97dCD4
BAT: 0x9D9E77cA360b53cD89cc01dC37A5314C0113FFc3
LBC: bZ8ANEJFsd2MNFfpoxBhtFNPboh7PmD7M2
COS: bnb136ns6lfw4zs5hg4n85vdthaad7hq5m4gtkgf23 Memo: 572187879
BNB: 0xD64fb51C74E0206cB6702aB922C765c68B97dCD4
MATIC: 0xD64fb51C74E0206cB6702aB922C765c68B97dCD4
Thanks, ca gain in my next tutorial.
#Halloween #arduinoproject #HalloweenArduino
30
views

All About RCWL0516 Microwave Radar Motion Sensor Module
Proximity sensing is a very common application in electronics.
There are several ways to accomplish this. The most common way is by using a PIR sensor. PIR Sensor senses the change in ambient infrared radiation caused by warm bodies. I have already covered this in my Tutorial No. 5: "PIR Sensor Tutorial - With or Without Arduino". However, since PIR sensors detect movement from living objects, they can generate false alarms. These sensors are also inefficient in hot environments, as they rely on heat signatures.
The other common methods of proximity sensing involve, using reflected ultrasonic or light beams. Using these sensors, the intruding object is detected by the reflected beam back to its source. The time delay between transmission and reception is measured to calculate the distance to the object.
In this tutorial, we are going to look at another method of proximity sensing using "Microwaves" and "Doppler Effect". In my hand is an inexpensive RCWL-0516 Microwave Radar Motion Sensor. The RCWL-0516 microwave sensor detects "any movement" from "any object" and does not rely on heat, making it more reliable in hot environments. I am going to use this sensor to create a geo-fence around my house to detect motion and get notifications.
Video: https://youtu.be/JOVd3sKEFaI
Full Blog Post:
Code: https://github.com/tarantula3/RCWL-0516/blob/main/Code.ino
Datasheet: https://github.com/tarantula3/RCWL-0516/blob/main/rcwl-0516-data-sheet.pdf
Schema: https://github.com/tarantula3/RCWL-0516/blob/main/rcwl-0516-schematic.png
Other Links:
PIR Sensor Tutorial - With or Without Arduino: https://youtu.be/jvGOtvnPU9Q
DIY Relay Module: https://www.youtube.com/watch?v=3n69b4sdDjk
All About nRF24L01 Modules: https://www.youtube.com/watch?v=LhBIRMMAGGE
DIY - NodeMCU Development Board: https://www.youtube.com/watch?v=y2m2nh7wHaY
Contactless Wireless Door Bell Using Arduino: https://www.youtube.com/watch?v=DF6Xojd7OvA
Doppler Effect: Wikipedia https://en.wikipedia.org/wiki/Doppler_effect
Support My Work
BTC: 1Hrr83W2zu2hmDcmYqZMhgPQ71oLj5b7v5
LTC: LPh69qxUqaHKYuFPJVJsNQjpBHWK7hZ9TZ
DOGE: DEU2Wz3TK95119HMNZv2kpU7PkWbGNs9K3
ETH: 0xD64fb51C74E0206cB6702aB922C765c68B97dCD4
BAT: 0x9D9E77cA360b53cD89cc01dC37A5314C0113FFc3
LBC: bZ8ANEJFsd2MNFfpoxBhtFNPboh7PmD7M2
COS: bnb136ns6lfw4zs5hg4n85vdthaad7hq5m4gtkgf23 Memo: 572187879
BNB: 0xD64fb51C74E0206cB6702aB922C765c68B97dCD4
MATIC: 0xD64fb51C74E0206cB6702aB922C765c68B97dCD4
Thanks, ca gain in my next tutorial.
#RCWL0516 #MicrowaveRadarMotionSensor #PIRsensor
46
views

Unboxing Makerfabs ESP32 S3 Parallel TFT Display with Touch
Product link: Visit https://www.makerfabs.com/esp32-s3-parallel-tft-with-touch-4-inch.html
Technical Support: techsupport@makerfabs.com
Makerfabs sent me this cute little 480x480 ESP32 based touch screen display. I am going to use this screen to create a touch panel for my home automation system.
In this video, I am going to unbox and show you guys how to program and use this cute little touchscreen, with the help of some examples.
Other Links:
ESP32-S3-Parallel-Examples: Download https://github.com/Makerfabs/ESP32-S3-Parallel-TFT-with-Touch-4inch
ESP32 Board Software Development Kit: http://arduino.esp8266.com/stable/package_esp8266com_index.json
Display Datasheet: Visit
ESP32-S3 Datasheet: Visit
MF_Lvgl library: Download
Makerfabs Wiki: Visit https://wiki.makerfabs.com/ESP32_S3_Parallel_4.0_TFT_with_Touch.html
How To Install ESP32 Board: Visit https://wiki.makerfabs.com/Installing_ESP32_Add_on_in_Arduino_IDE.html
3D Printed Photo-Frame: Visit https://www.youtube.com/watch?v=7l8Pan3V8EY
JPEGDEC-master: Download https://github.com/arduino-libraries/Audio
Audio-master: Download https://github.com/bitbank2/JPEGDEC
SquareLine-Demo: Download https://github.com/Makerfabs/SquareLine-Demo
SquareLine Studio: Download https://squareline.io/downloads
LovyanGFX lib: Download https://github.com/lovyan03/LovyanGFX/tree/master/src/lgfx_user
Support My Work
---------------
BTC: 1Hrr83W2zu2hmDcmYqZMhgPQ71oLj5b7v5
LTC: LPh69qxUqaHKYuFPJVJsNQjpBHWK7hZ9TZ
DOGE: DEU2Wz3TK95119HMNZv2kpU7PkWbGNs9K3
ETH: 0xD64fb51C74E0206cB6702aB922C765c68B97dCD4
BAT: 0x9D9E77cA360b53cD89cc01dC37A5314C0113FFc3
LBC: bZ8ANEJFsd2MNFfpoxBhtFNPboh7PmD7M2
COS: bnb136ns6lfw4zs5hg4n85vdthaad7hq5m4gtkgf23 Memo: 572187879
BNB: 0xD64fb51C74E0206cB6702aB922C765c68B97dCD4
MATIC: 0xD64fb51C74E0206cB6702aB922C765c68B97dCD4
Thanks, ca gain in my next tutorial.
#Makerfabs #ESP32S3 #LovyanGFX
132
views
Transformers PCB Badge
It's been a while, the Autobots have appeared on the silver screen. Finally they are returning to the big screen in their upcoming Transformers movie "Rise of the Beasts".
This inspired me in making a PCB Badge to complement my enthusiasm and love towards the Autobots.
In this tutorial, I am going to show you guys how to design this "Transformers PCB Badge" and how to solder the components to it.
Thanks
------
Thanks again for checking my post. I hope it helps you.
If you want to support me subscribe to my YouTube Channel:
/ tarantula3
Video:
• Transformers PCB ...
Full Blog Post: https://diyfactory007.blogspot.com/20...
LED Fader Using 555 Timer IC:
• LED Fader Using 5...
LED Fader - With or Without Arduino: Visit
• LED Fader - With ...
Adjustable Single/Dual LED Flasher Using 555 Timer IC: Visit
• Adjustable Single...
Other Links:
Gerber: https://www.pcbway.com/project/sharep...
Github: https://github.com/tarantula3/Transfo...
Simulation: https://tinyurl.com/2qv266bg
What Is Forward Voltage: https://42electronics.com/blogs/learn...
Support My Work:
BTC: 1Hrr83W2zu2hmDcmYqZMhgPQ71oLj5b7v5
LTC: LPh69qxUqaHKYuFPJVJsNQjpBHWK7hZ9TZ
DOGE: DEU2Wz3TK95119HMNZv2kpU7PkWbGNs9K3
ETH: 0xD64fb51C74E0206cB6702aB922C765c68B97dCD4
BAT: 0x9D9E77cA360b53cD89cc01dC37A5314C0113FFc3
LBC: bZ8ANEJFsd2MNFfpoxBhtFNPboh7PmD7M2
COS: bnb136ns6lfw4zs5hg4n85vdthaad7hq5m4gtkgf23 Memo: 572187879
BNB: 0xD64fb51C74E0206cB6702aB922C765c68B97dCD4
MATIC: 0xD64fb51C74E0206cB6702aB922C765c68B97dCD4
Thanks, ca again in my next tutorial.
#HowtomakeaPCB #designingPCB #PCBtutorial
22
views

LED Fader Using 555 Timer IC
PCBway: only $5 for 10 pcbs from https://www.pcbway.com/?from=CZcouple
Wanted to generate a LED fading effect (fade-in and fade-out) for my upcoming video tutorial using the 555 timer IC.
I already have a video where I used LM358 Dual Operational Amplifier IC and another one with Arduino to generate the LED fading effect.
YouTube, is full of video showing how to generate the fading effect using 555 timer IC. However, none of them produce a true fading effect.
Some just fades-in but never fades-out. And there is literally no explanation of how they are generating the fading effect other than just showing how to assemble the components.
In this tutorial, I am going to show you guys how to create a true LED fading effect using the 555 timer IC. I will also explain how the circuit works and how changing components change the fading effect of the LEDs.
-----------------------------------
Thanks again for checking my post. I hope it helps you.
If you want to support me subscribe to my YouTube Channel: https://www.youtube.com/user/tarantula3
Video: https://youtu.be/30wGujPnupw
Full Blog Post:
LED Fader - With or Without Arduino: Visit https://youtu.be/IIUsdICycOw
Adjustable Single/Dual LED Flasher Using 555 Timer IC: Visit https://youtu.be/B1URFJywtcI
Other Links:
Github: https://github.com/tarantula3/LED-Fader-Using-555-Timer-IC
Simulation: https://tinyurl.com/2qv266bg
What Is Forward Voltage: https://42electronics.com/blogs/learn-more/what-is-forward-voltage
Support My Work:
BTC: 1Hrr83W2zu2hmDcmYqZMhgPQ71oLj5b7v5
LTC: LPh69qxUqaHKYuFPJVJsNQjpBHWK7hZ9TZ
DOGE: DEU2Wz3TK95119HMNZv2kpU7PkWbGNs9K3
ETH: 0xD64fb51C74E0206cB6702aB922C765c68B97dCD4
BAT: 0x9D9E77cA360b53cD89cc01dC37A5314C0113FFc3
LBC: bZ8ANEJFsd2MNFfpoxBhtFNPboh7PmD7M2
COS: bnb136ns6lfw4zs5hg4n85vdthaad7hq5m4gtkgf23 Memo: 572187879
BNB: 0xD64fb51C74E0206cB6702aB922C765c68B97dCD4
MATIC: 0xD64fb51C74E0206cB6702aB922C765c68B97dCD4
Thanks, ca again in my next tutorial.
30
views

LED Fader Using 555 Timer IC
PCBway: only $5 for 10 pcbs from https://www.pcbway.com/?from=CZcouple
Wanted to generate a LED fading effect (fade-in and fade-out) for my upcoming video tutorial using the 555 timer IC.
I already have a video where I used LM358 Dual Operational Amplifier IC and another one with Arduino to generate the LED fading effect.
YouTube, is full of video showing how to generate the fading effect using 555 timer IC. However, none of them produce a true fading effect.
Some just fades-in but never fades-out. And there is literally no explanation of how they are generating the fading effect other than just showing how to assemble the components.
In this tutorial, I am going to show you guys how to create a true LED fading effect using the 555 timer IC. I will also explain how the circuit works and how changing components change the fading effect of the LEDs.
-----------------------------------
Thanks again for checking my post. I hope it helps you.
If you want to support me subscribe to my YouTube Channel: https://www.youtube.com/user/tarantula3
Video: https://youtu.be/30wGujPnupw
Full Blog Post:
LED Fader - With or Without Arduino: Visit https://youtu.be/IIUsdICycOw
Adjustable Single/Dual LED Flasher Using 555 Timer IC: Visit https://youtu.be/B1URFJywtcI
Other Links:
Github: https://github.com/tarantula3/LED-Fader-Using-555-Timer-IC
Simulation: https://tinyurl.com/2qv266bg
What Is Forward Voltage: https://42electronics.com/blogs/learn-more/what-is-forward-voltage
Support My Work:
BTC: 1Hrr83W2zu2hmDcmYqZMhgPQ71oLj5b7v5
LTC: LPh69qxUqaHKYuFPJVJsNQjpBHWK7hZ9TZ
DOGE: DEU2Wz3TK95119HMNZv2kpU7PkWbGNs9K3
ETH: 0xD64fb51C74E0206cB6702aB922C765c68B97dCD4
BAT: 0x9D9E77cA360b53cD89cc01dC37A5314C0113FFc3
LBC: bZ8ANEJFsd2MNFfpoxBhtFNPboh7PmD7M2
COS: bnb136ns6lfw4zs5hg4n85vdthaad7hq5m4gtkgf23 Memo: 572187879
BNB: 0xD64fb51C74E0206cB6702aB922C765c68B97dCD4
MATIC: 0xD64fb51C74E0206cB6702aB922C765c68B97dCD4
Thanks, ca again in my next tutorial.
19
views