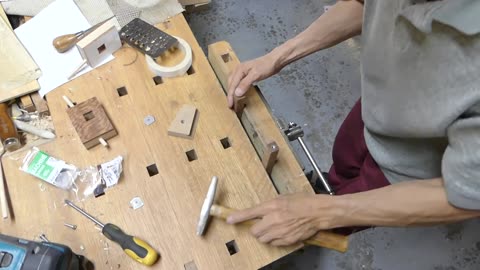
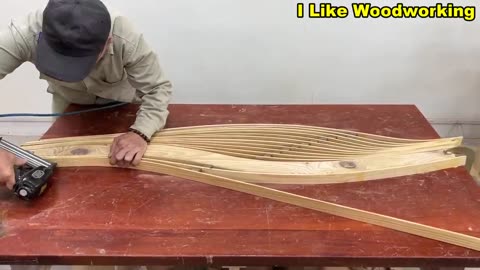
Making This Table Saw Miter Sled - Experimental - Workshop
"Embark on a woodworking adventure with us as we dive into the creation of an experimental table saw miter sled. In this workshop, we're pushing the boundaries of traditional techniques to craft a miter sled that's as innovative as it is functional. Join us as we explore new ideas, test out unconventional methods, and bring our vision to life. Whether you're a seasoned woodworker or just starting out, there's something here for everyone. Get ready to unleash your creativity and elevate your woodworking game with this unique project. Let's see what we can create together!"
4
views

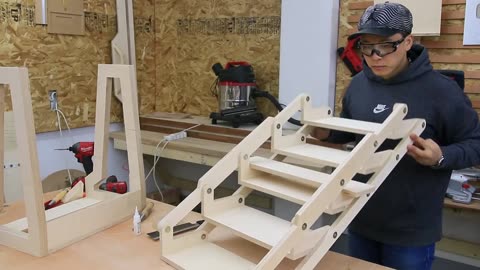
Unique Design Cross Cut Sled __ You Have Never Seen This Design Before.!
Materials Needed:
Hardwood lumber for the base and fences (such as maple or oak)
Plywood for the sled runners and fences
Aluminum T-track or T-slot extrusion
Bearings or runners for smooth movement
Screws, nuts, bolts, and washers
Wood glue
Sandpaper
Finish (such as oil or varnish)
Tools Needed:
Table saw or circular saw
Miter saw or hand saw
Drill and drill bits
Router and router bits (for cutting T-slots and shaping)
Chisels and hand planes
Clamps
Measuring tools (tape measure, square, marking gauge)
Step-by-Step Guide:
Design Planning:
Begin by brainstorming ideas for a unique and innovative design for your cross-cut sled. Consider features that would improve accuracy, efficiency, and safety in your woodworking projects.
Prepare the Base:
Cut the hardwood lumber and plywood to size for the base of the cross-cut sled. Ensure that the base is flat, smooth, and free from defects.
Cut the Runners:
Cut the plywood runners to size for the bottom of the sled. These runners will fit into the miter slots of your table saw and provide smooth, precise movement.
Create the Fence Assembly:
Cut hardwood lumber and plywood to size for the front and back fences of the cross-cut sled. Use a router to cut T-slots or T-tracks into the fences for attaching accessories and stops.
Attach the Runners and Fences:
Attach the plywood runners to the underside of the base using screws, ensuring they fit snugly in the miter slots. Attach the front and back fences to the base, aligning them perpendicular to the blade.
Add Features and Accessories:
Customize your cross-cut sled with unique features and accessories to enhance its functionality. This could include built-in stops, measurement scales, or clamping systems for securing workpieces.
Test and Adjust:
Once the cross-cut sled is fully assembled, test its functionality by making test cuts in scrap wood. Check for accuracy, stability, and smooth movement, and make any necessary adjustments to fine-tune the sled.
Sand and Finish:
Sand the entire cross-cut sled to smooth out any rough edges or surfaces. Apply a finish of your choice to protect the wood and enhance its appearance.
Use and Enjoy:
With your unique design cross-cut sled complete, it's time to put it to use in your woodworking projects. Enjoy the improved accuracy and efficiency it brings to your workshop, and take pride in your innovative design!
By following these steps and incorporating your own creative ideas, you can create a cross-cut sled with a unique and innovative design that will elevate your woodworking projects to new heights.
17
views
Here is the Table Saw Sled You Have Been Looking For
"Welcome to the ultimate table saw sled tutorial! Discover the perfect solution you've been searching for to achieve precise, repeatable cuts with ease. This innovative table saw sled is designed to revolutionize your woodworking projects, offering unparalleled accuracy and efficiency. Say goodbye to guesswork and hello to flawless cuts every time. Join us as we unveil the table saw sled you've been longing for – your key to unlocking new levels of craftsmanship and precision in your workshop. Let's get started!"
3
views
Handmade universal band saw made of wood
rame and components
Plywood for the tabletop and enclosure
Metal rods or tubes for the guide rails
Bearings for the blade guides
Bandsaw blade
Hardware (screws, bolts, nuts, washers)
Wood glue
Sandpaper
Finish (such as oil or varnish)
Tools Needed:
Table saw or circular saw
Planer or hand planes
Jointer or hand plane
Drill and drill bits
Chisels
Mallet
Router and router bits
Bandsaw (if available)
Measuring tools (tape measure, square, calipers)
Step-by-Step Guide for Part 1:
Design Planning:
Start by creating a detailed design for your universal bandsaw, considering the dimensions, features, and functionality you want to incorporate. Research existing designs for inspiration and guidance.
Frame Construction:
Begin by cutting the hardwood lumber to size for the frame components, including the uprights, horizontal beams, and base. Use a table saw or circular saw to make straight, accurate cuts.
Joinery:
Choose your preferred joinery method for connecting the frame components. Traditional options may include mortise and tenon joints, dowel joints, or pocket hole screws. Ensure that the joints are strong and secure to support the weight and tension of the bandsaw components.
Assembly:
Dry-fit the frame components to ensure everything fits together properly before gluing or fastening. Once satisfied with the fit, apply wood glue to the joints and assemble the frame, clamping it securely until the glue dries. Check for squareness during assembly.
Tabletop and Enclosure:
Cut the plywood to size for the tabletop and enclosure panels. The tabletop should be large enough to support your workpieces, and the enclosure panels will provide support and safety for the blade. Attach the tabletop to the frame using screws or bolts, and attach the enclosure panels to the frame using hinges or brackets.
Guide Rails and Blade Guides:
Install metal rods or tubes along the frame to serve as guide rails for the bandsaw blade. These should be positioned parallel to each other and perpendicular to the tabletop. Install bearings or blade guides to support the bandsaw blade and keep it aligned during operation.
Blade Installation:
Install the bandsaw blade onto the wheels or pulleys of the bandsaw mechanism. Follow the manufacturer's instructions for proper installation and tensioning of the blade. Ensure that the blade tracks properly on the guide rails and wheels.
Test Run:
Once the bandsaw is fully assembled, perform a test run to ensure that it operates smoothly and accurately. Check for any alignment issues, vibrations, or other problems that may need to be addressed. Make any necessary adjustments before proceeding to Part 2 of the project.
By following these steps, you can successfully create the frame and basic components of your handmade universal bandsaw. Stay tuned for Part 2, where we will cover additional features and enhancements to complete the project.
21
views
2
comments
The Dwarfed Behemoth Roubo Bench with Arms (The making of the body).
Materials Needed:
Hardwood lumber for the benchtop, legs, and stretchers (such as maple, beech, or oak)
Wood glue
Screws or dowels for joinery
Clamps
Sandpaper
Finish (such as oil or varnish)
Tools Needed:
Table saw or circular saw
Planer or hand planes
Jointer or hand plane
Drill and drill bits
Chisels
Mallet
Router and router bits (optional)
Bench vise (optional but helpful)
Measuring tools (tape measure, square, marking gauge)
Step-by-Step Guide:
Design Planning:
Start by creating a detailed design for your Roubo bench, taking into account the dimensions, proportions, and features you want to incorporate. The "Dwarfed Behemoth" variation may include shorter legs and a more compact overall size compared to a traditional Roubo bench.
Prepare the Lumber:
Mill your hardwood lumber to the appropriate dimensions for the benchtop, legs, and stretchers. Use a table saw, planer, and jointer to achieve smooth, flat surfaces and precise dimensions.
Cut the Components:
Cut the benchtop, legs, and stretchers to size according to your design. Double-check your measurements to ensure accuracy.
Joinery:
Choose your preferred joinery method for connecting the benchtop to the legs and stretchers. Traditional options for a Roubo bench may include mortise and tenon joints or dovetails. Use a combination of hand tools and power tools to cut the joinery accurately.
Assemble the Body:
Dry-fit the benchtop, legs, and stretchers to ensure everything fits together properly before gluing. Apply wood glue to the joints and assemble the components, clamping them securely until the glue dries. Check for squareness during assembly.
Optional Features:
Depending on your design, you may want to incorporate additional features such as dog holes, a tool tray, or a vise. Install these features according to your design plan, using appropriate hardware and techniques.
Final Shaping and Smoothing:
Once the glue has dried, remove any excess glue squeeze-out and sand the entire bench body to smooth out any rough surfaces or edges. Pay attention to detail, ensuring that all surfaces are uniform and free of defects.
Finish:
Apply a finish of your choice to protect the wood and enhance its appearance. Options include oil, varnish, or shellac. Follow the manufacturer's instructions for application and drying times.
Fine-Tuning:
Once the finish has dried, perform any final adjustments or fine-tuning to ensure that the bench body is sturdy, level, and square. Check for any wobble or instability and make any necessary corrections.
Celebrate Your Progress:
With the body of "The Dwarfed Behemoth Roubo Bench with Arms" complete, take a moment to celebrate your progress and the craftsmanship you've achieved so far. The body is the foundation of the bench, and completing this step is a significant milestone in the project.
By following these steps and paying careful attention to detail, you can successfully create the body of your Roubo bench, setting the stage for the next steps in the construction process.
22
views

Universal band saw made of wood 2 part, original clock made of wood and epoxy resin.
Materials Needed:
Hardwood lumber for the frame and components (such as maple, oak, or beech)
Plywood for the tabletop and motor mount
Metal rod or pipe for the bandsaw blade guides
Metal or plastic wheels for the blade tensioner and tracking
Bearings for the wheels and blade guides
Bandsaw blade
Hardware (screws, nuts, bolts, washers)
Wood glue
Epoxy resin (for stabilizing and reinforcing certain components, optional)
Sandpaper
Finish (such as oil or varnish)
Tools Needed:
Table saw or circular saw
Bandsaw (for cutting curved components)
Drill press or hand drill
Router and router bits (for shaping and profiling)
Chisels and hand planes
Clamps
Measuring tools (tape measure, square, marking gauge)
Step-by-Step Guide:
Design Planning:
Start by designing the universal band saw, considering factors such as the size of the cutting capacity, the frame structure, and the placement of key components such as the motor, wheels, and blade guides.
Prepare the Lumber:
Mill your hardwood lumber to the appropriate dimensions for the frame, tabletop, and other components. Ensure that all pieces are flat, straight, and free from defects.
Cut and Shape Components:
Cut the components for the frame, tabletop, motor mount, and other parts according to your design. Use a combination of power tools (such as a table saw) and hand tools (such as chisels and hand planes) to achieve the desired shapes and profiles.
Assemble the Frame:
Assemble the frame of the band saw, including the main uprights, horizontal supports, and base. Use wood glue and screws to join the components securely, ensuring that the frame is sturdy and square.
Install the Wheels:
Install the wheels for the blade tensioner and tracking mechanism. These wheels will guide the bandsaw blade and allow for adjustments to maintain proper tension and alignment.
Add the Blade Guides:
Attach the blade guides to the frame using metal rods or pipes and bearings. These guides will help support and stabilize the bandsaw blade during operation, reducing vibration and ensuring accurate cuts.
Mount the Motor:
Mount the motor to the frame using a motor mount or bracket. Ensure that the motor is aligned properly with the bandsaw wheels and that the drive belt or pulley system is correctly configured.
Install the Tabletop:
Attach the plywood tabletop to the frame, ensuring that it is level and securely fastened. This tabletop will provide a stable surface for supporting workpieces during cutting.
Test and Adjust:
Once the band saw is fully assembled, test its functionality by installing a bandsaw blade and powering it on. Check for proper blade tracking, tension, and alignment, and make any necessary adjustments to ensure smooth and accurate operation.
Finish and Fine-Tuning:
Sand the entire band saw to smooth out any rough edges or surfaces. Apply a finish of your choice to protect the wood and enhance its appearance. Perform any final fine-tuning or adjustments to ensure that the band saw is ready for use.
By following these steps and paying careful attention to detail, you can create a handmade universal band saw made of wood that will serve as a versatile and valuable addition to your woodworking shop.
21
views
make a marking gauge
Materials Needed:
Hardwood stock (such as maple or beech) for the body
Steel rod or screw for the marking point
Small brass or steel knob
Wood glue
Sandpaper
Finish (such as oil or wax)
Tools Needed:
Saw (hand saw or table saw)
Drill and bits
Chisel
Mallet
File
Screwdriver
Step-by-Step Guide:
Prepare the Stock:
Begin by cutting your hardwood stock to the desired length for the marking gauge body. A length of around 8 to 10 inches should be sufficient for most projects.
Shape the Body:
With the stock cut to length, shape it into a rectangular or oval shape, depending on your preference. You can use a saw and chisel to remove excess material and refine the shape.
Drill Holes:
Next, drill two holes near one end of the body: one for the marking point and one for the knob. The hole for the marking point should be drilled perpendicular to the face of the body, while the hole for the knob can be drilled at a slight angle to provide clearance.
Insert the Marking Point:
Insert the steel rod or screw into the hole drilled for the marking point, leaving a small amount protruding from the face of the body. Secure it in place with wood glue, and allow it to dry thoroughly.
Add the Knob:
Insert the small brass or steel knob into the hole drilled for it, and secure it in place with a screw. This will serve as the locking mechanism for the marking gauge.
Shape the Marking Point:
Once the glue has dried, shape the marking point to a sharp tip using a file or sharpening stone. This will ensure clean and accurate marking lines.
Sand and Finish:
Sand the entire marking gauge body to smooth out any rough edges or surfaces. Apply a finish of your choice, such as oil or wax, to protect the wood and enhance its appearance.
Test and Adjust:
Before using the marking gauge on your woodworking projects, test it to ensure that the marking point moves smoothly and locks securely in place. Make any necessary adjustments to the knob or marking point to achieve the desired tension.
Use and Enjoy:
With your marking gauge complete, you're ready to start using it in your woodworking projects! Whether you're laying out joinery or marking dimensions, your homemade marking gauge will provide accurate and reliable results for years to come.
18
views

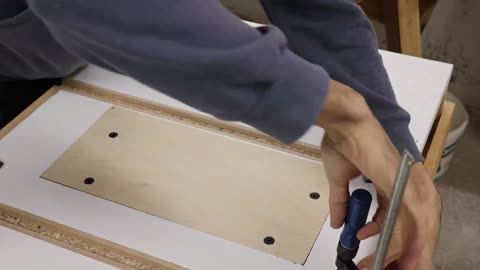
Homemade Table Saw 4 A Removable Insert and FineTuning
Materials Needed:
Plywood or MDF for the tabletop and base
Angle iron or aluminum extrusion for the fence and miter gauge slots
Steel or aluminum tubing for the miter gauge
Saw blade, arbor, and motor (repurposed from an existing circular saw or purchased separately)
Bearings or bushings for the arbor
Hardware (screws, bolts, nuts, washers)
T-track or T-slot extrusion for the miter gauge and fence
Inserts for the tabletop (made from plywood, MDF, or aluminum)
Adjustable feet or leveling pads for the base
Safety switch or paddle switch for powering the saw
Tools Needed:
Circular saw or table saw (for cutting plywood or MDF)
Drill and drill bits
Router and router bits (for cutting miter gauge slots and T-tracks)
Welder or metal adhesive (for assembling the fence and miter gauge)
Screwdriver and wrenches
Sandpaper and files (for smoothing edges and adjusting fit)
Step-by-Step Guide:
Design the Table Saw:
Sketch out your design for the table saw, including the dimensions of the tabletop, base, fence, miter gauge, and removable inserts. Consider ergonomic factors and safety features in your design.
Prepare the Tabletop and Base:
Cut the plywood or MDF to size for the tabletop and base of the table saw. Ensure that the tabletop is flat and smooth, as this will affect the accuracy of your cuts.
Install the Motor and Arbor:
Mount the circular saw motor onto the underside of the tabletop, aligning it with the center of the blade opening. Secure the motor in place using screws or bolts. Attach the saw blade to the motor's arbor, making sure it is centered and aligned properly.
Fabricate the Fence and Miter Gauge:
Construct the fence and miter gauge using angle iron, aluminum extrusion, or other suitable materials. Weld or glue the pieces together to create sturdy assemblies. Install T-tracks or T-slot extrusions onto the fence and tabletop to accommodate accessories and attachments.
Add the Removable Inserts:
Cut inserts from plywood, MDF, or aluminum to fit into the blade opening on the tabletop. These inserts should be removable to accommodate different blade sizes and angles. Use screws or bolts to secure the inserts in place, allowing for easy removal and replacement.
Fine-Tune the Alignment:
Adjust the position of the motor and arbor to ensure that the blade is parallel to the miter gauge slots and fence. Use shims or spacers as needed to achieve precise alignment. Check the alignment using a straightedge or precision measuring tools.
Install the Safety Switch:
Mount a safety switch or paddle switch onto the table saw base, within easy reach of the operator. This switch should be used to power the saw on and off, providing an additional safety feature during operation.
Test and Adjust:
Once the table saw is fully assembled, test its functionality by making test cuts in scrap wood. Check the accuracy of the cuts and the stability of the fence and miter gauge. Make any necessary adjustments to fine-tune the saw for optimal performance.
Finish and Customize:
Sand and finish the tabletop and base to protect the wood and enhance its appearance. Add any additional features or accessories, such as dust collection ports or auxiliary fences, to customize the table saw to suit your needs.
Safety Precautions:
Always wear appropriate safety gear, including safety glasses and hearing protection, when operating power tools. Familiarize yourself with the operation of the table saw and follow all safety guidelines provided by the manufacturer.
By following these steps, you can create a homemade table saw with a removable insert and fine-tuning capabilities that will serve as a versatile and reliable tool for your woodworking projects.
15
views
Homemade Table Saw 4 Removable Insert and FineTuning
Materials Needed:
Plywood or MDF for the table saw top and base
Hardwood for the fence and miter gauge slots
Steel or aluminum angle iron for the fence rails
Steel tubing or rods for the miter gauge
Bolts, nuts, washers, and screws
Table saw motor, arbor, and blade
Inserts made from hardwood or plastic
Sandpaper
Wood glue
Finish (such as varnish or paint)
Tools Needed:
Saw (table saw, circular saw, or jigsaw)
Drill and bits
Router and router table (optional)
Screwdriver
Clamps
Measuring tape
Square
Step-by-Step Guide:
Build the Tabletop:
Cut a piece of plywood or MDF to the desired size for the table saw top. Ensure it is flat and smooth. Cut another piece for the base, slightly larger than the top, to provide stability.
Install the Motor and Arbor:
Mount the table saw motor and arbor to the underside of the tabletop according to the manufacturer's instructions. Ensure the arbor is aligned perpendicular to the table surface.
Cut Fence and Miter Gauge Slots:
Use a saw or router to cut slots in the tabletop for the fence and miter gauge to slide in. These slots should be straight and parallel to the blade.
Install Fence Rails:
Attach steel or aluminum angle iron to the front and back of the tabletop to serve as rails for the fence. Ensure they are straight and parallel to each other.
Build the Fence:
Construct a wooden fence with a T-shaped profile that slides along the rails smoothly. Install locking mechanisms to secure the fence in place during use.
Make Miter Gauge:
Create a miter gauge using steel tubing or rods mounted in hardwood blocks. Ensure the gauge slides smoothly in the miter slots and locks securely at the desired angles.
Fine-Tuning Mechanism:
Implement a fine-tuning mechanism to adjust the blade height and angle precisely. This could involve adding threaded rods with knobs or using a rack and pinion system.
Create Removable Inserts:
Cut inserts from hardwood or plastic to fit into the table saw top around the blade. These inserts should be removable for blade changes and adjustments.
Sand and Finish:
Sand all surfaces of the table saw, including the tabletop, fence, and miter gauge, to remove any rough spots. Apply a finish of your choice to protect the wood and enhance its appearance.
Test and Adjust:
Before using the homemade table saw for woodworking projects, test all components to ensure they function smoothly and accurately. Make any necessary adjustments to achieve optimal performance.
Use and Enjoy:
With your homemade table saw complete, you're ready to start using it for a variety of woodworking tasks. Whether you're ripping boards or making precision cuts, your custom-built table saw will provide reliable performance and versatility in your workshop.
23
views
𝓜𝓪𝓴𝓲𝓷𝓰 𝓣𝓱𝓮 𝓦𝓸𝓻𝓶𝓱𝓸𝓵𝓮 𝓒𝓸𝓯𝓯𝓮𝓮 𝓣𝓪𝓫𝓵𝓮
Design Planning:
Begin by sketching out your design for the coffee table, incorporating the concept of a wormhole-inspired aesthetic. Consider the dimensions, materials, and overall shape of the table.
Material Selection:
Choose high-quality wood for the tabletop, selecting a slab with unique grain patterns and interesting features to serve as the focal point of the design. Additionally, select sleek metal for the legs, which will complement the organic beauty of the wood.
Preparation of Wood Slab:
Prepare the wood slab by sanding it smooth and applying a protective finish to enhance its natural beauty and durability. Consider using a clear epoxy resin to fill any cracks or voids in the wood, adding depth and visual interest to the tabletop.
Fabrication of Metal Legs:
Fabricate the metal legs according to your design specifications, bending and shaping the metal to create the desired curvature and form. Ensure the legs are sturdy and stable to support the weight of the tabletop.
Assembly:
Attach the metal legs to the underside of the wood slab, positioning them in a spiral or vortex-like pattern to evoke the concept of a wormhole. Use screws or metal brackets to securely fasten the legs to the tabletop, ensuring they are evenly spaced and aligned.
Finishing Touches:
Once the legs are attached, inspect the coffee table for any imperfections or rough edges. Sand down any rough spots and apply a final coat of finish to both the wood and metal surfaces to protect them from wear and tear.
Quality Check:
Perform a thorough quality check of the coffee table, ensuring that all components are securely attached and the table is stable and level. Make any necessary adjustments or refinements to ensure the finished product meets your standards of craftsmanship.
Display and Enjoyment:
Once completed, proudly display "The Wormhole Coffee Table" in your living room or designated space, where it will serve as both a functional piece of furniture and a stunning work of art. Invite guests to marvel at its unique design and craftsmanship, and enjoy the sense of wonder and fascination it brings to your home.
10
views
1
comment
𝓣𝓱𝓮 𝓦𝓸𝓻𝓴𝓫𝓮𝓷𝓬𝓱: 𝓣𝓻𝓪𝓭𝓲𝓽𝓲𝓸𝓷𝓪𝓵 𝓙𝓸𝓲𝓷𝓮𝓻𝔂 𝓑𝓮𝓷𝓬𝓱
Materials Gathering:
Begin by gathering high-quality wood, such as beech, maple, or oak, for the workbench. Ensure the lumber is straight, free of knots, and properly dried.
Design Planning:
Plan the dimensions and design of the workbench based on your needs and available space. Consider factors like height, width, and depth, as well as the type of joinery you'll be performing.
Lumber Preparation:
Cut the lumber to the desired lengths for the workbench components, including the legs, stretchers, top, and any additional features such as vises or tool trays.
Joinery Techniques:
Use traditional joinery techniques such as mortise and tenon, dovetail, or tongue and groove to connect the workbench components securely. Pay careful attention to accuracy and precision in your joinery work.
Assembly:
Assemble the workbench frame by joining the legs and stretchers together using the chosen joinery techniques. Ensure the frame is sturdy and square before proceeding.
Top Construction:
Construct the workbench top by laminating multiple boards together to create a thick, stable surface. Flatten and smooth the top using hand planes or power tools to ensure it is perfectly flat and level.
Vise Installation (Optional):
If desired, install woodworking vises such as a front vise and tail vise to the workbench. Follow the manufacturer's instructions for proper installation and adjustment.
Finishing Touches:
Sand all surfaces of the workbench to remove any rough spots and achieve a smooth finish. Apply a protective finish such as oil or polyurethane to protect the wood and enhance its appearance.
Testing and Adjustment:
Test the stability and functionality of the workbench by applying pressure to different areas and testing the vises. Make any necessary adjustments to ensure everything functions smoothly.
Workbench Accessories (Optional):
Consider adding accessories such as bench dogs, holdfasts, or tool storage solutions to customize the workbench to your specific needs.
Final Inspection:
Once complete, inspect the workbench thoroughly to ensure it meets your expectations in terms of stability, functionality, and appearance.
Utilization:
Begin using your traditional joinery bench for woodworking projects with confidence, knowing it was crafted with care and precision to serve as a reliable and indispensable tool in your workshop.
By following these steps, you can create a traditional joinery bench that will serve as a sturdy and reliable foundation for your woodworking endeavors for years to come.
28
views
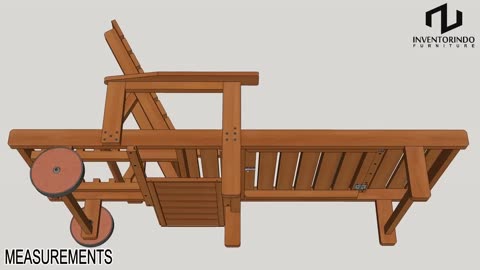
Amazing Woodworking Art - Build A Table With Artistic Curves
Inspiration and Design:
Begin by seeking inspiration from nature, architecture, or other artistic sources to envision the design of your table. Consider incorporating flowing, organic curves into the design to evoke a sense of fluidity and grace.
Material Selection:
Choose high-quality wood with attractive grain patterns and colors that complement your design concept. Woods like walnut, cherry, or maple are popular choices for their beauty and workability.
Sketch and Plan:
Sketch out your design ideas on paper, considering the overall shape, dimensions, and details of the table. Create a detailed plan that includes measurements and specifications for each component.
Curved Components:
Use a bandsaw, jigsaw, or other curved-cutting tools to shape the curved components of the table, such as the tabletop, legs, and aprons. Take your time to achieve smooth, flowing curves that enhance the aesthetic appeal of the table.
Joinery Techniques:
Choose joinery techniques that will securely connect the curved components while also adding visual interest to the table. Options include mortise and tenon joints, dovetails, or even creative sculptural joints.
Assembly:
Assemble the table components using glue, clamps, and appropriate joinery methods. Pay careful attention to alignment and fit to ensure a seamless connection between the curved elements.
Surface Preparation:
Sand all surfaces of the table to remove any rough spots and achieve a smooth finish. Use progressively finer grit sandpaper to achieve a silky-smooth surface that showcases the beauty of the wood.
Finishing Touches:
Apply a finish of your choice to enhance the natural beauty of the wood and protect it from damage. Options include oil-based finishes, lacquer, or polyurethane. Consider adding multiple coats for added durability and depth of color.
Detailing and Decoration:
Add artistic detailing or decoration to further enhance the beauty of the table. This could include inlays, carving, or marquetry that highlights the curves and adds visual interest.
Final Inspection:
Once complete, inspect the table thoroughly to ensure it meets your artistic vision and quality standards. Make any final adjustments or touch-ups as needed.
Display and Enjoyment:
Display your masterpiece with pride and enjoy the admiration it receives from others. Whether used as a functional piece of furniture or admired as a work of art, your table with artistic curves is sure to be a conversation starter and a source of inspiration for years to come.
5
views

𝕰𝖆𝖘𝖎𝖊𝖘𝖙 𝖂𝖆𝖞 𝖙𝖔 𝕸𝖆𝖐𝖊 𝕾𝖒𝖆𝖑𝖑 𝕯𝖗𝖆𝖜𝖊𝖗𝖘 .
Materials and Tools Preparation:
Gather the necessary materials such as wood for the drawer fronts, sides, and bottoms, as well as drawer slides or runners. Also, collect tools including a saw, drill, screws, wood glue, measuring tape, and sandpaper.
Measurements and Cutting:
Determine the dimensions of your drawers based on the space available and the items you plan to store. Mark and cut the wood pieces for the drawer fronts, sides, and bottoms according to your measurements.
Assembling Drawer Parts:
Begin by assembling the drawer box. Apply wood glue along the edges of the drawer sides and attach them to the drawer front using screws. Ensure the corners are square by using a carpenter's square.
Adding Bottom Panel:
Once the drawer box is assembled, insert the bottom panel. Apply wood glue along the bottom edges of the drawer sides, then place the bottom panel in position and secure it with screws.
Drawer Slide Installation:
Install drawer slides or runners inside the cabinet or furniture piece where the drawers will be located. Follow the manufacturer's instructions for proper placement and installation of the slides.
Attaching Drawer Front:
With the drawer box complete, attach the drawer front using screws from the inside of the drawer box. Ensure the drawer front is flush with the cabinet or furniture face when closed.
Testing and Adjustments:
Test the drawer by sliding it in and out to ensure smooth operation. Make any necessary adjustments to the drawer slides or drawer front alignment for proper fit and function.
Finishing Touches:
Sand the surfaces of the drawers to smooth out any rough edges or surfaces. Apply a finish of your choice such as stain, paint, or varnish to protect the wood and enhance its appearance.
Repeat for Additional Drawers:
If making multiple drawers, repeat the above steps for each drawer, ensuring consistency in measurements and assembly.
Final Installation:
Once all drawers are complete, install them into the cabinet or furniture piece by sliding them onto the drawer slides. Ensure they are aligned properly and function smoothly.
By following these steps, you can create small drawers with woodworking skills, perfect for organizing and storing various items in your home or workshop.
8
views

𝐇𝐎𝐖 𝐓𝐎 𝐌𝐀𝐊𝐄 𝐀 𝐌𝐈𝐍𝐈 𝐅𝐎𝐋𝐃𝐈𝐍𝐆 𝐓𝐀𝐁𝐋𝐄 𝐒𝐓𝐄𝐏 𝐁𝐘 𝐒𝐓𝐄𝐏
Gather Materials:
Prepare the materials you'll need, such as wood or plywood for the table surface and legs, hinges, screws, wood glue, and any additional decorations or accessories.
Design and Measurement:
Plan the size and design of your miniature folding table. Measure and mark the dimensions on the wood or plywood for the table surface and legs.
Cutting:
Use a saw to cut the wood or plywood according to your measurements. Be precise to ensure all pieces fit together properly.
Assembly:
Attach the legs to the underside of the table surface using hinges. Position the hinges evenly to ensure stability when the table is unfolded.
Use screws to secure the hinges in place, ensuring they are tight but not too tight to allow movement.
Apply wood glue to strengthen the joints between the legs and the table surface.
Finishing Touches:
Sand the edges and surfaces of the table to smooth out any rough spots and create a polished finish.
Apply paint, stain, or varnish to enhance the appearance of the table and protect the wood from damage.
Add any decorative elements or accessories, such as drawer handles or knobs, to personalize your miniature folding table.
Testing:
Carefully unfold the table to ensure the hinges work smoothly and the table stands sturdily when open.
Test the stability of the table surface by applying gentle pressure to different areas.
Final Adjustments:
Make any necessary adjustments to the hinges or legs to ensure the table folds and unfolds smoothly without wobbling.
Tighten screws or add additional support if needed.
Enjoy Your Creation:
Once you're satisfied with the construction and stability of your miniature folding table, place it in your desired location and enjoy its functionality and charm.
By following these steps, you can create a beautiful and functional miniature folding table using hand tools and your creativity.
24
views
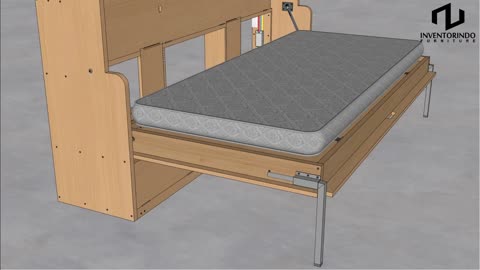
𝓗𝓞𝓦 𝓣𝓞 𝓜𝓐𝓚𝓔 𝓐 𝓗𝓞𝓡𝓘𝓩𝓞𝓝𝓣𝓐𝓛 𝓜𝓤𝓡𝓟𝓗𝓨 𝓑𝓔𝓓 𝓦𝓘𝓣𝓗 𝓐 𝓕𝓞𝓛𝓓𝓘𝓝𝓖 𝓓𝓔𝓢𝓚 𝓐𝓝𝓓 𝓒𝓐𝓑𝓘𝓝𝓔𝓣𝓢
Plan and Design:
Sketch out your design for the horizontal Murphy bed, folding desk, and cabinets. Consider the dimensions of the space where you'll install it.
Gather Materials:
Collect the necessary materials such as wood for the frame and cabinets, hinges, screws, desk hardware, and any decorative elements.
Build the Bed Frame:
Construct the frame for the Murphy bed according to your design. Ensure it's sturdy and capable of supporting the weight of a mattress.
Attach the Hinges:
Install hinges along the side of the bed frame to allow it to pivot horizontally. Make sure the hinges are securely fastened.
Build the Desk:
Create the folding desk using wood for the surface and supports. Install hinges to attach the desk to the bed frame, allowing it to fold up and down.
Build the Cabinets:
Construct the cabinets using wood panels for the sides, shelves, and doors. Install hinges for the cabinet doors and ensure they open and close smoothly.
Assemble Components:
Attach the cabinets to the wall above the bed frame, leaving space for the bed to fold down. Secure the desk to the bed frame.
Test Functionality:
Test the folding mechanism of the bed and desk to ensure they move smoothly without obstruction. Check that the cabinets open and close properly.
Finishing Touches:
Sand any rough edges and apply paint or stain to the wood for a polished finish. Add any decorative elements or hardware as desired.
Install Mattress and Accessories:
Place a mattress on the bed frame and add bedding to make it comfortable. Organize the cabinets with storage bins or baskets.
Enjoy Your Creation:
Step back and admire your handiwork. Revel in the functionality and space-saving design of your horizontal Murphy bed with a folding desk and cabinets.
By following these steps, you'll be able to create a beautiful and functional space-saving solution
20
views
𝕳𝕺𝖂 𝕿𝕺 𝕸𝕬𝕶𝕰 𝕬 𝕷𝕺𝕌𝕹𝕲𝔼 ℂℍ𝔸𝕀ℝ 𝕊𝕆𝔽𝔸 𝔹𝔼𝔻 𝕊𝕋𝔼ℙ 𝔹𝕐 𝕊𝕋𝔼ℙ
Planning and Design:
Begin by envisioning the design of your lounge chair sofa bed. Consider the dimensions, style, and functionality you desire.
Gather Materials:
Collect the necessary materials such as wood for the frame, foam or cushioning for the seat and backrest, upholstery fabric, hinges, screws, and other hardware.
Build the Frame:
Construct the frame of the lounge chair sofa bed using sturdy wood. Cut the pieces according to your design and assemble them using screws and wood glue.
Create the Seat and Backrest:
Cut foam or cushioning to the appropriate size for the seat and backrest. Attach them to the frame using adhesive or upholstery staples.
Upholstering:
Cut the upholstery fabric to fit the seat, backrest, and sides of the frame with some extra allowance for folding and stapling.
Securely staple the fabric to the frame, starting from the bottom and working your way up, ensuring a smooth and tight fit.
Add Armrests (Optional):
If desired, add armrests to the sides of the lounge chair sofa bed. Cut wood pieces to the desired shape and size, then attach them to the frame using screws.
Install Hinges:
Attach hinges to the backrest of the chair bed, allowing it to fold down to convert into a bed. Make sure the hinges are securely fastened to the frame.
Testing:
Test the functionality of the lounge chair sofa bed by folding and unfolding it to ensure smooth movement and stability.
Finishing Touches:
Sand any rough edges and apply paint or stain to the wood frame if desired. Trim any excess fabric and ensure all staples are firmly secured.
Enjoy Your Creation:
Place your lounge chair sofa bed in your desired location and revel in its versatility. Use it as a comfortable seat during the day and a cozy bed for guests at night.
By following these steps, you'll be able to create a stylish and functional lounge chair sofa bed to enhance your living space.
9
views
𝔹𝕖𝕟𝕔𝕙 𝕍𝕚𝕤𝕖 𝔻𝕚𝕐 𝔹𝕖𝕟𝕔𝕙 𝕍𝕚𝕤𝕖 𝕌𝕤𝕚𝕟𝕘 ℍ𝕒𝕟𝕕 𝕋𝕠𝕠𝕝𝕤
Materials Needed:
Wooden block for the vise jaw
Wooden block for the vise base
Metal rod or threaded rod
Nuts and washers
Wood glue
Wood screws
Sandpaper
Tools Needed:
Hand saw
Chisels
Drill with drill bits
Hammer
Screwdriver
Wood rasp or file
Step-by-Step Guide:
Prepare the Wooden Blocks:
Start by cutting two wooden blocks to the desired size. One will be the vise jaw, and the other will be the vise base. Ensure they are both flat and smooth.
Drill Holes for the Rod:
Measure and mark where you want the rod to go through the vise jaw and base.
Use a drill and appropriate drill bit to make holes through both wooden blocks. Make sure the holes are straight and aligned.
Insert the Rod:
Insert the metal rod or threaded rod through the holes in the vise jaw and base. Ensure it fits snugly but can still move freely.
Secure the Rod:
Use nuts and washers to secure the rod on both ends of the vise jaw and base. Tighten them enough to hold the rod in place but still allow it to rotate.
Attach the Vise Jaw to the Workbench:
Position the vise jaw where you want it on your workbench.
Use wood screws to attach the vise jaw securely to the workbench.
Test the Vise:
Open and close the vise to ensure it moves smoothly.
Adjust the nuts and washers as needed to tighten or loosen the grip of the vise.
Final Touches:
Sand down any rough edges or surfaces to ensure smooth operation.
Apply wood glue to reinforce the joints if desired.
Optional: Add Padding:
To protect your workpieces, you can add soft padding to the vise jaws using leather, rubber, or cork.
And there you have it! With some basic hand tools and materials, you can create your own DIY bench vise for woodworking projects. Remember to take your time, measure accurately, and
23
views

HOW TO MAKE A FOLDING STUDY DESK WITH BOOKS CABINET DETAILED STEP BY STEP
A Detailed Guide to Building Your Own Folding Study Desk with Book Cabinet
Materials Needed:
Plywood sheets
Wood screws
Hinges
L-brackets
Wood glue
Sandpaper
Paint or stain (optional)
Saw
Drill
Screwdriver
Step 1: Design and Measurements
Sketch out your design, including the dimensions for the desk surface, cabinet, and folding mechanism.
Determine the size of the desk and cabinet based on your available space and requirements.
Step 2: Cut the Wood
Use a saw to cut the plywood sheets according to your measurements. You'll need pieces for the desk surface, cabinet sides, shelves, and any other components.
Sand the edges of the cut plywood to smooth them out.
Step 3: Assemble the Desk Surface
Attach L-brackets to the underside of the desk surface for stability.
If desired, paint or stain the desk surface and allow it to dry completely.
Step 4: Build the Cabinet
Assemble the sides, shelves, and back panel of the cabinet using wood glue and screws.
Attach hinges to the back of the cabinet and the wall where you plan to mount it. Make sure the hinges are securely fastened.
Step 5: Attach the Desk to the Cabinet
Position the desk surface against the cabinet, ensuring it is aligned properly.
Attach hinges to the top of the cabinet and the underside of the desk surface, allowing it to fold down smoothly.
Test the folding mechanism to ensure it operates correctly.
Step 6: Final Touches
Add any additional features or decorations to personalize your desk, such as drawer pulls or decorative trim.
Secure the cabinet to the wall using screws or mounting brackets.
Step 7: Test and Adjust
Test the desk and cabinet to ensure they function as intended.
Make any necessary adjustments or reinforcements to improve stability and durability.
Step 8: Enjoy Your New Folding Study Desk with Book Cabinet!
Once everything is assembled and tested, you're ready to start using
20
views
🛠️ 𝔸𝕦𝕥𝕠 𝕃𝕚𝕗𝕥 𝕋𝕒𝕓𝕝𝕖 𝕊𝕙𝕖𝕝𝕗 🌿 Auto lift table shelf woodworking
🛠️ Crafted to Perfection: 🛠️
An auto lift table shelf for woodworking is a versatile and efficient piece of equipment designed to enhance the functionality of a woodworking workshop. It typically consists of a sturdy table with a built-in lifting mechanism that allows users to adjust the height of the table effortlessly. This feature is particularly beneficial for woodworking tasks that require precision and comfort, as it enables craftsmen to customize the working height according to their preferences and the specific requirements of their projects.
The shelf component of the auto lift table provides additional storage space for tools, materials, and accessories, keeping them organized and within easy reach during woodworking tasks. This helps to streamline the workflow and minimize disruptions, allowing craftsmen to focus more on their projects without constantly searching for tools or supplies.
The construction of an auto lift table shelf for woodworking often prioritizes durability and stability, with materials like steel or heavy-duty aluminum used for the frame and high-quality wood or composite materials for the tabletop and shelves. The lifting mechanism is engineered to be reliable and smooth-operating, ensuring seamless height adjustments without any wobbling or instability.
Overall, an auto lift table shelf for woodworking is an essential piece of equipment for any woodworking enthusiast or professional craftsman looking to optimize their workspace, improve efficiency, and enhance the overall woodworking experience.
Elevate your woodworking game with our auto lift table shelf – where craftsmanship meets sophistication in every exquisite detail.
16
views
The mobile Outfeed assembly table with kreg features.
This versatile assembly table is designed to facilitate efficient organization and assembly of components in outdoor settings. With its mobile design, it allows easy relocation to various locations within the outfield for convenience during events or maintenance tasks. Featuring a durable construction, it ensures stability and longevity, while its spacious tabletop provides ample space for arranging tools, equipment, and materials. The table's ergonomic design promotes comfortable working conditions, making it ideal for assembling sports equipment, groundskeeping tasks, or event setup. Its mobility, durability, and functionality make it an essential addition to any outdoor facility or venue.
8
views