Premium Only Content

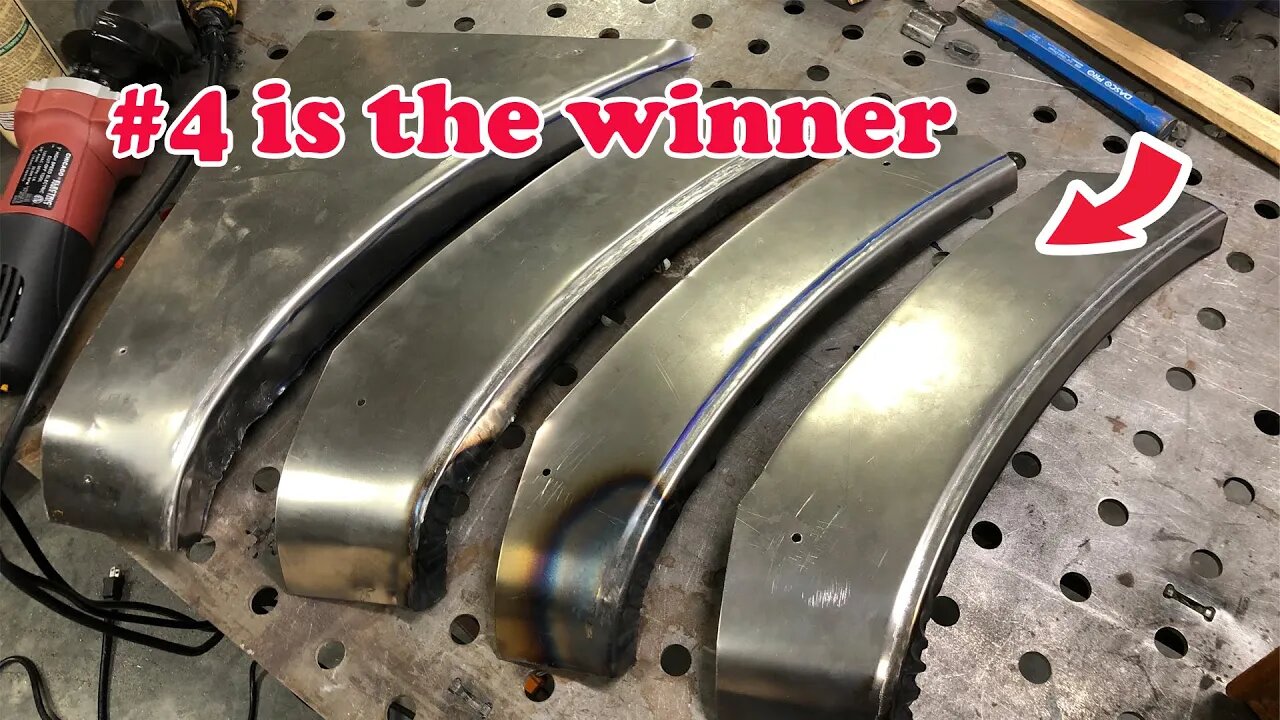
Metal shaping the final patch panel on my Chevy blazer
In this series of videos, I've had to learn how to use a shrinking disc, TIG weld, use a hammer and dolly, hammer form sheet metal, shrink metal with a torch, use shrinking pliers and a body hammer. Persistance pays off and patch panel number 4 is a keeper.
This final version is good enough to weld back onto my 1971 Chevy K5 Blazer. The video shows how I formed the sheet over a wooden and steel buck, hammer formed an thin detail around the wheel arch that's typically bead rolled, and flatten an area that that was corrugated with my shrinking pliers.
If you would like to see the early trials, check this video out.
How I made the shrinking pliers: https://youtu.be/RX5pyUncGyk
How I made a wooden clamping block: https://youtu.be/h54ZZtk7Vgg
How I made a hammer form: https://youtu.be/KVCuWbVYbgc
Hammer and dolly: https://youtu.be/GcK7O5nm_zc
Shrinking disc: https://youtu.be/kCKVejMQqao
TIG welding: https://youtu.be/KwjkODBF4OI
#firstgen #chevy
-
 33:41
33:41
The Finance Hub
4 hours ago $0.49 earnedBREAKING: NANCY PELOSI JUST GOT HIT WITH A MAJOR BOMBSHELL!!!
5.59K4 -
 LIVE
LIVE
LFA TV
21 hours agoLFA TV ALL DAY STREAM - WEDNESDAY 7/30/25
1,267 watching -
 2:04:14
Pop Culture Crisis
3 hours agoOprah Tsunami BACKLASH, Billie Eilish RACIST? Joey Swoll BENDS THE KNEE | Ep. 888
22.3K4 -
 1:22:25
The HotSeat
2 hours agoLibs Are BIG Mad Over New Commercials and The Fed Is Just Another Political Weapon
15.4K6 -
 LIVE
LIVE
Film Threat
6 hours agoSAN DIEGO COMIC-CON! FANTASTIC FALL OUT FOR MARVEL | Hollywood on the Rocks
68 watching -
![[Ep 717] NEVER Apologize to The Counterculture Mob! Be You, Be True | Oprah & “Elites” God Complex](https://1a-1791.com/video/fww1/81/s8/1/-/G/X/6/-GX6y.0kob.1-small-Ep-717-NEVER-Apologize-to-T.jpg) LIVE
LIVE
The Nunn Report - w/ Dan Nunn
2 hours ago[Ep 717] NEVER Apologize to The Counterculture Mob! Be You, Be True | Oprah & “Elites” God Complex
157 watching -
 1:38:10
The Quartering
4 hours agoKash Patel "Discovers" Secret FBI Files On Trump, NYC Shooter New Conspiracy, Planned Parenthood
131K20 -
 56:56
56:56
Crypto Power Hour
4 hours ago $1.38 earnedSmart Contracts On The Blockchain
18.5K9 -
 1:00:03
Russell Brand
6 hours agoRand Paul: Trump, Tariffs & The Tyranny of Centralized Power - SF623
148K123 -
 9:01
9:01
Dr. Nick Zyrowski
1 month agoThe BIG NAC ( N-Acetyl Cysteine) Mistake
20.3K10