Premium Only Content

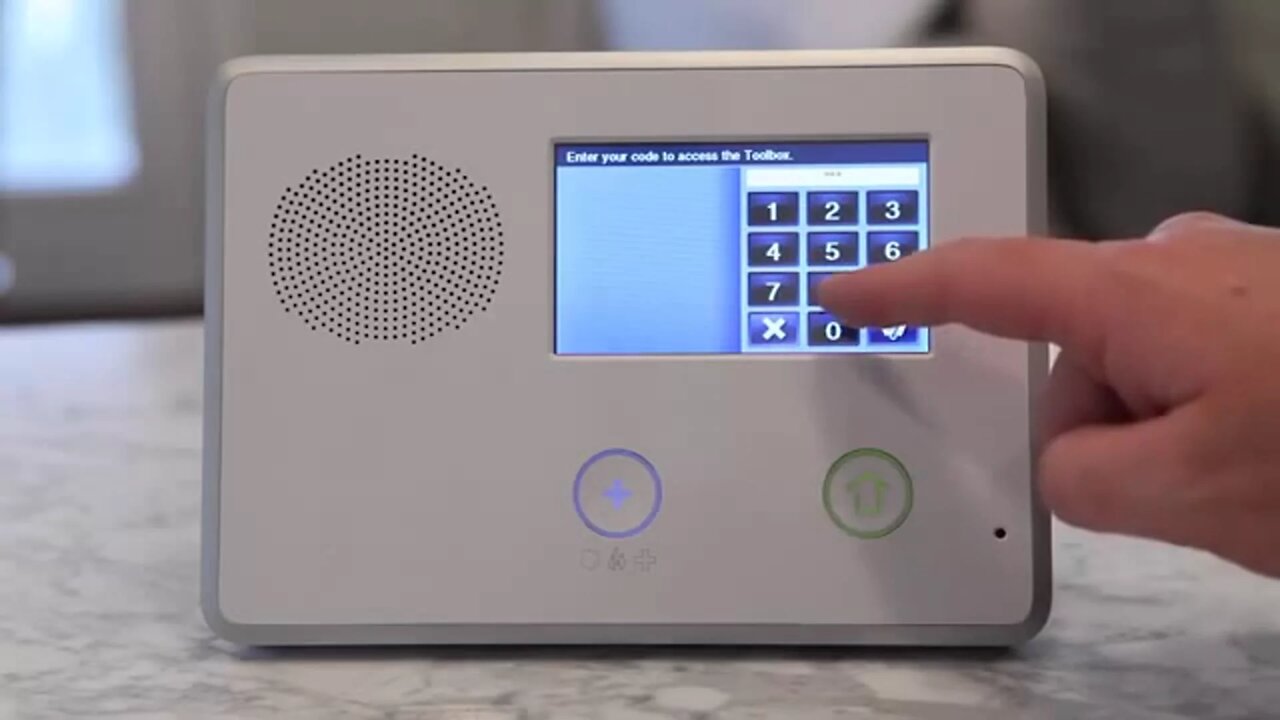
2GIG GC2: How to Calibrate the Screen
This detailed explanation will guide you through the process of resetting the display should your device’s display buttons are not responding properly.
The 2GIG GC2 system is designed to work efficiently. However, there may be times when some routine touch-screen maintenance must be done to keep the device running smoothly.
For instance, if you find the touch-screen display buttons on the 2GIG GC2 device aren’t responding in the proper manner, you will need to calibrate the screen to restore their proper functionality. This is a necessary step because it ensures that the touch screen’s coordinates align perfectly with the display.
If a button, like one of the function buttons on the 2GIG GC2, is properly aligned, the area touched by the user will appropriately activate because the corresponding coordinates are sufficiently close to what is displayed on the screen. If these coordinates drift away from their intended location, the software may not recognize the corresponding functionality, even if you’re pressing the button that on the surface would constitute an appropriate action.
There are a few causes to this issue. One cause may be due to a disruption based on electrical “noise.” Another may be due to various mechanical misalignments. Another example may be due to various tendencies on the end of the user, such as the way they push the button or the length at which they hold the button down.
More importantly, if a button is not working properly, this does not mean your 2GIG CG2 system is broken. It may be just a simple matter of refreshing your touch screen in a manner that re-sets the coordinates to their appropriate position.
While this may sound intimidating at first, it's a simple process. Our video will show precisely how simple it is to use the 2GIG GC2’s display calibration option, which can be accessed from the system monitor. This option will enable you to reset the display via touch screen technology, which will, in turn, get the monitor back on track.
The first step you’ll take to calibrate the screen is to select the security option from the touch screen, then the menu option, and then the toolbox option. Once you’ve entered your current master code, select the “calibrate touch screen” option,
This will direct you to a light blue screen with a prompt that reads “Touch Screen Calibration.” On the video, you’ll also see a cross on the screen with a corresponding message to touch the cross at its center. Doing this will cycle you through several screens.
After the video goes through the appropriate cycles, you will see a message informing you that the calibration has been successfully completed. When this happens on your end, press the OK button to confirm and officially complete the process.
If you see your system repeatedly losing its proper calibration over a rapid period of time, you should contact customer service or the installer. If it’s a persistent problem, there may be a bigger issue going on in your system that requires deeper scrutiny.
-
 10:19
10:19
Alarm Grid Home Security DIY Videos
1 year agoPROA7 or PROA7PLUS: Awareness Zone Types
32 -
 15:21
15:21
Tainoink
3 years agoHOW TO SCREEN PRINT HALFTONES
74 -
 5:03
5:03
Uniquevideo11
3 years ago $0.03 earnedHOW TO RECORD WINDOWS 10 COMPUTER SCREEN FREE
52 -
 LIVE
LIVE
Game On!
15 hours agoDonald Trump DEMANDS Washington Football Team Change Their Name Back To Redskins!
4,385 watching -
 LIVE
LIVE
The Bubba Army
21 hours agoHunter Biden UNHINGED! - Bubba the Love Sponge® Show | 7/22/25
4,205 watching -
 30:30
30:30
World2Briggs
13 hours ago $1.16 earnedTop 30 Cities EVERYONE is MOVING TO in America in 2025
20.8K5 -
 2:00:37
Lara Logan
3 days agoINFORMATION WARFARE: Filmmaker Mike Smith on Media Propaganda & Hollywood’s Dark Agenda | Episode 27
10.8K23 -
 LIVE
LIVE
BEK TV
22 hours agoTrent Loos in the Morning 7/22/2025
335 watching -
 9:06
9:06
MattMorseTV
17 hours ago $1.37 earnedTrump wants to END THE FED.
6.89K14 -
 5:35
5:35
Rena Malik, M.D.
22 hours ago $1.33 earnedBotox for your Bladder?! | Everything you need to know about botox for overactive bladder
12.8K2