2GIG GC3: Sensor & Panel Programming
This brief how-to video will discuss the methods used to program sensors in to the 2Gig GC2 control panel.
2GIG GC3: http://alrm.gd/2gig-gc3
Get Monitored! http://alrm.gd/get-monitored
The 2Gig GC3 control panel is the latest innovation from Nortek Security. The control panel is more intuitive and user-friendly than the predecessor: 2Gig Go!Control. This video will show you a quick run down of the home screen options and take you step by step on programming sensors in to your new system.
Follow along with the intuitive video to learn how to install sensors using the GC3 Tool box menu.
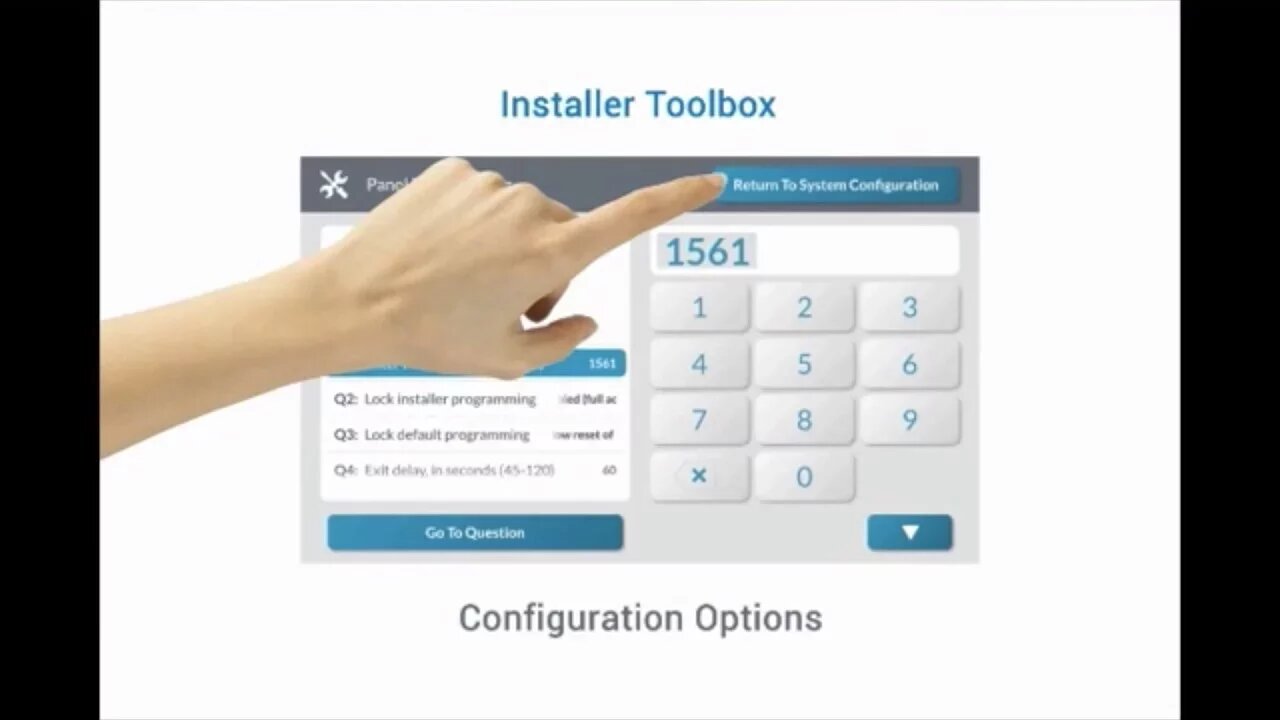
First you will enter the tool box menu by pressing the 2Gig logo in the upper right hand of the touch screen. Enter the installer code to access the menu options.
As you will learn in the video, sensors can be added, configured and various options enabled using the system configuration menu option. Press the system configuration button to access these menu options.
The smart home settings option is used for configuring Z-Wave devices for inclusion, exclusion, and configuration.
The walk test option will allow you to test each sensor that is connected to the system. As you will learn in the video, this is the option you will use to verify the sensors are working properly.
Radio status is the option that will display the GSM radio signal strength and condition. This will alert you to any issues with communications with the central station. The video will discuss the three remaining options: network test, restore defaults and disable sounder.
Press the system configuration menu option. You will see in the video that there are 5 sub sections in this program option. For this video and programming wireless sensors, press the wireless zones option. Note that the GC3 is able to control 100 wireless zones.
Follow along with the video for detailed configuration instructions. You will enter the zone and the device by using the menu buttons and arrow keys on the screen. Find and select your device as it is listed on the screen.
Next, you will need to enter the equipment code for the sensor you are programming. You can either enter the sensor’s 4-digit code, or select it from the drop down menu. The video will show you the drop down menu option.
The video will walk you step by step through each option needed to include the sensor. You must enter or automatically learn In the serial number for the device. The video will tell you how to accomplish this.
Once all the options have been entered, the sensor is now programmed to the control panel. With the sensor programmed and the zones enabled, press the return to configurations menu button and all the changes made will be displayed. Click save to lock in your changes.
You should always test your configuration. You can do so by following along with the video. Press the walk test menu option to ensure your sensors are being monitored by the panel correctly.
You can view our other GC3 videos to learn even more about configuration of the control panel.
-
 6:05
6:05
Alarm Grid Home Security DIY Videos
1 year agoPROA7 or PROA7PLUS: Using Lyric Sensors
22 -
 11:47
11:47
WJ6FRadio
4 years agoYaesu FT5 Programming From Front Panel And Computer
842 -
 16:01
16:01
Alarm Grid Home Security DIY Videos
4 years ago $0.01 earned2GIG Edge: Programming a Zone
31 -
 6:49
6:49
Alarm Grid Home Security DIY Videos
4 years ago2GIG GC3e: Enrolling an Image Sensor
21 -
 8:51
8:51
Programming Mql4 Tools of the Trade
3 years agoMql4 Programming Tutorial
26 -
 1:54
1:54
WKBW
3 years agoFree programming at local libraries
6 -
 LIVE
LIVE
GrimmHollywood
5 hours ago🔴LIVE • GRIMM HOLLYWOOD and BIG TALL REDNECK • 3K 3XL TAKEDOWN • PGA • BF6 REDSEC • ARC RAIDERS
61 watching -
 3:11:27
Right Side Broadcasting Network
17 hours agoLIVE REPLAY: President Trump Makes an Announcement - 11/6/25
144K55 -
 1:04:07
The Rubin Report
3 hours agoZohran Mamdani Humiliates Himself by Breaking His First Promise Only 24 Hours After His Win
74.9K138 -
 1:04
1:04
Steven Crowder
3 hours agoTEASER: Deport All Illegals | Change My Mind
129K513