Lyric Security System: Mounting Backplate to the Wall
In this video we will show you the best methods for mounting the Honeywell Lyric control panel back plate to the wall.
Honeywell Lyric Controller: http://alrm.gd/lyric-controller
Get Monitored: http://alrm.gd/get-monitored
In our previous videos we have shown you the best methods for finding the perfect location for your Honeywell Lyric Security System control panel, as well as how to run the power wire through the wall to hide any signs of wires.
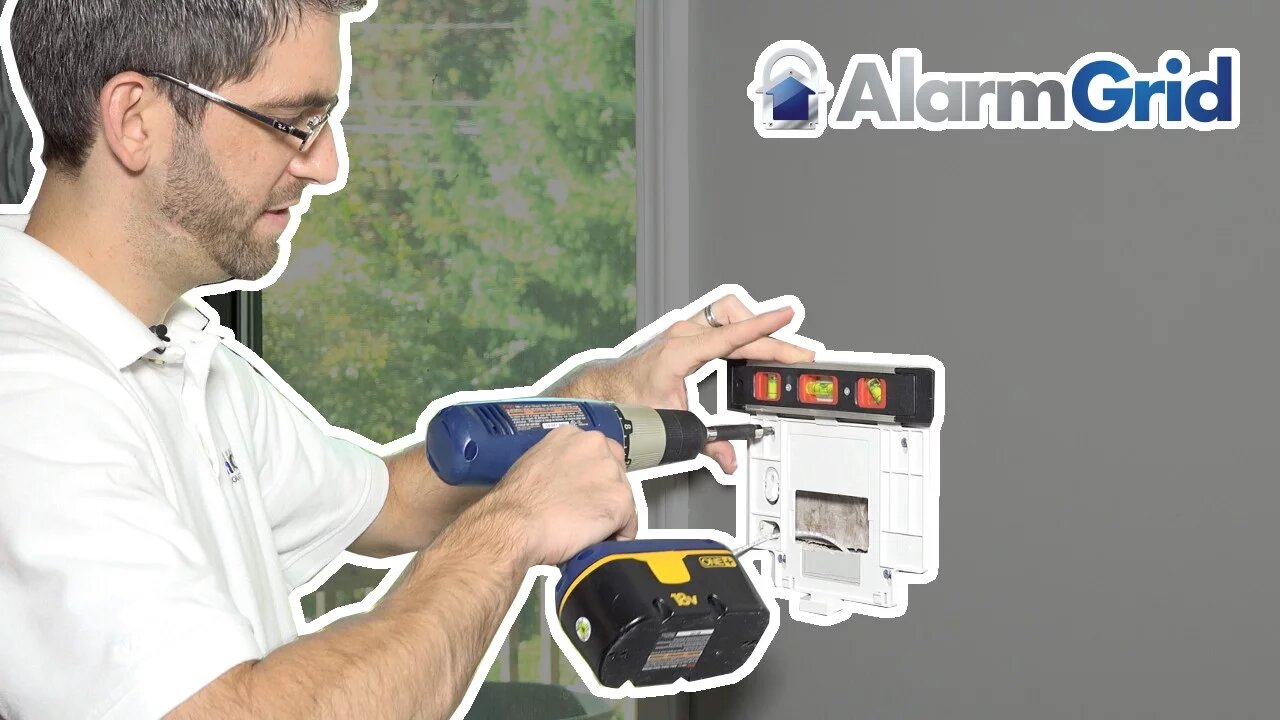
In this video we will continue the installation tutorial and show you how to properly mount the back plate to the wall. The back plate is what the control panel will attach to. The back plate should be securely fastened to the wall surface so it is flush and not bowed.
As you will learn in the video there is a tamper switch that can be screwed into a stud that will break away in the event the control panel is ripped from the wall. This will remove the tamper switch tab, causing the tamper alarm to ring.
If you have decided to mount the control panel in an area that doesn’t have a stud, you do not need to complete this step. The video guide will explain this tamper switch and break away tab in full detail.
Since you have used the back plate as a template for the drywall cut to run the power wire, you should already have the screw hole positions marked. If you do not, you can place the back plate in position and mark them with a pencil.
When you have the screw locations marked, use the power drill and a drill bit to create a hole that will hold the wall anchors. The hole should be big enough to slide the anchor most of the way through and tight enough that the anchor needs to be hammered flush.
When you have drilled the holes, place the wall anchors into the holes and gently hammer them until they are flush with the wall surface. Follow along with the video for guidance on how to do this.
Now you are ready to mount the back plate to the wall. Align the screw holes with the wall anchors and begin screwing down the included screws. As the video warns, you do not want to tighten the screws all the way down. Leave enough room so that you can ensure a level mount, adjusting the plate left, right or up and down as needed.
When you have a level mount, tighten the screws a little at a time until the back plate is secure and doesn’t move. You should ensure the back plate is flush to the wall and does not bow out as this will prevent the control panel from mounting properly.
If you find that the back plate is bowed, you can loosen the screws a little at a time until the bow is gone.
When the back plate is secure and without bowing, you are ready to mount the control panel. You can view our other installation videos in our library for guidance on these procedures.
-
 10:19
10:19
Alarm Grid Home Security DIY Videos
1 year agoPROA7 or PROA7PLUS: Awareness Zone Types
32 -
 0:25
0:25
ViralHog
3 years ago $0.03 earnedSecurity System Hits A Snag
218 -
 1:45:16
Redacted News
2 hours agoTrump issues Ultimatum to Putin "End this war now or else," Russia not backing down | Redacted Live
152K86 -
 1:07:56
Michael Franzese
2 hours agoBillionaire Insider Exposes Epstein’s Real Blackmail Operation
10.6K3 -
 46:12
46:12
Candace Show Podcast
2 hours agoBrigitte Presents “Proof” Her Brother Is Alive. | Candace Ep 221
42.7K99 -
 LIVE
LIVE
Robert Gouveia
1 hour ago'Missing Minute' is GONE! New IMMUNITY Demands! Obama's PLOT! Schiff in TROUBLE!
592 watching -
 11:35
11:35
Tactical Advisor
2 days agoAnother Sig Trigger Fail | P320 P365 and X Macro
3.82K -
 7:34
7:34
Michael Button
8 hours ago $0.19 earnedWhy I Left Academia to Explore Lost Civilizations
3.71K2 -
 1:01:58
Sarah Westall
2 hours agoNEW STUDY RESULTS: Humans have MAC ID Chips – How Did They Get There? w/ Hazen and Mansfield
10.7K4 -
 2:03:53
Pop Culture Crisis
4 hours agoBillie Eilish & Sydney Sweeney Blamed For 'Whiteness', Millennials WORRIED About Gen Z | Ep. 887
30.7K11