2GIG GC3: Setting Date & Time
Setting the date and time is one of the first steps you’ll take when installing your new security system. Our video shows you how.
2GIG GC3: http://alrm.gd/2gig-gc3
Get Monitored! http://alrm.gd/get-monitored
Your home security system is designed to keep you safe around-the-clock. But the system still needs to know the correct date and time for your location. This video shows you how to set the date and time for your 2GIG GC3.
Installation is covered in the previous video. After installation, the first step you’ll want to perform is setting the time and date. Fortunately, as the video illustrates, the process is simple and quick.
Once the GC3 is up and running, you’ll start the process by accessing the home screen. This is the main screen of the unit which displays current security settings, weather and the time/date. Note that the time currently displayed will likely be incorrect.
In the lower right corner of the home screen you’ll find a blue System Settings bar. Touching that opens up a screen where you’ll be required to enter your access code.
There are two types of access codes. The default installer code is used for initial setup while the master installer code is created by you for your specific unit. The installer code is only used to enter and exit the program. Additional details on access codes are provided in our next video.
Next, you’ll see the main interface. The video devotes some time to explaining the difference between the main interface of the GC3 and the previous model. Where the GC2 had a question-based installer toolbox, the GC3 has a grid of icons with more options outside the toolbox.
The video shows you the exact position of the Date/Time icon. Touching this button will take you a separate screen.
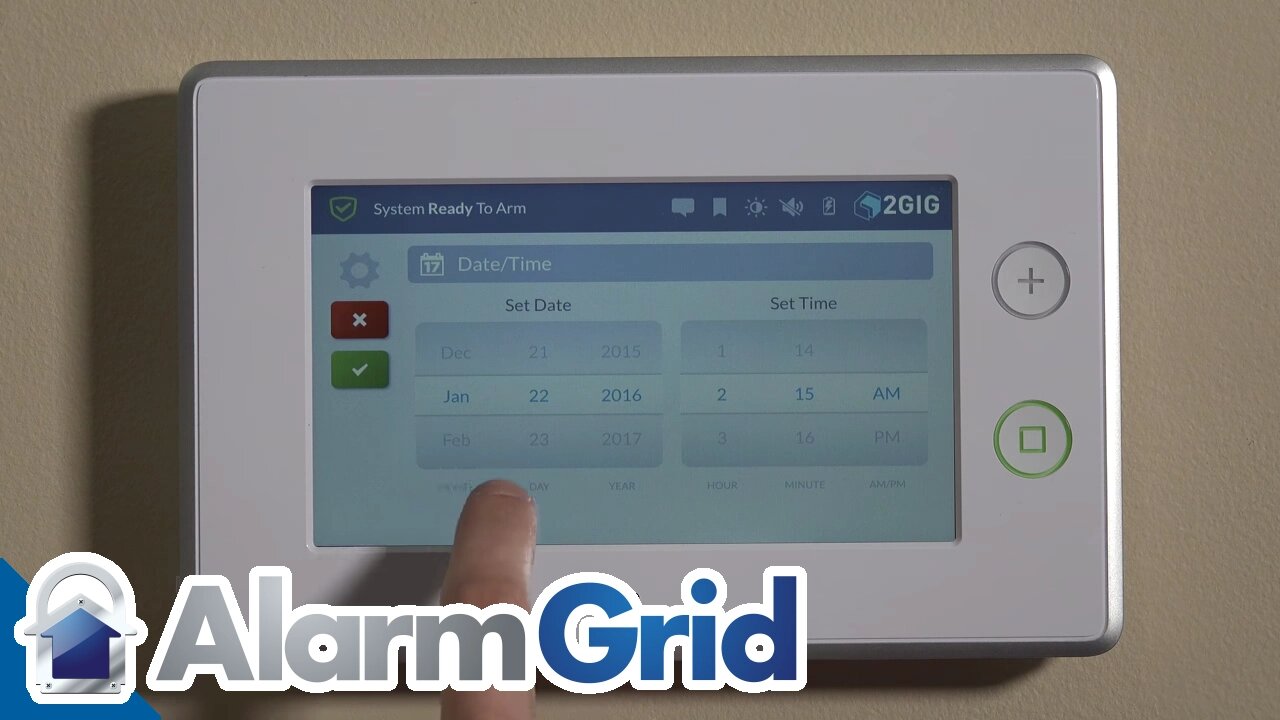
You don’t enter the date and time directly with a number pad. Instead, you scroll through virtual wheels to select the month, day and year. The time is AM/PM without a military option. Once you’ve selected the correct day and time, you’ll save your work by touching the green checkmark in the upper left of the screen.
The video then covers the use of the new home button. Both the GC3 and the previous model have a home key located on the right of the unit. It’s a physical button you can press to be taken to the home screen at any time.
While the home button in the GC2 had an illustration of a house, the button on the GC3 has changed to a square. Even though the functionality remains the same, we discuss why we actually prefer the earlier design. For new users, the house image is a bit easier to understand.
After returning to the home screen, the current date and time should be displayed. Not only is this convenient for the homeowner, but it also allows for feature scheduling.
Overall, setting the date and time is intuitive and easy. Plus, as one of the first steps you’ll perform, the process is a great way to become familiar with your new alarm system.
-
 3:31
3:31
Alarm Grid Home Security DIY Videos
1 year ago $0.01 earnedWireless Repeater: Use With Life Safety Devices
38 -
 LIVE
LIVE
TimcastIRL
2 hours agoFOOD STAMPS OVER, Ending Nov 1, Food RIOTS May Spark Trump INSURRECTION ACT | Timcast IRL
7,228 watching -
 2:18:46
Tucker Carlson
3 hours agoTucker Carlson Interviews Nick Fuentes
39.6K193 -
 LIVE
LIVE
Drew Hernandez
12 hours agoCANDACE OWENS CALLS CHARLIE KIRK STAFF INTO QUESTION?
1,102 watching -
 47:03
47:03
Barry Cunningham
5 hours agoPRESIDENT TRUMP MEETS WITH THE PRIME MINISTER OF JAPAN!! AND MORE NEWS!
22.4K17 -
 LIVE
LIVE
Flyover Conservatives
21 hours agoThe Dollar Devaluation Playbook: Gold, Bitcoin… and the “Genius Act” - Andy Schectman | FOC Show
579 watching -
 LIVE
LIVE
SpartakusLIVE
5 hours agoWZ Tonight || Battlefield 6 BATTLE ROYALE Tomorrow!
129 watching -
 LIVE
LIVE
megimu32
2 hours agoON THE SUBJECT: Halloween Nostalgia! LET’S GET SPOOKY! 👻
61 watching -
 1:24:56
Glenn Greenwald
4 hours agoThe Unhinged Reactions to Zohran's Rise; Dems Struggle to Find a Personality; DHS, on Laura Loomer's Orders, Arrests UK Journalist and Israel Critic | SYSTEM UPDATE #538
105K58 -
 LIVE
LIVE
Spartan
4 hours agoBack from worlds. Need a short break from Halo, so single player games for now
48 watching