CHECK OUT my BEAN PATCH!
Soil Tester:
https://amzn.to/2vQ5K6c
Bean Patch and Starters
On the previous episode I built on a trellis for my cold hard kiwi, on this episode I plant starters and create a bean patch.
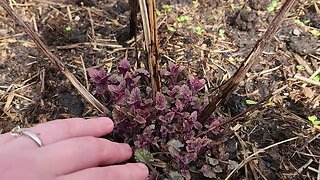
After planting my seeds a few episodes ago it was time to put some starters in the ground. I didn’t know how well my seedlings would grow as I didn’t test the soil. Doing it again from scratch I should I bought soil test like this which I’ll link below.
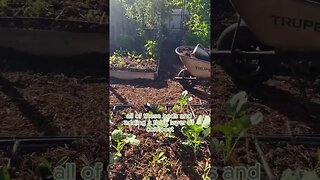
Unsure of the success of the seeds I got my hands on a handful of plant starters. I picked things that take longer to grow, like brussel sprouts, to get ahead of the growing season. Aftering planting kohlrabi, broccoli, cauliflower, cabbage and the brussel sprouts it was time to design my bean patch. This piece of land was initially a dry gravel patch, when I dug out the growing plot above it I took all the chunks of sod and flipped them upside down and put them on the gravel to create a layer of soil that wasn’t just rock. I than added multiple bags of manure and compost and seaweed in hopes the beans would grow. After that layer was down I started put putting bamboo poles in the ground. I wove some chicken wire around the poles and tied them with secure with some twine. I added some cross beams at the top to secure the wire then proceeded to plant the beans. I’m planting 8 different types of beans here, each have their own labeled popsicle stick.
All that’s left to do is water them and watch them grow. Fast forward to today, I can tell you this method worked exceptionally well as the beans were one of the most productive things on my property. I hope you enjoyed this episode and have a great day.
#growingbeans #beantrellis #plantingbeans
-
 10:34
10:34
TheDoItYourselfWorld
8 years agoSprouting & Planting Grocery Store Dry Bulk Soup Beans
283 -
 16:29
16:29
Growfully with Jenna
1 year agoWhat, How & Why to Plant Before Your Last Spring Frost
109 -
 24:38
24:38
DavidTheGood
1 year ago $0.01 earnedCan You Plant a Cover Crop OVER the Grass? Check Out Our Experiment! (Winter Pasture for Cows!)
83 -
 2:11
2:11
Two Acre Homestead
1 year agoFirst Garden, Final Potato Harvest of 2022. (see description for why we failed)
7 -
 4:37
4:37
Farm Hand's Companion
1 year agoPoling Beans - FHC Farm Bulletin #7
42 -
 4:10
4:10
A Pinch of Patience
2 years agoGarden Update April 2022
-
 5:23
5:23
Cultivated Change with Alex Corey
3 years agoGarden Update : EVERYTHING IS HAPPENING At Once | Review on All Spring Projects
64 -
 0:14
0:14
Growing in The Garden
9 months agoAdd Compost to Feed Your Soil #compost #organicgarden
142 -
 7:12
7:12
Pirate's Off Grid Homestead
4 months ago $0.10 earned....first garden update of 2024....24/3/24
63 -
 5:29
5:29
Cultivated Change with Alex Corey
3 years agoI Suck at Growing Carrots | Here is What I'm Doing Differently This Spring to Reduce FAILURE
1032