Premium Only Content

Preparing a Polariod 110A camera for 120 film using FEMO
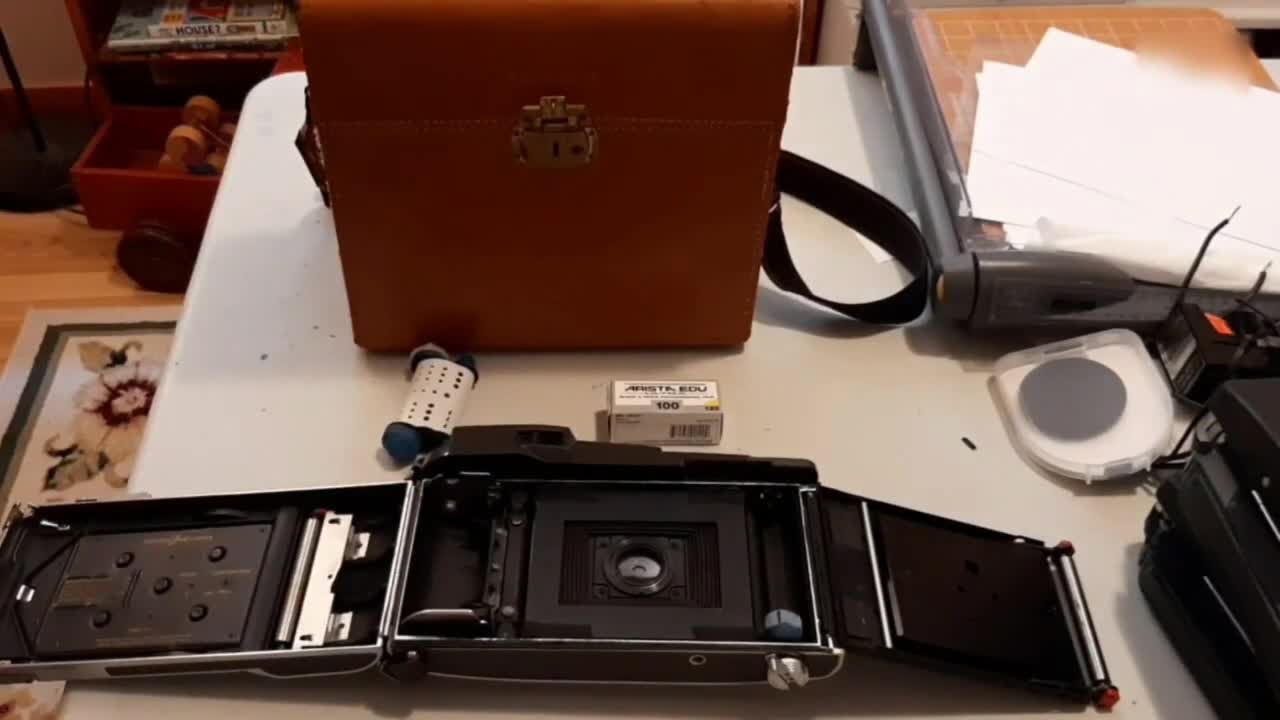
In this video, I show most of the steps I took in converting a Polaroid 40 series roll film camera (model 110A) to 120 film. Instead of heavy modifications to the inside of the camera, I relied on making adapters to fit the film spools and allow them to fit inside the Polaroid camera. This was done using Femo Sculpy clay, which bakes hard, and allows you to sand/shape it after baking.
This will shoot 6x9 format. The takeup spool needed to be modified to 220 size. I may have been able to drill the takeup spook lower and filed out the top groove, but this seems to work OK.
The video mentions 5 main steps:
1. Cutting the light baffle of the positive film chamber to allow the 120 film to move over the film plane without obstruction. This is done using a dremel. The bellows and lens were covered while doing this operation to prevent small bits from getting into the bellows.
2. Installing a film wind knob. I used a knob from an Olympus OM camera along with the housing which is designed to prevent light leaks. A hole is drilled into the bottom of the Polaroid to align with the bottom of the negative film groove. Later on, I discovered that a 120 spool is a tight fit because it ends up being too close to the door. I had to carve a 120 spool to more of the size of a 220 spool. This may have been prevented by drilling the hole lower, but the upper groove would have to have been made lower somehow as well, which would have required quite a bit of modification to the upper groove. Reducing the size of the spool seems to work fine. To install the wind knob, I screwed the housing to the bottom of the camera and inserted the shaft from inside the camera, then screwed it to the knob.
3. Making the spool adapters. Using FEMO clay, I formed 4 adapters by pressing one end into a 120 spool, then forming the body of it to fit the case. On the unexposed end, the bottom adapter has a rounded end to fit into the depression in the camera, and the top adapter is similar, except in 2 pieces with foam between to allow some spring so the assembly can snap and hold into place in the camera. On the receiving spool, the bottom adapter is formed to the wind knob, hopefully aligned to the film spool so it spins evenly. The top is formed to the film groove, again aligned with the spool so it spins evenly.
4. A hole is drilled into the inside back, aligned with the 6x9 exposure markers to indicate proper film advancement. The hole is drilled through the back and pressure plate, then filed flat so it won't damage the film backing. I used an orange filter from an old Polaroid cloud filter as the off coloured window. This isn't necessary since the film backing prevents light from striking the film, but it's traditional--probably used when orthochromatic film was in use and wasn't sensitive to red. The orange film counting window reminds me of my Brownie camera. This filter is carefully glued in place under the pressure plate.
5. A 6x9 mask is made out of a black binding cover and taped into place over the film plane. This prevents the sides of the 120 film from curling toward the film plane and being out of focus. It also reduces the horizontal film size form 10.5cm to 9 cm so the film counter works.
Other things not mentioned in the video:
1) Tape over the light leak at the back of the switch on the back of the camera.
2) Use craft foam cut into thin strips to line the edges of the camera where the door engages. This will prevent light leaks through the door.
3) Cut the pressure spring off which helped hold the Polaroid negative film in place. This will create too much pressure and make it hard to advance the film.
4) I tried unloading the film in daylight but got some slight light leaking in through the edges of the film, likely because I cut the spool down to 220 size and light was leaking through the edges. I unload the film in a dark bag and store the film in a light proof bag for now until I process it.
-
 9:37
9:37
MattMorseTV
14 hours ago $3.96 earnedThis just ENDED his CAREER.
18.3K50 -
 9:10:30
Spartan
14 hours agoPro Halo Player | Grinding, Another day to try and get better
57.2K1 -
 2:31:12
Nerdrotic
11 hours ago $8.58 earnedCosmic Summit Recap, Skinwalker Ranch Season 6 | Forbidden Frontier #106
131K8 -
 3:04:51
This is the Ray Gaming
6 hours ago $4.11 earnedSunday Night With The Homies
34.7K3 -
 2:26:29
vivafrei
20 hours agoEp. 270: MASSIVE SCOTUS WINS! Big Beautiful Bill! New-Scum Sues! Diddy Watch! Big Apple Rot & MORE
149K134 -
 8:38:54
a12cat34dog
14 hours agoTHE *NEW* KRATOS IS EPIC :: God of War (2018) :: FIRST-TIME PLAYING {18+}
46.5K3 -
 3:12:50
EricJohnPizzaArtist
4 days agoAwesome Sauce PIZZA ART LIVE Ep. #52: GEYCK!
43K3 -
 57:30
57:30
RiftTV/Slightly Offensive
10 hours agoTHIS is Where It ALL Went Wrong.. The Rise of NEOCONS | Rift Book Club | B1E2
66.5K43 -
 5:13:57
Barry Cunningham
14 hours agoBREAKING NEWS: SENATE FINAL DEBATE AND DISCUSSION ON BIG BEAUTIFUL BILL
176K102 -
![🔴LIVE | [NIGHTMARE] Assassin's Creed Shadows | PT 5](https://1a-1791.com/video/fww1/30/s8/1/h/S/Y/X/hSYXy.0kob-small-LIVE-NIGHTMARE-Assassins-Cr.jpg) 6:46:21
6:46:21
Tekavor
10 hours ago🔴LIVE | [NIGHTMARE] Assassin's Creed Shadows | PT 5
33.5K