DIY Plexiglass Kits - Detailed Step by Step Instructions
Ari Stone Art
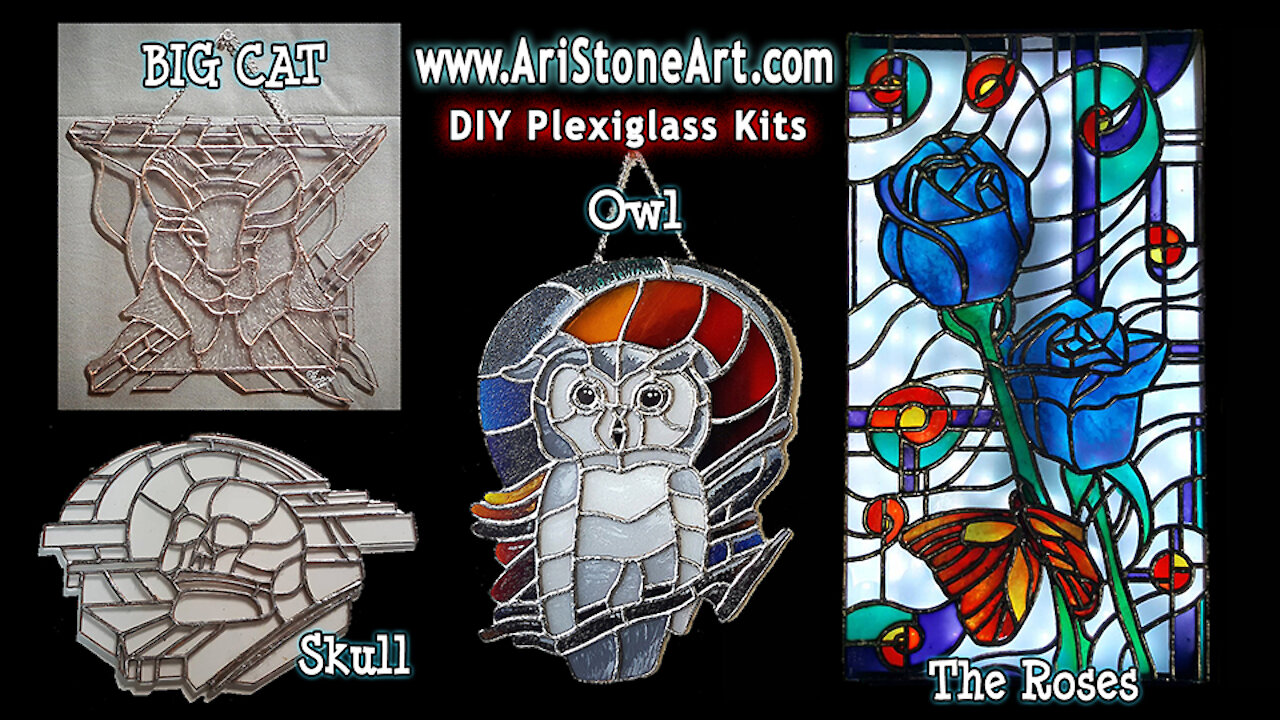
Looks like Stained Glass Plexiglass Kits
DIY Plexiglass kits are original stained glass styled designs created by Ari Stone, that are then GlowForge Laser cut from 1/8inch thick clear plexiglass. The pieces are then assembled like stained glass, with a few variations, to include you will get to paint the finished product.
This video is detailed step by step DIY assembly instructions and is ideal for anyone unfamiliar with stained glass assembly.
Visit:
http://aristoneart.com/shoponline/
for printable instructions
and
https://www.ebay.com/usr/aristoneartllc
to purchase kits
NOTE* For those with kits with a puzzle sheet image for placing plexiglass pieces on top of and no acrylic frame-form. ignore steps 3 and 4. Instead:
1) place copper foiled pieces on the matching pattern shape.
2) Tear off small blue painter tape pieces to hold pieced in place on top of the pattern sheet. Just enough to tack them into place is fine.
3) once all pieces are tacked into place, pull off long enough strips of fresh painters tape and cover the entire plexiglass pattern, placing tape in rows on top of the pattern, untill fully covered. It will look similar to the tape covered and pressed out pattern seen at the end of step 4.
4) Leave Painter's tape on the project and continue to step 5.
VIDEO TABLE OF CONTENTS
00:02:52 - STEP 1
Remove Protective Adhesive from Plexiglass with Metal Spoon
00:04:48 - STEP 2
Copper Foil edges of all pieces - replace into Plexiglass spots
00:10:48 - STEP 3
Place Blue Painters Tape over backside of pattern
00:10:56 - STEP 4
Press pattern out of Plexiglass puzzle frame (sticks to tape)
00:13:45 - STEP 5
Flux all Joints
00:15:44 - STEP 6
Solder front side of pattern at all joints
00:18:09 - STEP 7
Solder the rest of the front side joint tracks
00:20:26 - STEP 8
Flip over- remove blue painters tape - Solder back side
00:20:27 - STEP 9
Wash Project
00:21:17 - STEP 10
Add faux glass texture to frontside
00:25:30 - STEP 11
Paint with Pebeo Vitrail Paints on backside
00:33:11 - STEP 12
Add hanging hardware
-
 12:42
12:42
Kado Reviews
4 years ago $0.02 earnedTURN AIRPODS PRO INTO HEARING AIDS - STEP BY STEP INSTRUCTIONS
21 -
 26:39
26:39
Diovannie09
4 years agoStep by step instructions to Make Money Online in 2021 from scratch | Easy
38 -
 19:58
19:58
TampaAerialMedia
19 hours ago $7.80 earnedKEY LARGO - Florida Keys Part 1 - Snorkeling, Restaurants,
36.7K17 -
 1:23
1:23
Memology 101
2 days ago $7.07 earnedFar-left ghoul wants conservatives DEAD, warns Dems to get on board or THEY ARE NEXT
33.2K62 -
 3:27:27
SavageJayGatsby
9 hours ago🔥🌶️ Spicy Saturday – BITE Edition! 🌶️🔥
58.9K6 -
 26:09
26:09
Exploring With Nug
19 hours ago $12.27 earned13 Cold Cases in New Orleans What We Discovered Beneath the Surface!
54.4K23 -
 27:39
27:39
MYLUNCHBREAK CHANNEL PAGE
14 hours agoDestroying Time.
137K41 -
 3:27:19
Mally_Mouse
10 hours ago🌶️ 🥵Spicy BITE Saturday!! 🥵🌶️- Let's Play: Minecraft Christmas Adventure!!
134K9 -
 2:14:31
Side Scrollers Podcast
14 hours agoSide Scrollers INVITE ONLY - Live From Dreamhack
161K16 -
 1:18:23
Simply Bitcoin
2 days ago $14.62 earnedThe Bitcoin Crucible w/ Alex Stanczyk and Lawrence Lepard
39.3K7