My Spring Gnome
I absolutely LOVE my Spring Gnome! I knew what I wanted him to look like, but while I was crafting, I wasn’t sure it was working out! But I am happily surprised!
Supplies I Used for my Spring Gnome
Styrofoam cone: Dollar Tree is my source!
Rope Braid: once again Dollar Tree, and you’ll find then close to the styrofoam cone.
Fabric: of your choice, I found this cute bumble bee skirt at Dollar Tree
Hot Glue gun and glue
Scissors
Wood bead: for nose, click here to see how I painted my wood beads.
Chunky yarn: I had some cream-white yarn on hand from Hobby Lobby
Medium birch discs: this is optional
Embellishments: I used three paper sunflowers I had on hand.
ASSEMBLING MY SPRING GNOME
I knew on my recent trip to Dollar Tree, I wanted to make Spring Gnome, in a sort of beehive style.
Dollar Tree had most of my supplies; styrofoam cone, rope, and even the cute bumble bee skirt I used for fabric I found by the register!
The remaining supplies, I had on hand.
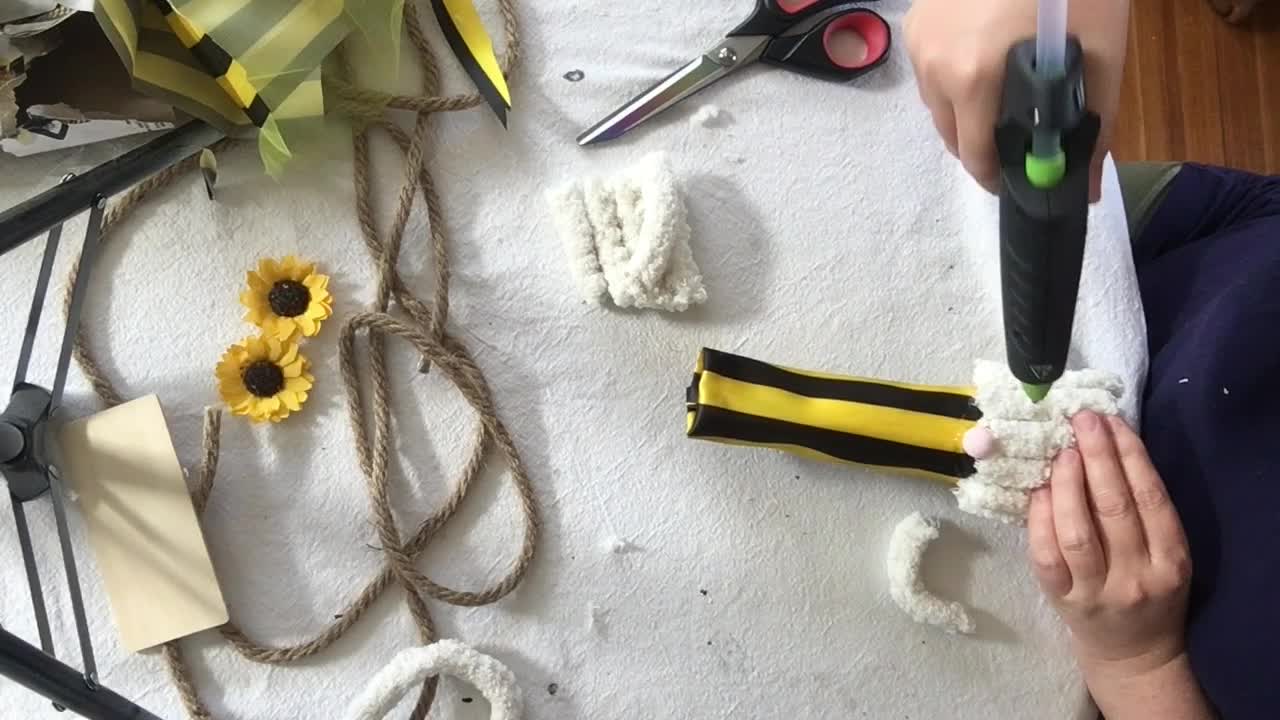
LET’S GET STARTED
First, I had to be careful using hot glue on my styrofoam cone, I was worried it would melt.
So, I cut the fabric I had in approximately 12″ x 12″ “square”.
A very rough square.
Since it was wrinkled, I ironed it and then I wrapped it around the cone and glued it in place.
Once that was done, I measured how long I wanted my “chunky yarn beard” and cut about 12 strips.
They ended up being about 5″ long.
When I was done, I realized I probably added to many, I’ll know better next time.
Next time, I’ll have my bottom row of five pieces of yarn and then add three pieces on top to make a “fluffy” chunky yarn beard.
Once the yarn was glued in place, I grabbed my speckled painted wood bead for the nose and glued that in place.
Click here to see how I paint wood beads, with one color and then two colors to make a speckled effect.
For the final piece, I added one chunky yarn over the top of the nose as the eyebrows.
So in all, we’ll need nine pieces of chunky yarn for the beard and uni-brow.
MY SPRING GNOME STOCKING HAT
Now here comes the fun part.
I now grabbed the rope, started wrapping and gluing the rope in a circular fashion working my way up the cone.
Be careful not to burn your fingers as your gluing, craft sticks or tongue depressors helps but I always forget them!
Once I reached the top, I made sure to glue the ends down and then I grabbed my paper flowers and glued them randomly in place on the hat as an embellishment.
For the final impromptu piece, I decided to glue a medium birch disc to the bottom of my Spring Gnome as a stand.
Since I used a styrofoam cone, this was pretty lightweight and this helps add height and a stable base so it doesn’t tip over.
And that is it!
I can not wait to do this again and try the “chunky yarn beard” again, I loved how this turned out!
-
 5:05
5:05
MPDtribe
4 years agoHow I Upcycled my Mother's Day Vase
67 -
 3:36:30
TonYGaMinG
5 hours ago🟢 ABI WITH FRIENDS | 🍩JOE DONUTS | 😶 🌫 VLADSGAMINGCARTEL |
16.7K4 -
 21:24
21:24
marcushouse
11 hours ago $0.08 earnedStarship Flight 10: Go or No? 🚀
21.8K12 -
 LIVE
LIVE
MrR4ger
16 hours agoSUNDAY FUNDAY w/ R4GER - VARIETY / DIABLO 4/ FOR HONOR / ETC?
89 watching -
 5:40
5:40
WhaddoYouMeme
3 days ago $0.22 earnedThey’re Calling This the End of Masculinity
26.8K28 -
 15:24
15:24
Tactical Advisor
20 hours agoBest 2011 of 2025 | Bul Armory Ultralight Pro
28.2K2 -
 27:31
27:31
True Crime | Unsolved Cases | Mysterious Stories
2 days ago $0.14 earnedThe Hong Kong Schoolgirl Mystery – 5 Mysterious Unsolved Cases (Part 8)
21K3 -
 7:19
7:19
China Uncensored
1 day agoChina is DONE in the South China Sea
17.1K45 -
 5:17:07
Joe Donuts Live
7 hours ago🟢 Loot Rats Unleashed: Arena Breakout Chaos! | Joe + Tony + Vlad
27.5K1 -
 30:37
30:37
Degenerate Plays
19 hours ago $0.01 earnedThis College Is Out Of Control - GTA Online : Part 9
10.2K