
Hello Baby by reDesign with Prima | Melissa Peterson Designs
Hello baby! My top 2 favorite transfers are from ReDesign with Prima are America and Hello Baby! Check out how I took an unfinished wood sign from Hobby Lobby and dressed it up with this adorable Hello Baby transfer and a little Dixie Belle’s VooDoo Gel Stain in Black Smoke!
Supplies I Used
Unfinished Wood Sign of your choice, I used White Beveled Beaded Wood Wall Decor
Hello Baby transfer from ReDesign with Prima
Dixie Belle’s Clear Coat in Flat.
VoodooGel stand in Black Magic by Dixie Belle
My two favorite transfers are from ReDesign with Prima are America and Hello Baby!
Click here to see how I turned the America transfer into a beautiful rustic sign.
Just for the record, I was in Hobby Lobby’s unfinished wood section and came across this adorable white sign with beads hanger!
So far I can not find this unfinished sign online BUT I will keep looking since I hope to nab some more for future projects!
In the meantime, feel free to find a board or an unfinished sign you’d like to dress up and lets get started!
CREATING OUR HELLO BABY DECOR!
Before getting started with our new sign, make sure she is good and clean.
I prefer to use Dixie Belles’ White Lightning to clean my projects, click here to see how I use this product!
Next, grab your Hello Baby transfers from ReDesign with Prima.
I picked out the flower transfers available in this design, and with scissors cut around them plus the words “Hello” and “Baby”.
Next I worked on placement.
For a more thorough blog post on how to apply transfers you can click here.
Otherwise, just know that transfers comes in three layers usually, The white backing, the design or transfer itself and the clear plastic film on top.
Once I had an idea on where I wanted everything to lay I started pulling the back off the flowers first and applying.
Position the design where you want it.
Be careful not to touch the transfer on the project until you are ready to commit to where it will lay.
Once you do, put it on and start rubbing.
Each transfer comes with it’s own stick, I start rubbing the transfer and slowly pull up on an edge to see where it’s applied.
If the transfer pulls up a little, push it back down and keep rubbing.
Some lay down really easy, others take a little more time and elbow grease.
Once you have the clear plastic film completely removed and your transfer is on your project, use a clean towel or rag and rub over your sign.
This will help push the transfer down onto your project for a better adherence.
Don’t be afraid of overlapping some of your transfers, it’s ok!
PROTECTING OUR HELLO BABY
Now it’s time to seal our sign.
I use Dixie Belles’ sealer and for this project I used their Flat sealer for minimal shine.
Apply a coat of sealer, let dry.
Once it’s dry, you can add a second coat again.
When this is dry, if you like the fresh clean look, your sign is done!
But, if you like the aged look, keep reading!
Adding an aged touch to your projects is easy and my first go to is usually using black or brown water-based wax by Dixie Belle.
But this time I wanted to use something else, VooDoo Gel Stain Black Magic by Dixie Belle.
Once my sign was sealed and cured, I used damp clean rag and squirted a little Black Magic on the rag and then started wiping across the sign.
I then used a separate area of the rag and wiped away some of the stain back off of the sign.
You can repeat this process again if you want a darker look.
Once this is dry, add another coat of sealer and you are done!
That’s it!
-
 6:20
6:20
MPDtribe
3 years agoHow to Make G'ma Macs Simply Delicious Pasta Pepperoni Salad
81 -
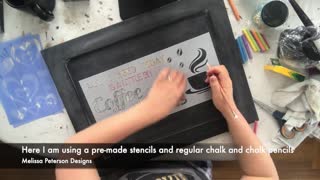 11:18
11:18
MPDtribe
4 years ago $0.01 earnedHow to Stencil your Chalkboard | Part 2 | Melissa Peterson Designs
481 -
 0:09
0:09
coffeemama
4 years ago $0.01 earnedBaby Says Hello
3481 -
 53:24
53:24
Mikhaila Peterson
4 years agoQ&A with Jordan Peterson | Mikhaila Peterson Podcast
4.65K21 -
 5:10
5:10
One America News Network
4 years agoTipping Point - Neonatal COVID Protocols with Mikhaila Peterson
3.85K24 -
 6:04
6:04
PastorMelissaScott
4 years agoComplete Communion With God by Pastor Melissa Scott, Ph.D.
37 -
 4:12
4:12
The Wayne Dupree Show
4 years agoSpecial Interview with Melissa
2.91K1 -
 LIVE
LIVE
The Shannon Joy Show
2 hours ago🔥🔥The Roots Of Technocracy EXPOSED. Dark Enlightenment & The Game B Techno-Beast. Top Experts Patrick Wood, Courtenay Turner & Joe Allen LIVE & Exclusive! 🔥🔥
249 watching -
 46:48
46:48
Grant Stinchfield
1 hour agoLawyers, Lies & Deleted Tweets: The Russia Hoax House of Cards Is Collapsing
2.49K1 -
 21:51
21:51
Tudor Dixon
2 hours agoMarsha Blackburn on Ending DEI & Fighting Political Indoctrination | The Tudor Dixon Podcast
6.94K2