How to set up DNS on any Android phone (3 methods)
This tutorial video will show you step by step how to set up DNS on an Android phone.
You can use Google Public DNS, Cloudflare DNS (1.1.1.1), Quad9, AdGuard, or another DNS provider on your Android smartphone.
The steps in this video work for all Android phones, such as Samsung, Lenovo, Motorola, OnePlus, ASUS, Nokia, Google, Sony, LG, and other Android smartphones.
Changing DNS can improve your online security and privacy, may increase your internet speed, and maybe also unblock websites that are blocked by your ISP (Internet Service Provider).
If your smartphone has Android 9, 10, or 11, then you can use “Private DNS” which uses DNS-over-TLS to provide security and privacy for your DNS queries.
For Private DNS you can use: dns.google or one.one.one.one (Cloudflare) or 1dot1dot1dot.cloudflare-dns.com or dns.quad9.net or dns.adguard.com.
If your smartphone runs Android 8 or an older version of Android, then you can use a DNS changer app, like Cloudflare's 1.1.1.1, BGNmobi's DNS Changer, or Quad9 Connect.
You can also change DNS manually via the wifi settings on your phone.
You can use the DNS server addresses below.
Google Public DNS:
DNS 1: 8.8.8.8
DNS 2: 8.8.4.4
Cloudflare DNS:
DNS 1: 1.1.1.1
DNS 2: 1.0.0.1
Quad9 DNS:
DNS 1: 9.9.9.9
DNS 2: 149.112.112.112
AdGuard DNS:
DNS 1: 94.140.14.14
DNS 2: 94.140.15.15
-
 15:49
15:49
binarybishop
4 years ago $0.13 earnedTurn Your Android Phone Into A Linux Phone
4142 -
 28:18
28:18
MTandiZ
4 years agoIjoy Cable Bytes iPhone Android Cord Phone Tablet Accessory Protective Protection for Cords tzumi
22 -
 1:58
1:58
Ban_Kick
4 years ago $0.08 earnedPubg Mobile Ipad View For Android Phone No Root No Ban
5.38K -
 4:42
4:42
How to Survive
4 years agoHow to Survive an Exploding Phone
1.87K9 -
 2:21
2:21
IPGraySpace
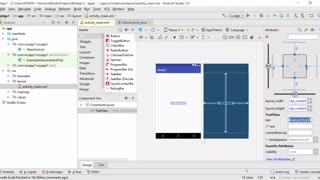
4 years agoIPGraySpace: Android - How to delete projects from Android Studio
109 -
 15:47
15:47
MistaRye
5 years agoHow To Make Beats On Android
35 -
 4:04
4:04
Elky
4 years ago $0.01 earnedAndroid System Tracing
138 -
 4:29
4:29
IPGraySpace
4 years agoIPGraySpace: Android - How to create sample project in Android Studio
21 -
 2:16:35
DLDAfterDark
15 hours ago $18.63 earnedIs The "SnapPocalypse" A Real Concern? Are You Prepared For SHTF? What Are Some Considerations?
47.2K15 -
 19:58
19:58
TampaAerialMedia
1 day ago $11.91 earnedKEY LARGO - Florida Keys Part 1 - Snorkeling, Restaurants,
56.9K24