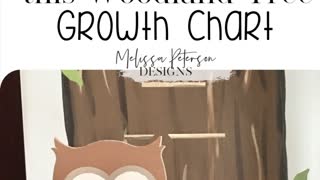
Part 2: How I Painted this Woodland Tree Growth Chart
I had a blast painting this Woodland Tree Growth Chart! Part stenciling, part free-hand, oh my! Let me show you how I, with the help of my daughter, put this all together!
Supplies I Used for the Woodland Growth Chart
1″ x 10″ x 72″ Pine Board, sanded and clean
Dixie Belle Paints: Haint Blue, Coffee Bean, Caviar, Putty, Fluff, Driftwood, Palmetto, Rebel Yellow, Terracotta, Rustic Red.
DIY Paints: Monets Garden, Fancy Farmgirl
Mod Podge
Sandpaper or sand block.
Paint brushes: I used regular artist brushes and my favorite large round watercolor brush.
acrylic ruler, pencil
Contact paper to make my stencils in my Silhouette Cameo 3
Growth Chart cut file (minus woodland animal): click here to join MPD tribe for access to this design on others in my free library.
Woodland Animals: set of four, owl.
PREPPING THE GROWTH CHART
My daughter and I came up with a vision of a woodland growth chart and she wanted a sky blue background.
For the sky like color, we went with Haint blue by Dixie Belle.
One of my idiosyncrasies, is to paint, seal and apply the hanger to the backside of my personalized signs, first.
I applied two coats and sealed the backside with Dixie Belle’s Flat sealer.
Before I was finished I added a special touch to the back, Psalm 91:11.
A few days later, I flipped her over and painted two coats of Haint blue to the front side.
DRAWING AND PLACEMENT OF THE WOODLAND TREE
Our woodland tree has a faux sign hanging on it, so I set up my design to cut the top of the overall design to help with the placement of this on the board.
My board is approximately 9″ x 72″ long, so in my Silhouette design program, I made a rectangle using one of the shape tools and with these same measurements.
After I had added the growth chart measurements to the design, I figured the placements of the tree sign, plus the five woodland animals.
I then figured out how to divide this into two separate stencils.
The first stencil is where the top of the tree is that includes the sign, the bottom stencil includes the growth measurements and woodland animal.
I cut my first stencil, weeded the outline of the sign and placed this on the top of my pine board, then I grabbed my pencil and traced around the inside of the tree sign.
Next I removed the stencil.
Now I’m ready to work on a rough draft of my tree.
I grabbed my acrylic ruler and measured 2″ in at the bottom but then moved my ruler in 1/8″ and used my pencil to draw and line along the ruler.
Repeat this process on the other side of the board and this will be the base or bottom or the tree.
Next, I grabbed my ruler and lined it up with the pencil marking, then brought the top of the ruler 1/8″ in and again marked it with the pencil I kept repeating this process until I reached my tree sign outline and also above the tree sign.
Finally, I marked where I wanted the woodland branches to be and penciled then in.
PAINTING MY WOODLAND TREE
I started painting the tree in Dixie Belle’s Coffee Bean.
When this was dry, I grabbed my round watercolor brush and some water and Dixie Belles Caviar.
In a disposable bowl, I watered the paint down a little and outlined the woodland tree, I also added some vertical lines, inside the tree.
Next i grabbed Dixie Belle’s Putty with a little water to use as highlights on the tree.
All these highlights and lowlights were random going vertically along the woodland tree to represent bark.
When this step was completed, I added two coats of sealer and let my project set until the next day.
STENCILING THE WOODLAND TREE MEASUREMENTS & ANIMALS
Now it’s time to cut the bottom portion of the long rectangle stencil that includes the growth measurements and the base of the woodland animals.
Each Woodland animal will be painted in layers, and this first stencil will only include the very bottom layer of each animal.
Once the stencil is prepped, cut and weeded, I use the hinge method to apply this to the pine board.
APPLYING THE WOODLAND STENCIL
Next I grab my transfer tape, which is about 12″ x 18″ and apply it to the very bottom part of the stencil,
I lay the stencil on top of the board where I want the stencil to be placed, grab two small strips of painters tape and tack the stencil to the board just above the transfer tape.
Then I removed the backing, only where the transfer tape is applied, cut the backing off and then apply it to the board.
I removed the transfer tape carefully and then worked my way up the stencil in the same manner until the stencil is all applied to the woodland growth chart.
Once the stencil is applied, I burnished with Mod Podge to help prevent any paint bleeds.
PAINTING THE WOODLAND ANIMALS
The raccoon base cutout, I painted in Dixie Belle’s Driftwood.
Next I painted the other four animal base cutouts in Dixie Belle’s Putty.
Then I painted the measurements and numbers in Putty also.
I decided before I removed the stencil to add some highlights and lowlights to the measurements with Dixie Belles Fluff and Caviar.
Once the paint was all dry, I lightly sanded the stencil with my 220 grit sand block before removing the stencil carefully to avoid pulling any paint.
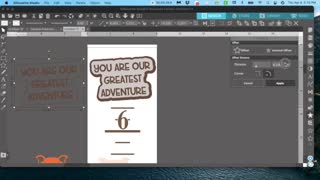
LETTERING THE WOODLAND TREE SIGN USING PVPP METHOD
This method is very simple.
As you can see below in the pic how I weeded my stencil for this part of the Woodland tree sign.
Once I applied this with transfer tape, I grabbed my Dixie Belle Putty and painted in vertical strokes.
Before this layer was dry, I added some watered down Fluff to give it a streaky or aged wood look.
When this area was dry, I lightly sanded with a 220 grit sand block before slowly removing the stencils.
Click here and here for more examples of how I use the PVPP method.
ADDING LEAVES TO THE WOODLAND GROWTH CHART
These are so easy, especially with my large round watercoloring brush.
For the leaves I used Palmetto, Monets Garden and Fancy Farmgirl
I started with the dark greens first and then the light ones.
My leaves are basically oval shapes and I use the end of my brush to start the end of each leaf.
My daughter came over to help finish this growth chart and took over the task of painting the remaining leaves.
I had her practice on a plain sheet of paper first, the trick it to make sure your brush is loaded with enough paint.
After about four tries, she was good to go! And she did a GREAT job!
PAINTING THE WOODLAND ANIMALS
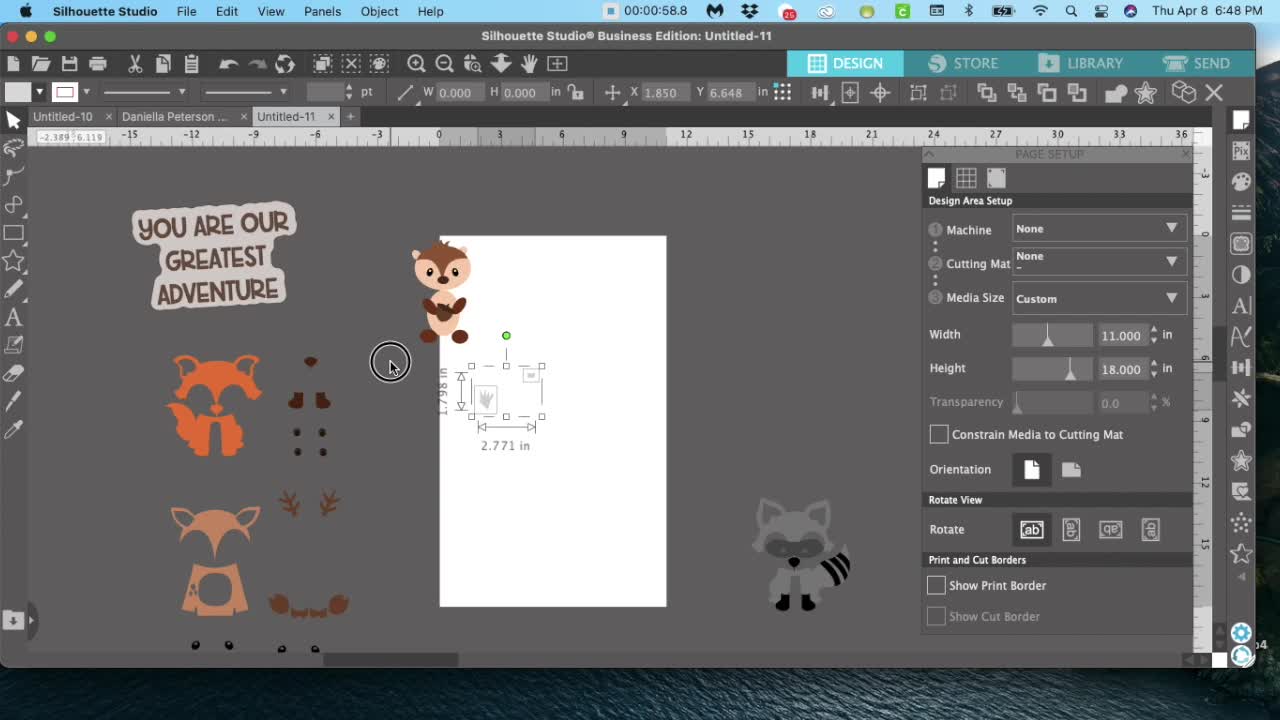
I like using contact paper for my stencil material with my Silhouette.
Before we get started, I have a quick video showing you how I set up my SVG designs in Silhouette to cut my stencils on 12″ x 18″.
To keep my stencils straight, or to help me from getting confused, I worked with two animals at a time, and I made sure to label each stencil with a pen, the animal names.
I have another blog post on how I layered the stencils to paint certain cartoon characters, click here to get a better idea of how it’s done.
Now you don’t have to use the color of paints I used, or even mix paint like I did.
PAINTING THE FOX
The fox’s head and body were approximately two parts Terracotta to one part Coffee Bean.
And the fox’s nose and feet were Coffee bean and the eyes were Caviar then Fluff.
PAINTING THE DEER
While baby deer’s body was Putty and the antlers were Coffee Bean, along with the eyes being the same as the fox, Caviar and Fluff.
PAINTING THE OWL
The Owl was two parts Coffee Bean and one part Terracotta. This leftover mixture was also used to paint the squirrel’s nut.
Back to the owl, the wings were equal parts Coffee bean and Caviar and the feet were Rebel Yellow.
PAINTING THE SQUIRREL
The squirrel was equal parts Terracotta and Coffee Bean, but the squirrels hands and feet were equal parts Rustic Red and Coffee bean.
For the nut, I used some of the leftover paint mixture from the Owl for the bottom portion and Coffee Bean for the top portion.
PAINTING THE RACCOON
Finally, the raccoon’s base was Driftwood, so I mixed equal parts Driftwood with Caviar to paint the body.
Then I added a little more Caviar to this same mixture to paint the raccoons mask, for his feet, stripes and nose I used straight Caviar.
The key to painting or stenciling in layers, is to make sure the previous layer is good and dry before adding the next stencil on top of it.
FINISHING OUR WOODLAND GROWTH CHART
When everything was all painted and dry I lightly sanded the woodland growth chart and added three coats of Dixie Belle’s Flat sealer.
-
 1:57
1:57
MPDtribe
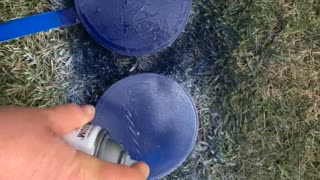
4 years ago $0.01 earnedMy Dollar Tree Garden Stakes
94 -
 11:07
11:07
MPDtribe
4 years agoPart 1: How I Painted this Woodland Tree Growth Chart
327 -
 1:12
1:12
MPDtribe
4 years agoFinal: How I Painted this Woodland Tree Growth Chart
294 -
 1:22
1:22
ElizabethGardnerBlanchardArt
4 years ago $0.01 earnedPainting a Woodland Scene Timelapse: Part 1
44 -
 1:38
1:38
ElizabethGardnerBlanchardArt
4 years ago $0.01 earnedPainting a Woodland Scene Timelapse Part 2: The Oil Painting
1041 -
 3:41
3:41
ZipTieDomes
4 years agoHow to Use a Geodesic Dome Calculator - Part 3: Weight Chart
48 -
 19:36
19:36
carolanns creative adventure
4 years agoClay Tree Part 2
37 -
 44:43
44:43
Microsoft Excel Full Course
4 years agoExcel 365 Part 14 – Chart
120 -
 2:05
2:05
Over-Dew Music
4 years agoA WOODLAND WALTZ - music by Rishard Lampese
40 -
 1:58
1:58
KIVI
4 years agoHispanic population growth
371