
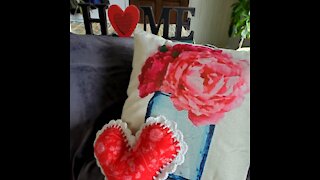
DIY Home Decor from a Salvaged Hobby Lobby Sign
I purchased this sign from Hobby Lobby on clearance years ago and I really liked it at the time! However, after the last time it fell and came apart is was time to turn this into a salvaged DIY Home Decor.
Supplies I Used
Hobby Lobby Sign: purchased on clearance years ago
Hot glue gun and glue sticks
Cooking oil or spray
Paper clay
Powder: I use what I have on hand and right now I use baking soda.
Plastic Putty Knifes: this is not the set I use but it’s very similar
Elmers wood glue
Dixie Belle’s Slick Stick, Caviar, and Clear coat.
ReDesign with Prima mould: the one I used may not be available anymore. I will keep looking!
ReDesign with Prima transfer: Love and Dreams. I purchased this transfer from my friend Anna at The Furniture Boutique
Dixie Belle’s white wax
paint brushes
220 grit sandblock
let’s get started
Before I started my project, I prepped by cleaning the sign.
While I was cleaning, I noticed for the first time a pretty large chipped area on the plastic frame.
And the large chipped area that was missing included some pretty details which is one of the reason why I wanted to salvage this sign.
I either ignore it or fix it.
REPAIRS
I saw a year a two ago someone making moulds from hot glue for repairs so I thought I would give it a try.
Why not? I had all the supplies on hand!
The area that needed repair was approximately 6″ long.
I should have measured but I didn’t.
HOW TO MAKE A MOULD
Once my glue gun was heated up, I picked a section of the frame that was longer than the area I needed to fix.
I rubbed this area generously with cooking oil.
Then I started applying the hot glue from the glue gun to this area.
Let this section cool and applied more where needed until I enough of the area was covered to make a mould.
Once it was cool, I started peeling the glue off of the frame.
Sure enough, I had made my very own mould!
REPAIRING THE FRAME
I really enjoyed this part.
It brings back memories of using Play-doh!
I used Paper-Clay and tried to grab enough of this material so I can roll it into one ball and then spread into the mould.
When making moulds, if we piece in the Paper-clay into the mould, it may make the embellishment weak and easy to break.
For this reason, it’s best to use a little too much and then remove the excess.
PREPPING THE MOULD
To prep the mould, first dust it with powder.
I use what I have on hand and right now that’s baking soda.
This will make removing the Paper Clay from the moulds easier.
I grab my chunk of Paper-Clay, roll it into a ball and then start pressing it into the mould.
Once I have the Paper-Clay formed into the mould, I use a putty knife and sometimes just my fingers to remove the excess.
Then to remove the material from the mould I “break the seal”.
HOW TO BREAK THE SEAL
To break the seal for my DIY home decor project, I just work my way around the mould and pull the mould away from the Paper-Clay.
It will bounce back to the Paper-Clay but the seal is mostly broken.
Then flip the mould upside down onto the table and slowly pull the mould up away from the formed Paper-Clay.
APPLYING THE PAPER CLAY TO MY DIY HOME DECOR
Here I just manually worked the moulded paper-clay into the areas of the frame I needed to repair.
It took me a couple of tries, I removed some of the excess and I used Elmer’s Wood glue to secure the paper clay until it dried.
Next, prepping the sign with Dixie Belle’s Slick Stick.
PRIMING MY DIY HOME DECOR SIGN
I decided to go back to the basics and cover my entire sign with Dixie Belle’s Slick Stick.
I realized after this sign fell apart was made from MDF-like material and plastic for the detailed frame.
Both surfaces are pretty slick so I decided to prep my sign with two coats of Dixie Belle’s Slick Stick.
Chalk paint is pretty adhesive but I wanted to have a little more security that my finished product would pass the scratch test.
Click here to see how I finished my salvaged DIY Home Decor sign!
-
 5:05
5:05
MPDtribe
4 years agoHow I Upcycled my Mother's Day Vase
67 -
 32:04
32:04
scripturediy
4 years agoDIY Valentine's Day Home Decor
22 -
 12:04
12:04
slmcewin
4 years agoNew Camera Review & Hobby Lobby Haul
2.6K -
 21:09
21:09
Life with Renata Marie
4 years ago $0.01 earnedNew 2020 Christmas Home Tour| Decorations from Home Goods, Target, Hobby Lobby, Joann's, Big Lots
58 -
 0:14
0:14
JKNeer
4 years agoHome decor made easy with our HOME sign. Be ready for spring.
35 -
 0:20
0:20
KTNV
4 years agoHobby Lobby increases their employee minimum wage
871 -
 14:27
14:27
My Southern Backyard
4 years agoThrift Store Finds, Sesame Street and a Trip to Hobby Lobby
40 -
 2:41
2:41
Kimber ~ Kreate With Me
4 years agoHoliday Floral ~ DIY Home Decor ~ Crafts
1073 -
 15:58
15:58
CherylsCountryHome
4 years ago $0.01 earnedChristmas Home Decor Tour 2020
62 -
 9:11
9:11
Adventures on the Homestead
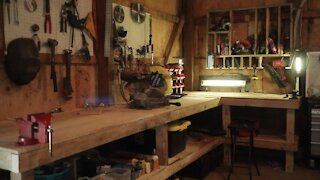
4 years agoI built my workshop from Salvaged Pallets| Farm Vlog
173