DIY Painted Books & ReDesign with Prima Transfers
Check out how I updated my painted books AND added ReDesign with Prima Transfers for an extra special touch!
Supplies I Used
Books: used or new
Dixie Belle Caviar
ReDesign with Prima transfers: Midnight Floral
Dixie Belle’s white wax
paint brushes
220 grit sandblock
Embellishments of your choice. I used black jute rope, small wood key and heart.
let’s get started
I decided to re-paint my books from another project I completed before, click here to see that post!
PREPPING BEFORE PAINTING
The only prepping I needed to do with these three books was to sand lightly over the areas of the book-ends I had stenciled and then wipe the dust off.
That’s it!
TIME TO PAINT OUR BOOKS!
I went with Dixie Belle’s Caviar!
I knew I wanted to go with this dark, rich deep color because I planned on using Midnight Floral transfers from ReDesign with Prima.
Since these books were already painted before and I am going dark, it only took one coat of Caviar to cover the books completely!
MIDNIGHT FLORAL
I absolutely love this transfer by ReDesign with Prima!
You can see here, where I used sections of these transfers on my daughters tabletop jewelry armoire and storage box.
Because I am using pieces here and there, I am getting a lot of use from this one transfer.
Of course, you can always use the entire transfer on large project.
It’s up to you!
Transfers come in three pieces
Backing
Transfer design
Clear plastic on top of transfer
First decide which section of the transfer you want to use and then decide where you want to place it.
Then carefully cut out and around the part of the design you want to use.
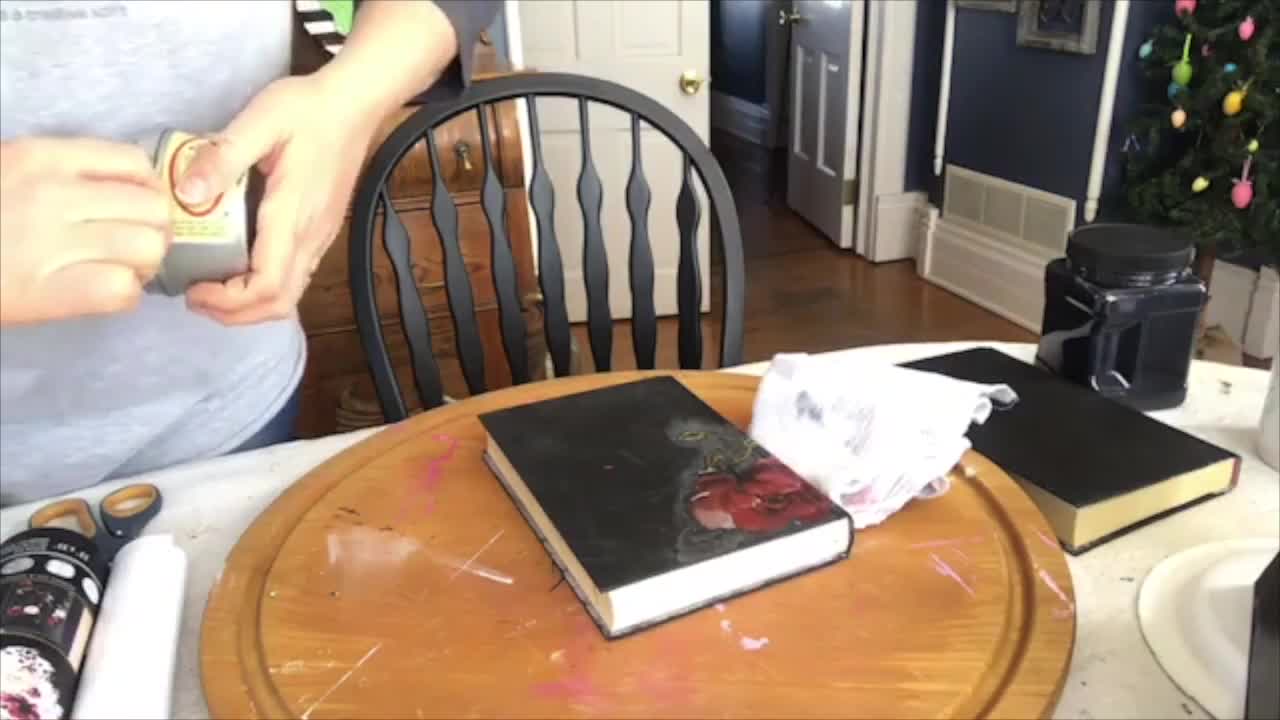
When I picked out the rose, I had decide on placement where I thought was the top of the book.
But after I finished the Facebook live I realized it was at the bottom.
Everything worked out just fine!
Instead of this book being the top of the three piece set, it instead became the bottom piece.
Then I found a larger section of the Midnight floral transfer I wanted to incorporate and I managed to hold the three books together and apply the transfer across all three spines of the books!
This was actually easier than applying the rose on the book shown below when I didn’t have the right squeegee.
Each roll of transfers you purchase comes with a squeegee.
This squeegee works wonders.
It’s just the right fit and shape so you can hold it and apply the pressure you need to make applying transfers easy!
After finishing the spine of the books I moved to the front book.
I found the perfect section and applied this in the same fashion also!
SEALING YOUR PAINTED BOOKS WITH TRANSFERS
I have yet to apply sealant yet like clear coat to books.
But when I do I will let you know how it turns out!
To seal this set I used Dixie Belle’s Best Dang White Wax.
I actually applied this pretty liberally and then buffed back the excess with a lint free cloth.
If you don’t have a brush to apply your wax, you can use the same lint free cloth to both apply and buff your book set.
I use cloth diapers for my lint free cloths.
To apply the wax, just dip the end of you brush into the wax and start wiping your project.
I rub the wax in circles, side to side and up and down.
When you have a section waxed, take your lint free cloth and start wiping or buffing the area you just worked on.
I usually run my hand over the area, if it catches or sticks, keep buffing.
When it feels buttery soft, your section is done and you can move onto the next section.
EMBELLISHMENTS
You can leave your books just as is or dress them up a little bit more.
First I added black jute rope to my books, and I added enough to wrap it around about three times.
In addition to the jute rope, I also added a small heart and key wooden embellishments I had on hand.
I’m not positive, but I think I purchased these at Hobby Lobby.
When it comes to personalizing your set of books, the sky is the limit!
I’d love to see what you come up with!
PAINTING PAGES!
Yes, I went back and painted the pages with Dixie Belle’s Caviar and waxed them too!
It wasn’t that hard!
I held the book in my left hand, and held the book closed.
I ran my paint brush over the pages and painted them with Caviar until the pages were covered.
Once the paint had dried, I went back and fanned the pages and separated the ones that were still sticking together.
That was it!
After the pages of all three books were painted, I went back and used my white wax in the same manner and even buffed them with my lint free cloth!
Now that I know I can paint the pages of my books, I will be adding more decorate books to my home decor!
-
 6:20
6:20
MPDtribe
4 years agoHow to Make G'ma Macs Simply Delicious Pasta Pepperoni Salad
89 -
 2:38
2:38
KERO
4 years agoBakersfield Facebook group spreads joy with painted rocks
281 -
 2:21
2:21
menoora
4 years agoFun Toddler Time with Books
19 -
 0:40
0:40
KTNV
4 years agoGetting painted for Halloween with Skin City
19 -
 2:55
2:55
KERO
4 years ago23ABC to surprise local school with hundreds of books
15 -
 5:30
5:30
DiamondSteph74
4 years agoASMR Painted Plaster Bowl's With Cornstarch And Sequins& Glitter Crush
8 -
 2:03
2:03
WGBA
4 years agoNBC 26 surprises local school with thousands of new books
8 -
 0:40
0:40
WMAR
4 years agoAtomic Books is open with walk-ins, curbside pick-up and local deliveries
5 -
 0:40
0:40
HaiMax
4 years ago $0.01 earnedPainted Stork 2
29 -
 0:42
0:42
Mr. Nate Books
4 years agoReview Mr. Nate Books with Stars and Comments
78