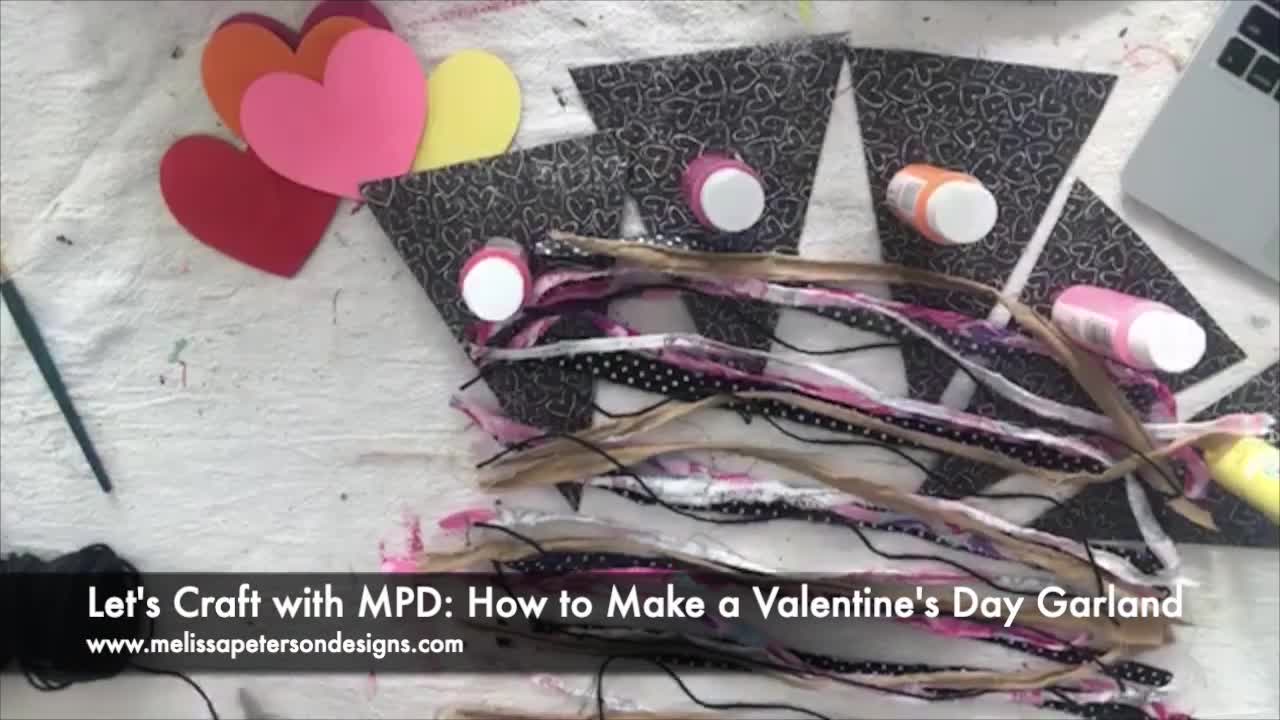
How to Make a Valentine's Day Garland
My coffee bar needed a little extra touch, and this Valentine’s Day Garland fit just perfect! I will show you how I decorated one of my favorite areas. And yes, I have a quick video included!
First gather your supplies
For your Valentine’s Day Garland you will need the following supplies
Your choice of banners. I used Chipboard Pennants from Hobby Lobby
Wood Heart Cutouts I found at Hobby Lobby in their Valentine section.
Messy bows: Click here for instructions and supplies you will need.
Jute rope or twine
Mod Podge, paint brushes, scissors, hot glue gun and glue sticks
You Choice of Paint (craft or chalk paint). I used craft paint from Walmart and painted each heart a different color. I used the following colors: Pale Daffodil, Candy Pink, Bright Magenta, Bright Red, and Jack O Lantern.
LET’S GET STARTED
Making these Valentine’s Day Garland is such an easy task and except for the use of the hot glue gun, this would be a kid-friendly craft.
This craft is also very versatile. Instead of using heart cutout, you could use letters to spell a specific word such as HOME or decorate your kiddos room and personalize it.
So many options!
LET’S PAINT
I started with painting my wood heart cutouts.
This will give them a chance to dry while I move onto putting the rest of the garland together.
The chipboard pennant banners I picked out from Hobby Lobby actually gave me enough to make 2 small garlands for the area I wanted to decorate.
For my small Valentine’s Day garland I used 5 pennants banners, so I painted 5 heart wood cutouts.
I decided to use a variety of colors and painted each one with a regular brush.
PENNANT BACKGROUND
For the pennant background, I used 2 pieces of scrapbook paper I had on hand.
I wanted to keep my color theme with the typical Valentine colors of red, pinks and I added orange, yellow and my base colors of black and white.
On the backside of the 12″ x 12″ scrapbook paper, I used the chipboard pennant and traced with a pen around the pennant.
On the scrapbook paper I was able to squeeze in 3 templates on one sheet and 2 on the remaining sheet.
Once these are traced, I cut them with my scissors.
Next, I grabbed my Mod Podge and a brush and painted the pennant with the glue.
I applied enough Mod Podge to cover the entire surface but trying to be careful not to leave excess for the scrapbook paper to bubble up.
I then placed one of the triangle scrapbook papers on the pennant with Mod Podge.
Once I had the scrapbook paper in place, I set it aside to dry, but I applied one of the paint bottle on top to keep the chipboard from warping.
When these were all in place, I then moved back to the wood heart cutouts.
APPLYING THE HEARTS
Here I used the hot glue gun.
I was somewhat generous with the hot glue but I applied the glue more in the middle of these wood cutouts.
I then immediately placed these on the pennant where I wanted them.
Hold in place for a few minutes or put something heavy on them while the hot glue cools.
MESSY BOWS
If you check out my video below I miscalculated how many bows I needed.
Better too many than not enough!
Click here, to see how I made my larger Messy Bows for one of my Valentine’s Day garland.
You can also click here to see how I make my smaller Messy Bows.
TIME TO ASSEMBLE
Now it’s time to bring together our Valentine’s Day Garland.
I decided to use black twine to string my pennant banners.
I wrapped approximately 1″ scotch tape to the ends to make it easier to thread them through the holes of the pennants.
Thread the jute rope through the holes of the pennant.
I didn’t cut my cut my jute rope until I had all the pennants threaded and knew how long I wanted it.
Once I had this arranged, I then tied the Messy Bows onto the pennants.
I placed one Messy Bow in-between each pennant and on each end.
That is it!
-
 1:57
1:57
MPDtribe
4 years ago $0.01 earnedMy Dollar Tree Garden Stakes
94 -
 1:50
1:50
Jacob Artly
4 years agoValentine's Day 2020
801 -
 32:04
32:04
scripturediy
4 years agoDIY Valentine's Day Home Decor
22 -
 1:40
1:40
Race Videos
4 years ago2014 Valentine's Day 5K
50 -
 1:45
1:45
Race Videos
4 years ago2016 Valentine's Day 5K
361 -
 2:36
2:36
Race Videos
4 years ago2019 Valentine's Day 4 Mile
31 -
 6:26
6:26
Sharing Paper Smiles
4 years agoValentine's Day Cards
47 -
 0:07
0:07
THE QUADRIPLEGIC JOURNEY
4 years agoCANDYHAP VALENTINE'S DAY
231 -
 24:06
24:06
True Crime | Unsolved Cases | Mysterious Stories
5 days ago $0.20 earnedShe Traveled Alone… and Never Came Back – 5 Mysterious Unsolved Cases (Part 6)
26.6K6 -
 27:23
27:23
Clickbait Wasteland
18 hours ago $0.05 earnedAsking New Yorkers Who They Support For Mayor: Staten Island
28.5K14