Premium Only Content
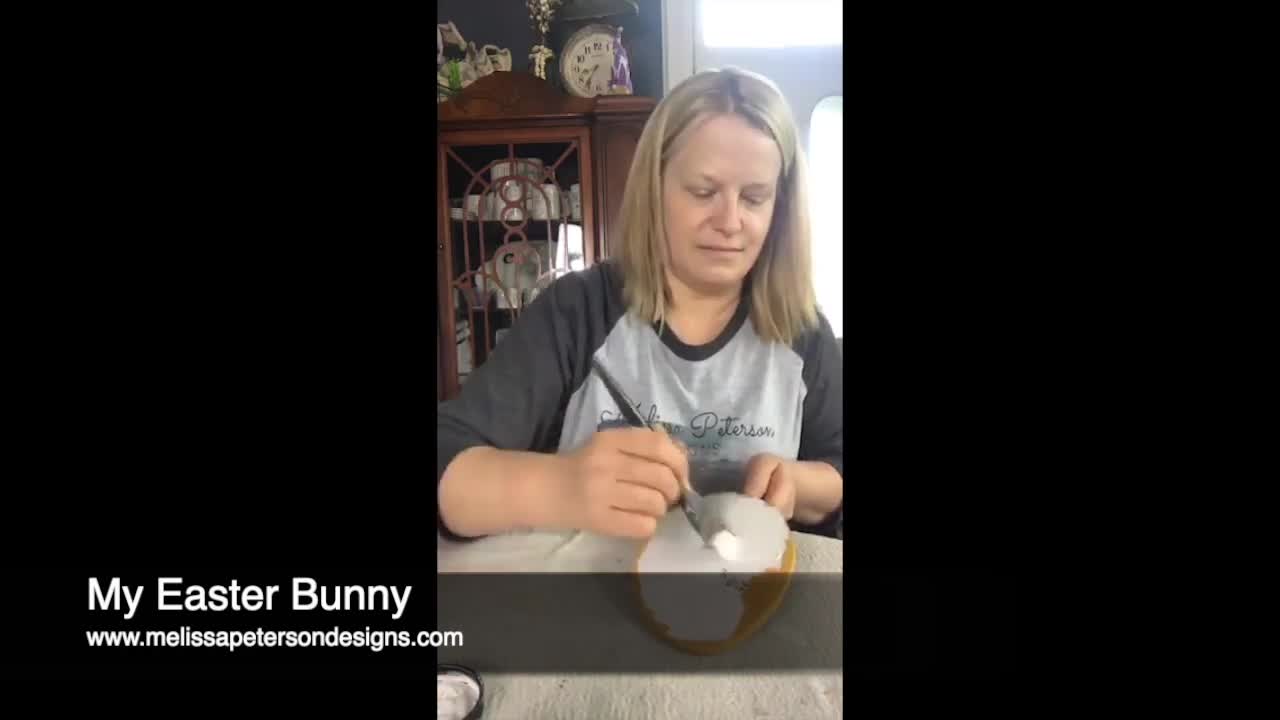
My Easter Bunny
Check out how easy it is to use the PVPP method to make these adorable Easter Bunny crafts!
Supplies I Used
Unfinished wooden Egg cutout
Fabric strips or ribbons of your choice to make your Messy Bow: click here for more information.
Bunny stencil made from contact paper: click here to see how I use contact paper with my Silhouette personal cutter.
Dixie Belle’s Colonel Mustard and Fluff
Dixie Belle’s Crackle
Mod Podge
Glue gun and glue stick
let’s get started
For my easter bunny I decided to use an egg shaped wood cutout.
I painted the background and around the edges with Dixie Belle’s Colonel Mustard.
Once the paint was thoroughly dried, I applied my bunny stencil without transfer tape.
Normally I use clear contact paper to apply my stencils, however, this is one piece stencil and it was just as easy to apply it myself.
Then I burnished around the stencil with mod podge to prevent any paint from bleeding underneath the stencil.
Adding crackle to my easter bunny
I love this product!
Such an easy way to add a little character and so far I’ve only used this on small projects and not furniture.
Before starting, stir your crackle good.
Using a paint brush or foam brush apply a liberal amount of this product where you would like to see your paint to crack.
I applied this around the bunny and just up to the edge of my easter egg.
I used my heat gun to help this dry, or you can just wait.
Once this was thoroughly dried, I then painted in a cross-hatch pattern, Dixie Belle’s Fluff over the same area where I had applied the crackle.
As the Fluff dries, you will notice areas developing cracks.
This process can take awhile, so be patient.
Due to technically difficulties, I was only able to catch a short clip in a time lapse video.
What I was able to video tape, you can check it out below!
TOUCHING UP MY EASTER BUNNY
To touch up the paint around the edges of the Easter Egg, I used a fan brush and went around the edges with Colonel Mustard again.
This technique created a rustic-frame around my Easter Bunny.
You could also use a chip brush and do the same thing.
I also painted the backside of my Easter Egg with Colonel Mustard to give my project a finished look when it’s sitting in a tray in case the backside shows.
EMBELLISHING MY EASTER BUNNY
For my Easter Bunny butt, I decided to make a small Messy Bow with my favorite colors, naval blue and mustard.
Click here to check out my blog post on Messy Bows.
That is is!
-
 3:42
3:42
MPDtribe
4 years agoCheck Out My Patriotic Gnome
102 -
 7:12
7:12
My Hanger Art
4 years ago $0.07 earnedHanger Easter Bunny
299 -
 1:00
1:00
ViralHog
6 years ago $0.08 earnedEaster Bunny Brawl
1351 -
 6:00
6:00
BrianEStead
4 years agoCaleb with Easter Bunny 2003ish
71 -
 4:00
4:00
KiwiLimon_DessertsRecipes_English
4 years agoBunny Cake for Easter
321 -
 1:00
1:00
Buzzvideos - EN
4 years agoEaster Bunny brings pregnancy announcement
90 -
 0:07
0:07
MoosetheGoldenBoy
5 years agoImposter Easter Bunny!
141 -
 0:32
0:32
ViralHog
5 years agoDisgruntled Easter Bunny
63 -
 0:24
0:24
KSHB
5 years agoEaster bunny visiting local children
28 -
 0:10
0:10
ViralHog
5 years ago $0.30 earnedToddler Unsure About The Easter Bunny
1.77K1