
Part 1 DIY Easter Bunny Butt
I think this is my favorite craft so far! I hope after reading this post I will have inspired you to make your own DIY Easter Bunny Butt!
All items are Also located in ‘My favorite Products‘
Burlap canvas: I used the Master Touch Burlap Canvas 10″ x 10″ from Hobby Lobby.
Your choice of faux flowers: I used leftover leaves from another project and a small flowers stem cut in two. One for each side.
Your choice of scrap lace and ribbons for your Messy Bows (Bunny Butt Tail): I used my favorite colors Naval Blue and Mustard with Gray Polka Dots and my all time favorite mesh ribbon in green.
Assorted sizes of Basswood Rounds: 1 medium and 3 smalls
Hot glue gun and glue sticks
E6000
Sawtooth hanger and 2 nails (optional)
LET’S GET STARTED
Before I started assembling my Easter Bunny Butt, I arranged the items and rearranged them again until I found the look I wanted!
In fact, I sent several photos of different arrangements to my daughter to get her opinion.
BACKGROUND
I first added a sawtooth hanger to the backside of the canvas so I had the option to hang this craft in the future.
Then I started with my favorite mesh ribbon.
I meant to add my gray polka dot ribbon over the mesh ribbon, but I forgot and glued one of the two small wood slices as the Bunny feet down first.
In the end it worked out and that sometimes happens when crafting.
Don’t fret, just enjoy the process.
Once I had the two Easter Bunny feet glued down with both E6000 and hot glue, I worked on the placement of the head (small wood round) and the Bunny Butt (medium wood round).
BUNNY EARS
Next, I decided to use a cream lace ribbon as the Bunny Ears.
I roughly measured how tall I wanted my Bunny ears.
Then I folded the lace over in half and cut the ears in a rounded triangle.
Next, I then placed them where I wanted them. tacked this down with hot glue and then I used both E6000 and hot glue to secure the Bunny’s head.
BUNNY BUTT
Next came the Bunny Butt.
I repeated this process and glued the medium wood round down also with E6000 and hot glue.
Then I made my Messy Bow for my Easter Bunny Butts tail.
I used my favorite colors, dark (Naval) blue and mustard with gray polka dot ribbon and my favorite mesh ribbon.
Once I had my messy bow assembled I glued this towards the top of my Bunny Butt.
EMBELLISHMENTS
I added a little grass-y embellishments to my project by using left over leave stems from another project.
I kept them cut short because I didn’t want them to compete with the height of my bunny.
Once I had these placed and glued down on each side of my Bunny Butt I cut small strips of gray polka dot ribbon and glued these down over the bottom of the stems on each side to camouflage the leave stems and hot glue.
TIME TO SHOW OFF OUR BUNNY
I was worried with the wood rounds this craft would not do well as a shelf sitter.
As long as this project is leaning against a wall or another item, it worked great!
Otherwise, I have the option of using the sawtooth hanger I applied on the backside and I can hang my craft as well.
Did you know I made a family of bunnies?
Check out my post, DIY Easter Bunny Butt Family!
-
 7:12
7:12
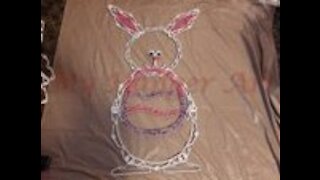
My Hanger Art
3 years ago $0.07 earnedHanger Easter Bunny
289 -
 1:00
1:00
ViralHog
5 years ago $0.05 earnedEaster Bunny Brawl
1181 -
 6:00
6:00
BrianEStead
3 years agoCaleb with Easter Bunny 2003ish
66 -
 4:00
4:00
KiwiLimon_DessertsRecipes_English
4 years agoBunny Cake for Easter
311 -
 1:00
1:00
Buzzvideos - EN
4 years agoEaster Bunny brings pregnancy announcement
85 -
 0:07
0:07
MoosetheGoldenBoy
4 years agoImposter Easter Bunny!
136 -
 0:32
0:32
ViralHog
4 years agoDisgruntled Easter Bunny
59 -
 0:24
0:24
KSHB
4 years agoEaster bunny visiting local children
24 -
 35:51
35:51
Project Kirschwasser
3 years agoEaster Long Weekend Push April 2017 Part 3
69 -
 37:42
37:42
Cr8urCanvas
3 years agoDIY Wilderness Bunny
62