How I Made my XO Signs
If you see those unfinished wood XO letters at a craft store, grab em! I’m gonna show you how to make them into cute signs you can use in your Valentine decor whether you add them on a shelf, or as fillers for those tiered trays!
Supplies I Used for mY XO Signs
Unfinished wood letters: XO
Craft unfinished wood cubes: I found these in the craft section at Dollar Tree and unfinished wood section at Hobby Lobby
Caviar: Dixie Belle’s Chalk Mineral paint in black
Mod Podge
Scrapbook paper of your choice: I used red and white stripes
Fiskar Self Healing Mat, Cricut craft knife, sandpaper or sand block.
Mod Podge in matte
Hot glue and glue gun
MAKING OUR XO SIGNS
Are these really signs? Or fillers?
Either way, I love how these turned out!
First I painted the backsides and the sides in Caviar, Dixie Belles’ black.
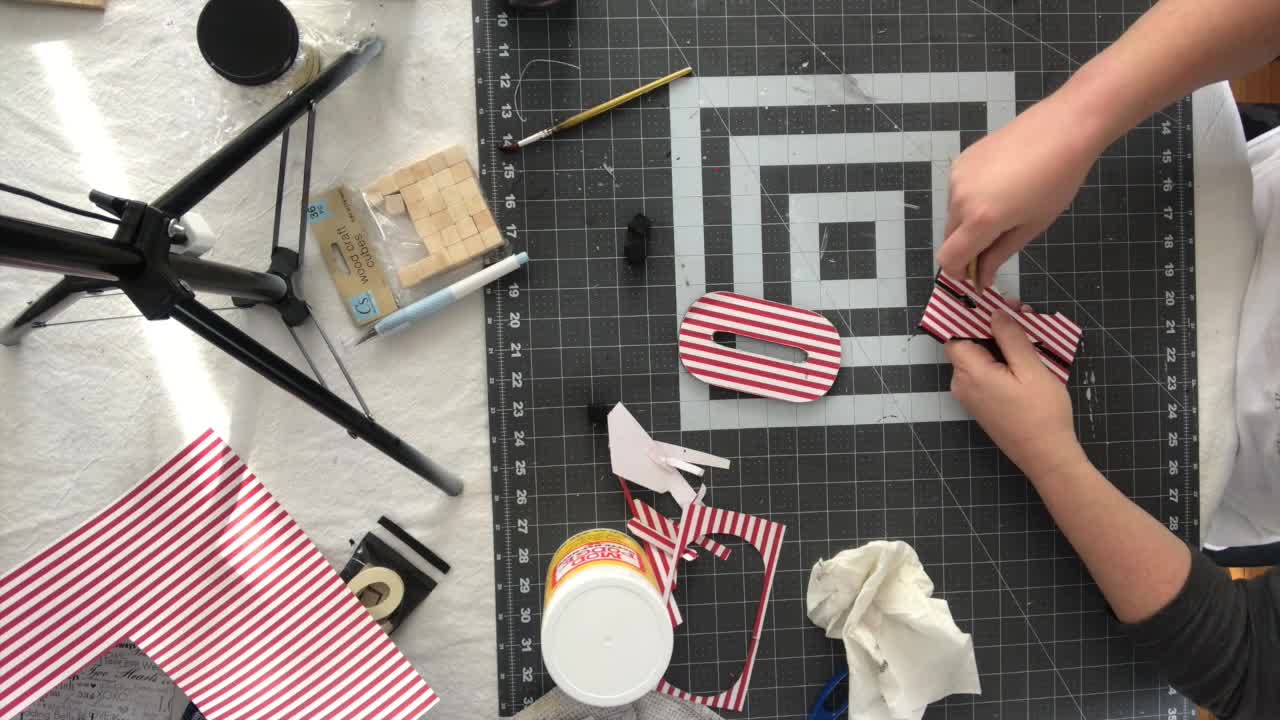
Once this was dry, I painted Mod Podge and then I decoupaged my scrapbook paper onto the front side.
Since I have striped scrapbook paper, I had to be careful I match the strips on each letter, going vertically.
Once the Mod Podge was dry, I used my cricut knife to cut around the letters and remove the excess scrapbook paper, then I used my sandpaper to clean up the edges.
When this was done, I applied a coat of Mod Podge over the topside of my XO’s as a sealer.
Since these letters won’t stand on their own, I ended up using unfinished wood cubes and glued them onto the backside.
I hope you check out my video, I try to show you how I glued them on.
They were not hot glued, flush on the backside of the letters, I placed the cube on the table and then butted the letter up to it the way I wanted the letter to be held.
This ended up being at an angle.
On another project, it took me a few times to get it.
I just removed the cube and re-glued until I had it the way I wanted it!
And that is it!
Currently my XO’s are sitting on my mantle, but they also fit nicely on my tiered trays too!
-
 6:20
6:20
MPDtribe
4 years agoHow to Make G'ma Macs Simply Delicious Pasta Pepperoni Salad
89 -
 0:22
0:22
WrightJunkRemoval
4 years agoNew Signs
157 -
 0:55
0:55
Cuthbert404
4 years agoHow zodiac signs act in school
6 -
 0:44
0:44
CarGuyPhilly
4 years ago $0.55 earnedFunny church signs
789 -
 0:39
0:39
CarGuyPhilly
4 years ago $0.01 earnedSilly Fast Food Signs
51 -
 43:26
43:26
@GreggHuestis67 & Thecitizenjournalist.news
4 years agoHow To Spot Telltale Signs Of A FalseFlag
175 -
 1:15
1:15
KJRH
4 years agoPolitical signs stolen
250 -
 9:59
9:59
IMBP
4 years agoUE-TE 3 - Signs and Definitions
79 -
 16:22
16:22
Getting An Ex Back
4 years agoSigns My Ex Is Hurting
32 -
 0:43
0:43
sawncarve
4 years agoWooden Signs By Treasurewood
361