
How to Use a Geodesic Dome Calculator - Part 3: Weight Chart
4 years ago
48
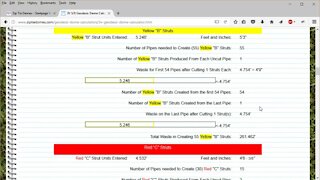
https://www.ziptiedomes.com - This video describes how to determine the weight of a geodesic dome using any type of material.
Loading comments...
-
 12:36
12:36
ZipTieDomes
4 years agoHow to Use a Geodesic Dome Calculator - Part 5: Dome Coverings
71 -
 4:50
4:50
ZipTieDomes
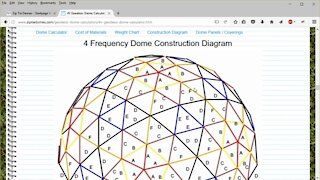
4 years agoHow to Use a Geodesic Dome Calculator - Part 4: Construction Diagram
108 -
 7:03
7:03
ZipTieDomes
4 years ago $0.01 earnedHow to Use a Geodesic Dome Calculator - Part 1: Strut Lengths
106 -
 12:10
12:10
ZipTieDomes
4 years agoHow to Use a Geodesic Dome Calculator – Part 2: Cost/Utilization
95 -
 4:17
4:17
ZipTieDomes
4 years ago $0.01 earnedGeodesic Dome Construction for a 2v Geodesic Silo Dome
98 -
 16:04
16:04
ZipTieDomes
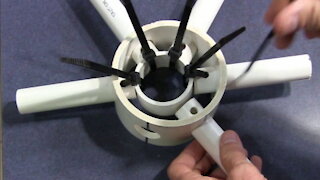
4 years ago $0.01 earnedOur Geodesic Dome Connector - How it Works!
147 -
 6:55
6:55
ZipTieDomes
4 years agoHow to Attach a Geodesic Dome Covering for a Greenhouse
134 -
 1:51
1:51
ZipTieDomes
4 years agoZip Tie Domes: How to Take Down a Geodesic Dome
27 -
 4:33
4:33
ZipTieDomes
4 years ago $0.01 earnedHow to Make a Greenhouse Door for your Geodesic Dome
125 -
 8:01
8:01
ZipTieDomes
4 years agoGeodesic Dome Construction for a 25' 3/8 3 Frequency Geodesic Dome
292