DIY Weather Stripping
Replacing weather stripping on an exterior door is a low cost project that can significantly lower your utility bill. So in this video, we provide a simple way to fix a drafty door.
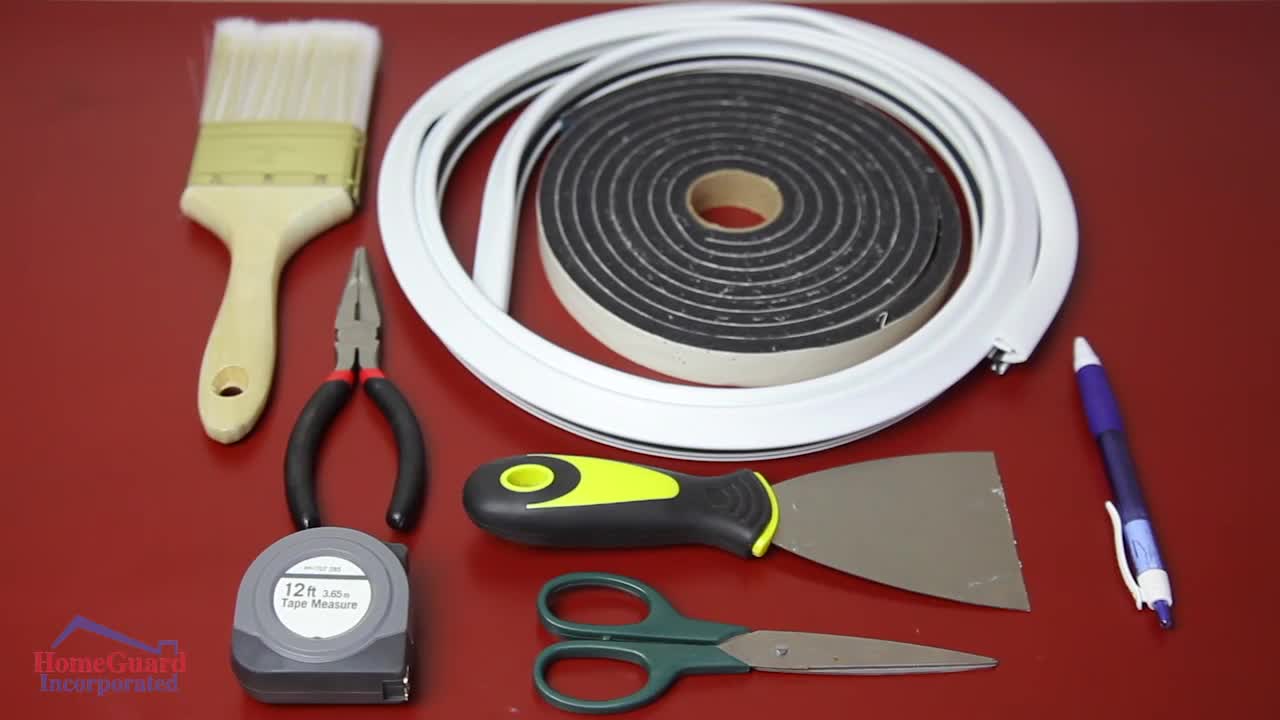
The tools that you may need for this project are: new weather stripping, measuring tape, scissors or a utility knife, dry cloth or paintbrush, a scraper, and pliers.
To start, remove the old weather stripping. You may need to use pliers to pull it away from the frame. Visually inspect the frame, and make sure it clear of any debris before you install the new weather stripping. Measure the length of each side of the frame and cut the new weather stripping accordingly. Two common types of weather stripping are vinyl clad with a spline, and self adhesive foam. For vinyl clad weather stripping, once it is cut to the correct length, push the spline into the slot in the door jam. You may need to use a dull putty knife to push it into place. If you are using self-‐adhesive foam weather stripping, carefully remove the adhesive backing, and firmly push the weather stripping onto the door jam. To test if you have a tight seal, take a piece of paper and close it in the door. If there is resistance, then your seal is good.
Find more HomeGuard DIY Videos and other resources here: https://homeguard.com/resources/
Learn more about HomeGuard's roof, termite, and home inspections services here: https://homeguard.com/
-
 0:31
0:31
KMGH
4 years agoWeather trivia: Thanksgiving weather
35 -
 0:51
0:51
WEWS
3 years agoCleveland weather
17 -
 0:44
0:44
WEWS
3 years agoAkron weather
11 -
 1:19
1:19
WEWS
3 years agoCleveland weather
15 -
 1:10
1:10
WEWS
3 years agoAkron weather
8 -
 1:42
1:42
WEWS
3 years agoCleveland weather
28 -
 0:45
0:45
WEWS
3 years agoAkron weather
10 -
 1:07
1:07
WEWS
3 years agoCleveland weather
20 -
 1:12
1:12
WEWS
3 years agoAkron weather
13 -
 1:05
1:05
WEWS
3 years agoCleveland weather
6