Kettlebell Low Windmill in the Safety Zone
Kettlebell Low Windmill in the Safety Zone
Five Reasons to do the kettlebell Low Windmill
1. Back pain? The Windmill decreases back pain when the underlining cause is limited range of motion resulting in tight hamstrings, lack of glute activation & weak core muscles. When the range of motion is increased flexibility improves in your posterior chain muscles such as the glutes and hamstrings stress decreasing the load o the lower back causing the pain. The Windmill is a great way to stretch the hamstrings and work laterally the abs, lats & strengthen & brace your core to perform this movement & correct muscle imbalances..
2. Tight hamstrings? The Windmill increases primarily the range of motion & flexibility of the hamstring working each leg independently instead of together. This eliminates one leg compensating for the other. This also teaches your hamstrings & glutes to fire in a stretched position. To get up from the ground position you must fire your hamstrings & glutes besides laterally using your abs, lats & intraabdominal core pressure to control the movement pattern.
3. Glues activated? The Windmill works each glute independently teaching you how to contract the muscle from the bottom position to get back up hinging at your hips in a lateral position. Want to jump, run, get out of a chair? The glute muscles help you perform these activities & more. Plus, activated glutes takes the pressure off the lower back pain.
4. Want to increase core strength? The Dynamic Integrated Stabilization exercise protects your spine by bracing the core muscles done in a dynamic way. The Windmill requires your hips to move while your packed shoulders are stabilizing requiring the core to work even harder to maintain control of the movement pattern. This is a highly effective way to take a basic core strengthening exercise to strength of the core musculature.
5. How to decrease shoulder injury & healthier shoulder. A strong, packed stable shoulder reduces likelihood of injury to hold as a progression first using a resistance band as shown in the video to progress to a 5-pound weight to start with (or less with a dumbbell). Holding the weight overhead required the shoulder to position itself in different positions as your body moves through the movement pattern.
How to do Low Windmill:
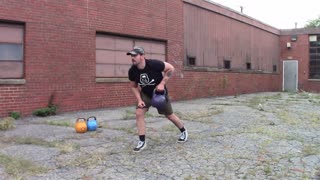
Stand with the feet a little wider than shoulder-width apart at 45 degrees (bow-stance) & hold a kettlebell in one hand so that it is hanging down along the front of the right thigh (you can place the kettlebell on a Yoga Block if you lack flexibility) kick your hip back with a slight bend in your other knee.
Point the other arm straight overhead locked out, squeeze your shoulder blades, and sink back on your hip to lower the kettlebell in the other hand along the inside of the right leg right while looking up at the overhead arm. Keep your eyes on the hand being held overhead.
Place most of your weight on the back heel, kick your hip out with front knee with a slight bend.
The kettlebell exercise should first start out with no kettlebell, next use a resistance band to increase flexibility aligning your arm at the top position with the more in the lowest position in a straight line, then adding one kettlebell to the bottom hand and finally to the top
Give the Windmill a try to increase flexibility motor control, working the body laterally, transitions, and movement. Mastery Coach Ketllebell Lady of Iron is available for coaching. Let’s talk soon!
-
 4:52
4:52
Kettlebell Plus 360
2 years agoChain Training & Cluster Training Done
189 -
 1:55
1:55
Kettlebell Plus 360
3 years agoKettlebell Bottoms-Press in the Safety Zone
17 -
 2:03
2:03
Kettlebell Plus 360
3 years agoKettlebell Cluster Strength Training in the Safety Zone
95 -
 4:27
4:27
Kettlebell Plus 360
3 years agoKettlebell Swing & Overhead Press Remedials in the Safety Zone
29 -
 2:33
2:33
WKBW
3 years agoCouncilmember expresses regrets over approval of School Zone Safety Program
3 -
 0:15
0:15
1672Billy
3 years agoWindmill blade
55 -
 0:59
0:59
Lightningkings1
3 years ago $0.01 earnedFirearms safety
73 -
 0:07
0:07
SeekingTheNextAdventure
3 years agoNutcracker Windmill
229 -
 1:53
1:53
GroundUp1
3 years agoKettlebell mega plex!
71 -
 20:44
20:44
Atomic Bytes and EDTech
3 years agoLab Safety Notes
54