Ford Ignition Switch Actuator (Found in 1992-2014 Ford, Lincoln, Mercury Cars and Trucks)
Mustang, Aerostar, Bronco, Crown Victoria, Ford E150, E250, E350, E450, E550, Econoline, Lincoln Town Car, Continental, Navigator, Mercury Cougar, Grand Marquis, Mountaineer, Excursion, Expedition, Explorers, Ford F150, F250, F350, F450
(((Example vehicles based on model year and part number search)))
PLEASE REMEMBER TO DISCONNECT THE BATTERY BEFORE DOING THIS REPAIR! Haynes manual says one minute, most people I talk to say 30 minutes, I say the longer the better :-)
Parts needed to fix this problem: "Ignition Actuator (upper) F2DZ-3E723-A and (lower) FODZ-3E715-A" and Lithium Grease
The steering column I'm repairing is in a 2000 Mustang GT. If your column is different but you use the same part numbers as above then the install will be very similar.
(Personal Note) The upper actuator pin broke because it could not push the lower actuator through the column. To replace just the upper will probably mean you have to do this job again in the future :-D
www.steeringcolumnservices.com states that "This white plastic ignition actuator gear with teeth often breaks preventing you from starting or shutting off the vehicle with the ignition key. The ignition rack actuator failure is often misdiagnosed as a bad lock or ignition switch problem. The steel pin falls out of place and will not pull the lower rack and switch. Reinserting the pin only delays the inevitable --- the need to replace the rack gear (it will fall out again)"
( ( ( SHORTCUTS: ) ) )
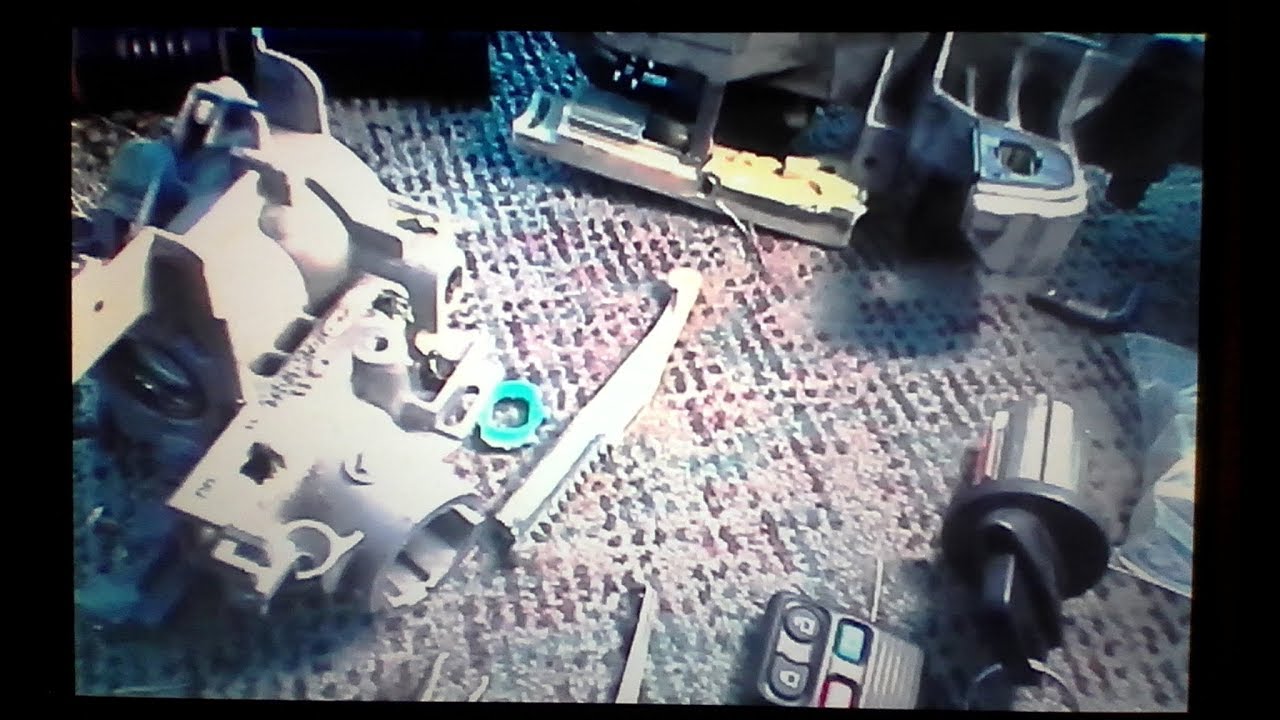
Quick check to see if this is your problem. Remove covers from around steering column and remove the ignition box from under steering column. Then check lower actuator connection to upper actuator 00:18
(((To get home without a tow truck simply follow these steps:
1. Lower the ignition box located under the steering column. (07:50)
2. Then insert the key into the ignition and turn it to unlock the steering wheel and deactivate the anti-theft.
3. Push and hold the ignition box switch until the vehicle starts.
4. When finished, pull back on the ignition box switch until the engine and dash lights turn off.
5. Remove Key
Removing Lower Plastic Dash Cover 01:23
Removing Lower Steel Dash Cover 03:08
Removing Steering Column Covers 03:55
Removing Ignition Switch Tumbler 04:47
Removing The Tilt Steering Lever 06:13
Removing the RFID Anti-theft Device 06:40
Removing the Ignition Box Under the Steering Column 07:50
Removing ? ? Buzzer/Chime Wire ? ? 08:40
Unpluging Clock Spring / Air Bag / .... 08:50
Removing Air Bag 11:08
Removing Turn Signal Switch 12:54
Removing Steering Wheel Screw 14:23
Unpluging Cruise Control & Horn from Clock Spring 15:04
Pulling the Steering Wheel 15:37
((Repairing Stripped Threads)) I haven't uploaded the video to rumble yet. I will make time to upload it if someone asks me.
Removing Clock Spring 21:20
Removing Cancel Cam and Upper Steering Column Retainer 22:56
Removing Upper Housing Pivot Bolts, Shift Tube Spring and Steering Column Tolerance Bearing Ring 25:17
Removing the Upper Lock Cylinder Housing 29:20
Removing Ignition/Shifter Interlock Cable 30:34
Removing Lower Coupler and Bearing Retainer 31:29
Removing Lower Steering Housing 32:39
Removing Lower Bearing Retainer 33:22
Removing Lower Actuator 33:59
Helpful comment from "mcqjohn" on column shift models: 3 months ago (edited) Thanks for the video- helped greatly! I will say, my 1996 F150 with automatic trans, on the column made for a different process. The bar you remove at 34:00 will not slide out like that on this configuration. There is a safety block on the top of assembly. You need to drive the pin out and lift the locking block out to remove the bar.
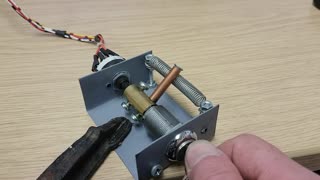
Making Tool to Remove Upper Lock Cylinder Retainer (GREEN) 34:23
Removing Upper Lock Cylinder Retainer (GREEN) and Actuator 35:02
Lubricating with Lithium Grease and Upper Actuator Install 36:10
Thrush Washer Alignment and (GREEN) Retainer Install 37:37
Installing Lower Actuator and Lubricating 39:38
(((Note: DON'T FORGET TO GREASE THE PIVOT BOLT HOLES TOO!)))
Installing Lower Bearing Retainer 42:26
Assembling Upper and Lower Housings Together 42:58
Aligning Upper Actuator with the Key Tumbler 49:15
Column Install in Car 52:24
BE SURE TO UNLOCK THE IGNITION SWITCH! 53:46
Installing Lower Coupler and Bearing Spring 54:26
Installing Ignition/Shifter Interlock Cable 55:42
Proper Location of Turn Signal Harness 56:42
Arranging Harness Plugs and Hand Tighten Rear Nuts 57:33
Installing Tilt Steering Spring 58:12
Install of Tilt Steering Pivot Bolts 1:00:15
Tightening All Column Mounting Nuts 1:03:49
Installing Upper Housing Bearing Retainer and Lubricating 1:04:55
HOW I GOT THE RETAINING RING ON ! 1:07:54
If that doesn't work this guy used a pipe: https://youtu.be/Ww0VbPEhH-k?t=778
Installing Cancel Cam / Clock Spring with Harness Plugs and Key-in Warning Switch on Key Cylinder / RFID / Blinkers 1:09:07
Installing Ignition Box 1:13:23
Installing Column Covers 1:15:33
Lubricate Install Key Tumbler 1:17:41
Install Steering Wheel / Airbag / Tilt Steering Arm 1:18:12
Connected Battery Testing 1:21:41
Installing Lower Dash Covers 1:24:01
Helpful Links:
http://www.steeringcolumnservices.com/exploded-views.php
http://www.steeringcolumnservices.com/92ford.php
http://www.justanswer.com/ford/1jy38-turning-key-95-crown-vic-will-push-ignition-switch.html
-
 0:11
0:11
WV838
4 years ago $0.01 earnedGA Ignition Switch for Flight Simulator
257 -
 6:50
6:50
1987 Fleetwood Bounder
4 years ago $0.02 earned87 Bounder Ignition Switch issue
1241 -
 14:55
14:55
CityHighKustomz
4 years agoChinese ATV, Junk or Not? Ignition Switch Fix
89 -
 5:02
5:02
HopFam Media
4 years ago $0.02 earnedFord Power-Mirror Switch Replacement
68 -
 0:09
0:09
Rumble at Adrian’s
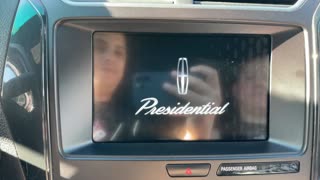
4 years agoFord Sync 3 Theme - Lincoln Presidential
168 -
 10:10
10:10
2015 Harley Davidson Iron 883
4 years ago2015 Harley Davidson - Iron 883 - DK Custom Ignition Switch Relocation Kit
359 -
 6:34
6:34
Mercedes-Benz W124
4 years ago $0.01 earnedFord Mondeo MK1 1993 1996 - Change the indicator switch DIY
42 -
 4:34
4:34
Sparkburn Hotrods
4 years ago $0.03 earnedEpisode 3: 32 Ford and 1950 Mercury Updates
190 -
 0:22
0:22
jeffersonbb
4 years ago $0.02 earnedLincoln California Train
1491 -
 2:14:50
Badlands Media
13 hours agoBadlands Media Fantasy Football Live Draft
43.2K