Access 2019 In Practice - Ch 4 Independent Project 4-6 - Courtyard Medical Plaza (Full answer 2025)
Independent Project 4-6
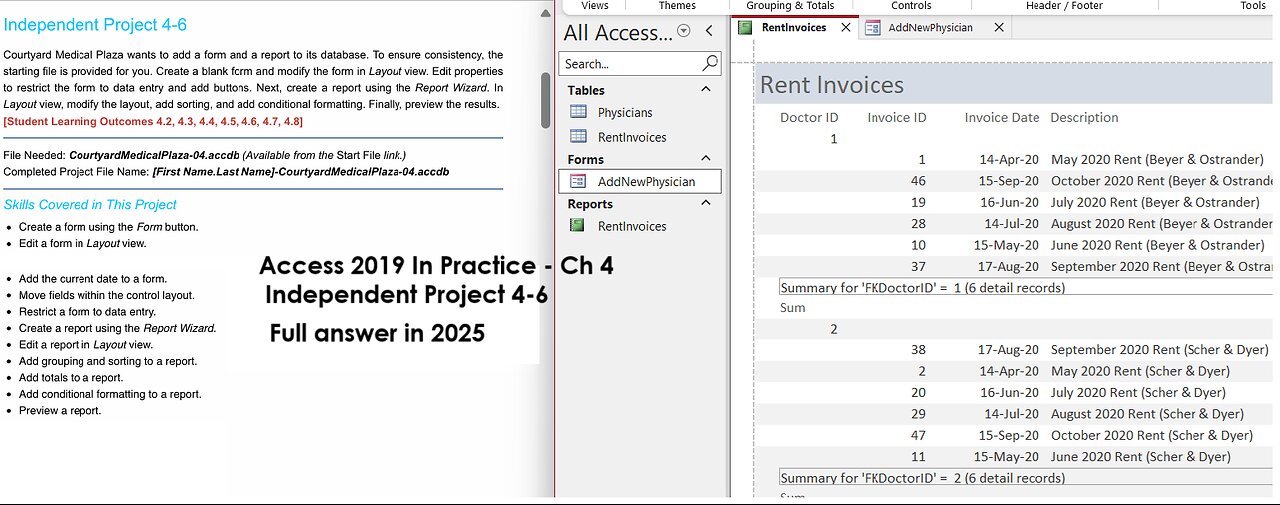
Courtyard Medical Plaza wants to add a form and a report to its database. To ensure consistency, the
starting file is provided for you. Create a blank form and modify the form in Layout view. Edit properties
to restrict the form to data entry and add buttons. Next, create a report using the Report Wizard. In
Layout view, modify the layout, add sorting, and add conditional formatting. Finally, preview the results.
[Student Learning Outcomes 4.2, 4.3, 4.4, 4.5, 4.6, 4.7, 4.8]
File Needed: CourtyardMedicalPlaza-04.accdb (Available from the Start File link.)
Completed Project File Name: [First Name.Last Name]-CourtyardMedicalPlaza-04.accdb
Skills Covered in This Project
Create a form using the Form button.
Edit a form in Layout view.
4/22/21, 11:57 PM
Add the current date to a form.
Move fields within the control layout.
Restrict a form to data entry.
Create a report using the Report Wizard.
Edit a report in Layout view.
Add grouping and sorting to a report.
Add totals to a report.
Add conditional formatting to a report.
Preview a report.
1.
2.
3.
Open the CourtyardMedicalPlaza-04 database start file.
The file will be renamed automatically to include your name. Change the project file name if
directed to do so by your instructor.
Enable content in the database.
4. Create a form using the Blank Form button.
a.
b.
c.
Add all the fields from the Physician table in the following order: DoctorID, FirstName,
LastName, PrimarySpecialty, OfficeNumber, and MoveInDate.
Close the Field List.
Save the form as AddNewPhysician.
5. Edit the form in Layout view, add a new column and new rows to the control layout, and modify their
size.
a. Add two rows below the Tenant Since row.
b.
c.
d.
Add one column to the right of the existing columns.
Adjust the Width of each column to 1.6".
Adjust the Height of the last row to .4".
6. Add command buttons, a title, and the date to the form.
a.
b.
c.
d.
e.
Add a button into the bottom row of the left-most column to save a record [Record Operations
Category].
Change the wording to Save Physician Record.
Name the button AddPhysicianFormSaveButton.
Add a second button into the bottom row of the middle column to add a new record [Record
Operations Category].
Change the wording to Add New Physician.
4/22/21, 11:57 PM
f.
g.
h.
i.
j.
k.
l.
m.
Name the button AddPhysicianFormAddButton.
Add a third button into the bottom row of the right most column to close the form [Form
Operations Category].
Use the existing wording for the button.
Name the button AddPhysicianFormCloseButton.
Add a title to the form header. Edit the title to include spaces between the words.
Add the date to the form. Use the DD-Mon-YY format. If necessary, deselect the Include Time
check box so that only the date is added.
Enter 1.1" in the Width property and 4" in the Left property for the Auto_Date control.
Save the changes to the form. The revised form should look similar to Figure 4-154.
7. Restrict the form to data entry.
a.
b.
c.
d.
Open the Property Sheet for the form
if necessary and select the Data tab.
Click the drop-down arrow in the
Selection box of the Property Sheet and
select Form.
Select Yes in the Data Entry property
box.
Figure 4-154 AddNewPhysician form Select Yes in the Allow Additions
property box. Recall that when both the
Data Entry and Allow Additions properties are set to yes, the values in the Allow Deletions and
Allow Edits properties do not have an impact
e.
f.
Save the form.
Close the form.
8. Create a report using the Report Wizard.
a.
b.
c.
d.
e.
Launch the Report Wizard.
Add all the fields from the RentInvoices table in the following order: InvoiceID, FKDoctorID,
InvoiceDate, Description, DueDate, DateReceived, AmountDue, and Discount.
Accept the suggested grouping by FKDoctorID on the second page of the Report Wizard.
Add summary options on the third page of the Report Wizard. In the Summary Options dialog
box, select the Sum of the AmountDue field and select the Detail and Summary radio button for
the Show option if necessary (Figure 4-155).
Choose a Stepped layout an
#SIMnet
#MicrosoftAccess
#Access
#IndependentProject
-
 1:07:25
Man in America
15 hours agoThe BRICS War on the Dollar Just Hit Endgame—What's Next Changes EVERYTHING
39.8K15 -
 3:23:45
SOLTEKGG
6 hours ago🔴LIVE - Community Game Night - GIVEAWAY
32.6K2 -
 DVR
DVR
SpartakusLIVE
9 hours ago#1 Friday Night HYPE, viewers GLUED to the screen
52.5K -
 55:50
55:50
NAG Podcast
7 hours agoAda Lluch: BOLDTALK W/Angela Belcamino
23.1K2 -
 2:45:31
VapinGamers
4 hours ago $3.20 earnedKellan Graves - Fallen - Game Review and Game KeyGiveaway - !rumbot !music
20.6K -
 1:06:41
MattMorseTV
7 hours ago $34.18 earned🔴Trump PREPARES for WAR with VENEZUELA.🔴
48.2K69 -
 39:59
39:59
Clownfish TV
11 hours agoHollywood NO MORE! Animation Industry Will DIE First?! | Clownfish TV
24.1K2 -
 25:57
25:57
The Kevin Trudeau Show Limitless
2 days agoThe Sound Of Control: This Is How They Program You
71.2K21 -
 47:41
47:41
Sarah Westall
6 hours agoNew Actions by Insiders Never Seen in History – Bitcoin Moves Ahead w/ Andy Schectman
25.4K3 -
 1:08:26
Glenn Greenwald
8 hours agoGlenn Takes Your Questions on Bill Ackman's Meddling in the NYC Election, Dems' Refusal to Endorse Zohran; MAGA Abandoning "America First," and More | SYSTEM UPDATE #537
115K33