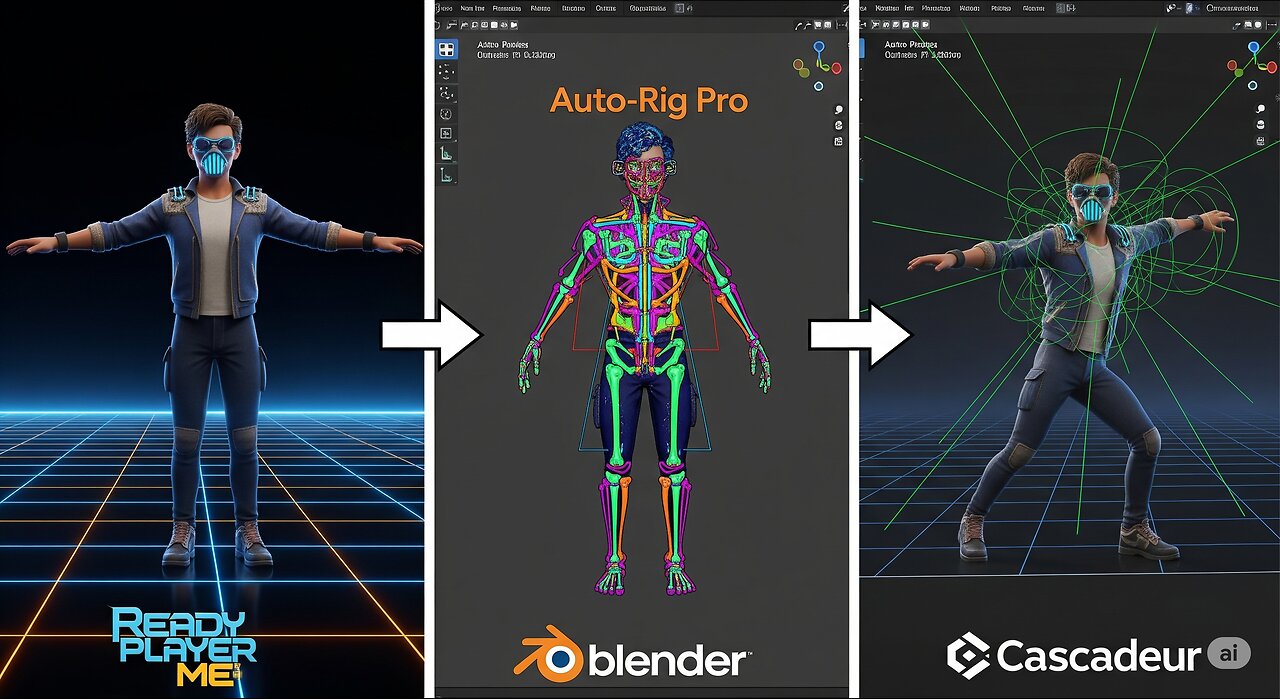
Full Character Animation Pipeline Ready Player Me to Blender to Cascadeur to Blender
📚 Blender to Cascadeur to Blender Pipeline Tutorial: https://www.sabbirz.com/blog-3d/the-complete-blender-to-cascadeur-to-blender-workflow
00:00 - Intro
00:05 - Explaining Milestone of the Tutorial Series
00:45 - Generate Character from Ready Player Me Website
01:45 - Import Character in Blender
02:11 - Removing Default Armature
02:23 - Measure Character Height
03:16 - Auto Rig Pro: Placing Body Reference Points
03:51 - Auto Rig Pro: Placing Face Reference Points
04:43 - Auto Rig Pro: Assign Eye Ball
04:50 - Auto Rig Pro: Generating Bones
05:14 - Auto Rig Pro: Match To Rig to generate control points from bones
05:40 - Auto Rig Pro: Bind to the Mesh
07:19 - Auto Rig Pro: Knowing the Collection where bones are kept
07:30 - Auto Rig Pro: Export Character
07:52 - Cascadeur: Import the character
08:10 - Cascadeur: Quick Rigging
10:09 - Cascadeur: Rigging Completed Now we can Animate
10:21 - Ending of this tutorial
Ready to master the complete character animation pipeline? In this comprehensive tutorial series, you'll learn everything you need to know to take a character from creation to a fully finished animation, moving seamlessly between Blender, Cascadeur, and Ready Player Me.
This step-by-step guide is perfect for intermediate artists who want to build a professional workflow. We cover the entire process, including creating a custom 3D character, rigging it with the powerful Auto-Rig Pro add-on in Blender, creating dynamic animations in Cascadeur, and finally, bringing it all back into Blender to retarget the animation perfectly onto your rig.
Website - https://sabbirz.com
Patreon - https://www.patreon.com/sabbirzz
Facebook - https://www.facebook.com/sabsabbirz
Behance - https://www.behance.net/sabbir_shn
Instagram - https://www.instagram.com/studiozoetrope/
-
 29:13
29:13
Clownfish TV
20 hours agoGen Z are Becoming the Boomers?! | Clownfish TV
76324 -
 1:48:31
Squaring The Circle, A Randall Carlson Podcast
15 hours agoMEGA Tsunamis and the formation of our World ft. Dr. Dallas Abbot
8101 -
 13:13
13:13
Mrgunsngear
13 hours ago $0.50 earnedStreamlight TLR-1 HP Review: Can It Dethrone Surefire?
1.66K4 -
 6:53
6:53
Rena Malik, M.D.
22 hours agoWhy Antidepressants Wreak Havoc on Your Sex Life?! | Urologist Explains How to Boost your Libido
852 -
 1:00:00
BEK TV
2 days agoMIKE MOTSCHENBACHER ON NORTH DAKOTA POLITICS, TEA PARTY ROOTS, AND THE 2026 ELECTION
2.7K -
 15:31
15:31
Breaking Points
1 day agoIs Trump Planning VENEZUELA Regime Change?
19.4K15 -
 2:06:05
"What Is Money?" Show
2 days agoTrump Family Bitcoin Bet Will Trigger Nation-State FOMO w/ Matt Prusak (CEO American Bitcoin)
5.94K -
 1:04:36
Dialogue works
3 days ago $2.44 earnedMohammad Marandi: Iran Just Gave Israel a FINAL Warning…
10.6K6 -
 9:20
9:20
daniellesmithab
1 day ago3 Bad Laws
15.1K7 -
 9:22
9:22
MattMorseTV
17 hours ago $10.46 earnedINDIA just made a BIG MISTAKE.
58.3K53