3d Printing & Assembly of a Complex Model: SpaceX Starship, Super Heavy, and Launch Tower - Part 14
This video series explores how to 3d print and assemble a very complex 3d model of a real object. In this case, the SpaceX Starship Rocket, Super Heavy Booster, and Launch Tower:
https://en.wikipedia.org/wiki/SpaceX_Starship
It's the most powerful rocket every built and is designed to be completely and (eventually) rapidly reused.
I do a lot of public outreach about space exploration through my astronomy club. I've found it much more effective to have 3d models of things I'm explaining than just showing people pictures.
I knew I needed to have a 3d model of this rocket to connect with the public at future events. I thought about designing my own, but I decided it would be better to buy an already designed model and print that. That would be a lot faster than starting from scratch. I chose the 1:200 scale MoreThan3d version:
https://morethan3d.com/product/space-models/spaceship-booster-olm-olit-xs3/
At 1:200th scale, after some disassembly, it will fit in a box so I can transport it to events.
Here's what part of the series covers:
Part 1: Selection of design and MoreThan3d website
Part 2: Printing of Starship upper stage (except raptor engines which are part of the booster part)
Part 3: Printing Super Heavy Booster
Part 4: Printing Orbital Launch Mount and Base, Rocket Engines, and reprinting the Hot Staging Ring
Part 5: Printing the Black Pieces of the Orbital Launch Tower - Part 1
Part 6: Printing the Black Pieces of the Orbital Launch Tower - Part 2
Part 7: Printing the Draw works and Gray Pieces of the Orbital Launch Tower - Part 1
Part 8: Assembling the Starship and Base - Part 1
Part 9: Assembling the Starship and Base - Part 2
Part 10: Assembling the Super Heavy Booster - Part 1
Part 11: Assembling the Super Heavy Booster - Part 2 - fixing the Grid Fins
Part 12: Assembling the Base of the Orbital Launch Integration Tower - New & Improved method of ensuring magnet polarity
Part 13: Weighting the Base of the Orbital Launch Integration Tower, Assembling the Draw Works, Assembling Section 1 of the Tower
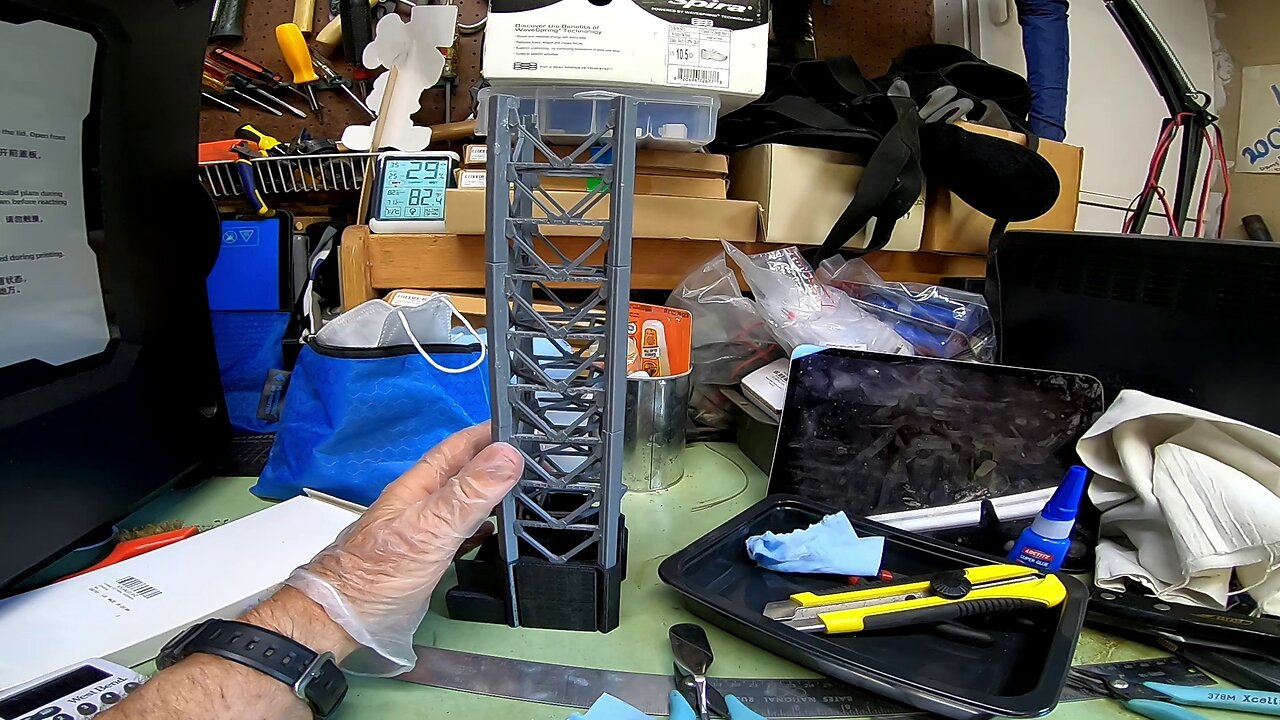
Part 14: Assembling Section 2 of the Tower, Gluing Sections 1,2,3 together, Discussion of Sections 4,5,6,7 which are basically the same (assembly not shown), Testing the Chopstick Arms Moving Up and Down on Sections 1-3.
Part X: Wrap up: total cost, total print and assembly time, and suggests for improvements to the design (some I plan to do myself by modifying the 3d model with editing tools).
Filament, Rods, and Magnets
--------------------------------
Sources for filament, plastic rods, and magnets I used:
JAYO PLA+ Filament 1.75mm: https://www.amazon.com/dp/B0BJ1FR86Y
CC3D Silk Silver PLA 3D Printer Filament 1.75 mm: https://www.amazon.com/dp/B06XSBFB17
FilaCube Gray PLA 3D Printer 1.75mm Filament: https://www.amazon.com/dp/B076Z2BPDC
5mm dia x 3mm thick N42 Neodymium magnets: https://www.amazon.com/gp/product/B09TQQ494M/?th=1
25x8x1.5mm thick Bar Magnet Neodymium: https://www.amazon.com/Magnets-Neodymium-Refrigerator-Storage-Cabinet-0-8x0-31x0-06/dp/B09QCGZ4LJ/?th=1
3mm (1/8") Acrylic Rod: https://www.amazon.com/dp/B0B4JT6DMG
---
Other 3d Space Models I offer in my Etsy Store:
https://betacygnidesigns.etsy.com?section_id=34741693
---
These are the spatulas I used to help remove the pieces from the print bed:
https://smile.amazon.com/gp/product/B075SLTY8B/
---
These are the tweezers I used to help remove dripping filament from the print head:
https://smile.amazon.com/gp/product/B0845SKD7Z/
---
This is the wire brass brush I use to clean the nozzle tip:
https://smile.amazon.com/gp/product/B01J2BS92S/
---
Flashforge Guider II on the Flashforge Website:
https://www.flashforge.com/product-detail/flashforge-guider-2-3d-printer
---
OpenSCAD website:
https://www.openscad.org/
---
I used Simplify3D slicer software:
https://www.simplify3d.com/
-------------------
Link to my Etsy Store:
https://betacygnidesigns.etsy.com/
---------------------
Music:
"Blippy Trance" Kevin MacLeod (incompetech.com)
Licensed under Creative Commons: By Attribution 4.0 License
http://creativecommons.org/licenses/by/4.0/
---------------------
End Screen Video Acknowledgement: Cosmic Reef Video produced by NASA and the Space Telescope Science Institute (STScI).
https://hubblesite.org/contents/media/videos/2020/16/1277-Video
-
 8:30
8:30
Helping others to learn new things and experience other parts of the world.
29 days agoCalifornia Earthquake Brace & Bolt Program: My Experience - Part 1
11 -
 LIVE
LIVE
Amarok_X
2 hours ago🟢LIVE WARZONE | LETS SQUAD UP | PREMIUM CREATOR | VETERAN GAMER
177 watching -
 27:03
27:03
The Kevin Trudeau Show Limitless
3 days agoThey're Not Hiding Aliens. They're Hiding This.
55.6K78 -
 22:17
22:17
MetatronGaming
6 days agoI spent 7 days in the 1980s
19.1K8 -
 LIVE
LIVE
FrizzleMcDizzle
3 hours agoGRINDING new NightReign content - COME HANG
53 watching -
 26:02
26:02
Planet 3 Outdoors
28 days ago $1.20 earnedBuilding a Treehouse and Catch & Cook a Giant Fish by the River 🌧️🍳
18.3K5 -
 LIVE
LIVE
Shield_PR_Gaming
4 hours ago12/06/25 | Mobius Final Fantasy Reborn & other games!? Follow me on PickAx (referral in description)
1 watching -
 34:21
34:21
Demons Row
18 hours ago $21.51 earnedJason Momoa Reveals His REAL Life in the REDRUM Motorcycle Club ⚠️🔥
163K30 -
 31:07
31:07
Blackstone Griddles
18 hours agoTop 4 Burgers of the Year | Blackstone Griddles
19.4K7 -
 15:37
15:37
True Crime | Unsolved Cases | Mysterious Stories
2 days ago $0.34 earned5 Disturbing 911 and 999 Calls Made by Killers
4.6K