American Standard Champion 4 Toilet Running? Cheap & Easy Non-Wing Nut Flapper Seal Fix!
#cheaptoiletrepair #toiletrepair #toiletrunning #diytoiletrepair
Hey there, Veterans, Active-Duty Military, Military Spouses, Reservists, and all you non-techie DIYers! I made this video because I couldn’t find any simple, clear guides for fixing a toilet flush valve without those tricky black wing nuts. If I can do this, trust me, it’s easy, cheap, and fast! I fixed my toilet for under $5 and in less than 5 minutes, and now I’m sharing these beginner-friendly steps to help you get your toilet running smoothly without leaks. No fancy tools or skills needed—perfect for anyone who wants a no-fuss repair! FYI - this is the American Standard Champion 4 Toilet (model 4215A). It's the toilet that has all the claims that it can flush so many golf balls at one time (which by the way, when working, it likely can as it's got great pressure).
Chapters:
00:00 - Intro: Easy Toilet Flush Valve Fix
00:35 - Replacement Seal/Gasket I Purchased
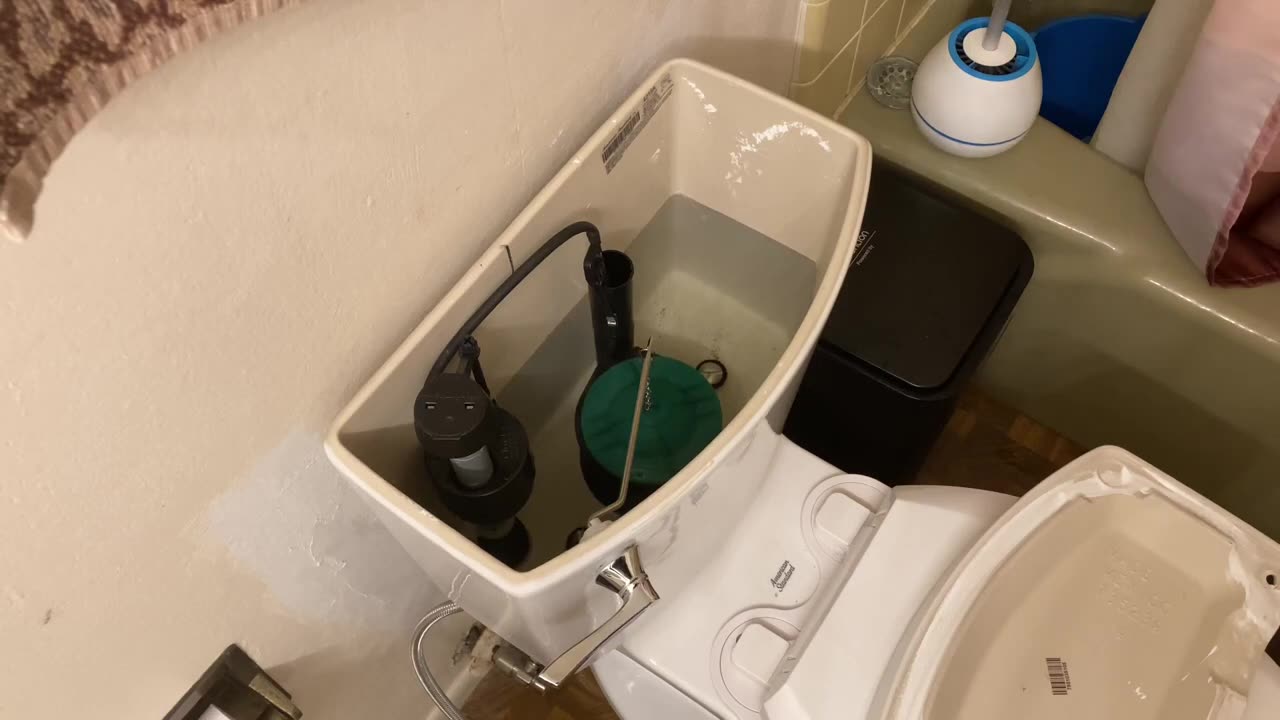
01:13 - Toilet model # and overview
01:25 - Pointing out the non wing-nut flapper (vs one that unscrews)
01:35 - Unscrewing solid flapper part from rod under it
01:56 - Solid flapper (no wing-nut) un attached and upside down
02:10 - Flapper seal/gasket location and removing bottom part
02:21 - Bad seal removal and pointing out rod that screws into flapper
02:40 - New seal added to flapper (upside down)
02:53 - Showing everything back in place and working
03:14 - Toilet flush to make sure everything is working correctly
03:20 - Explaining how easy it was to replace and get back together
03:40 - Be sure the chain it pointing downward. Mine had a slight kink at first.
03:55 - Watching it fill up and overview of this easy, cheap, fast 2 minute fix!
04:38 - Close up of what the new seal/gasket looks like out of the package and the common issue with this toilet seal
Steps for Non-Wing Nut Flush Valve Repair:
Turn Off Water: Shut off the toilet’s water supply and flush to empty the tank.
Detach Chain: Unhook the flush lever chain from the flush lever arm.
Remove Upper Assembly: Lift the valve’s upper assembly and twist the interior rod clockwise to take it off.
Remove Lower Cup: Twist the lower cup clockwise to detach it from the upper assembly.
Replace Seal/Gasket: Pop off the old seal/gasket and snap on a new long-lasting replacement seal/gasket. Hint: if you have your receipt, contact American Standard for a free replacement seal/gasket (red) that is supposed to last many years. American Standard USA phone number: 1-855-815-0004, Monday – Friday, 9AM – 6PM ET.
Clean Surface: Use a wet rag to gently wipe the flush valve’s sealing surface to clear any debris.
Reassemble: Align the tab and slot, then snap the lid and lower cup back together. Twist the upper assembly clockwise onto the interior rod.
Reattach Chain: Hook the chain back to the flush lever arm.
Turn Water On: Restore the water supply and enjoy your leak-free toilet!
Got a flush valve with a black wing nut? Check out our other video for those steps. Need help? Reach out to a trusted plumbing support team or drop a comment below!
Subscribe for more easy DIY fixes and let’s keep things simple, affordable, and quick!
#DIY #ToiletRepair #NonTechie #easyfix #toiletsealreplacement #diytoiletrepair #doityourself #doityourselfproject #toilet #toiletrun #americanstandard #americanstandardtoilet #fixingthings
-
 1:32:21
JTtheSG
3 hours agoLIVE Replay - Ready To Play VOID BREAKER
12.9K -
 4:43:17
DoldrumDan
6 hours agoNEW STREAM SCHEDULE 3PM EST TO 7PM EST EVERY DAY
38K5 -
 3:45:41
Sgt Wilky Plays
5 hours agoSunday Finals | Regiment Donor Drive
21.8K1 -
 LIVE
LIVE
Ouhel
7 hours agoSUNDAY | Active Matter | Exploring the postapocalyptic | O'HELL LIVE
44 watching -
 7:15:31
Astral Doge Plays!
8 hours agoFinal Fantasy IX ~LIVE!~ Iifa Tree Visitation Hours
15.1K -
![[Classic] Pac-Man World Re-Pac 1 and 2 👻 🟡 🟡 🟡 Relaxing on Sunday](https://1a-1791.com/video/fwe2/7a/s8/1/W/5/8/l/W58lz.0kob-small-Classic-Pac-Man-World-Re-Pa.jpg) 6:15:30
6:15:30
J0hnThunder
7 hours ago $1.35 earned[Classic] Pac-Man World Re-Pac 1 and 2 👻 🟡 🟡 🟡 Relaxing on Sunday
20.5K1 -
 LIVE
LIVE
Lofi Girl
2 years agoSynthwave Radio 🌌 - beats to chill/game to
162 watching -
 4:23:27
TonYGaMinG
9 hours ago⚔ Trying out this NEW game called " SWORN " ⚔
49.9K4 -
 29:27
29:27
James Klüg
2 days agoAmericans Remembering Charlie Kirk
46.4K9 -
 9:36:11
GoA_Malgus
16 hours ago $1.33 earnedGoA Malgus - The Legend Has Returned!!! - Live domination on Black Ops 6
32.9K2