Adorable Neck Design_ Collar Cutting _ Stitching Tutorial for Sewing Enthusiasts
Adorable Neck Design: Collar Cutting & Stitching Tutorial for Sewing Enthusiasts
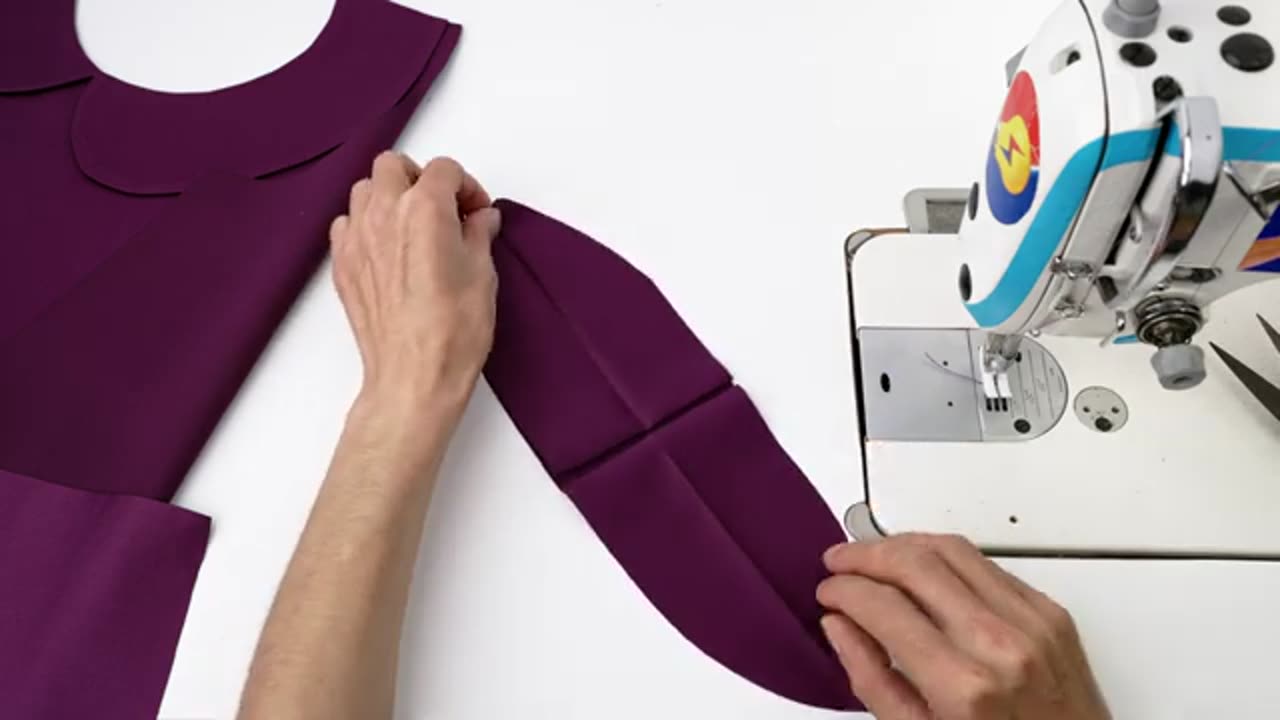
Elevate your sewing skills with this adorable neck design tutorial! Whether you're making a chic blouse, a cute dress, or a stylish shirt, mastering collar cutting and stitching will give your garments a polished, professional look. This step-by-step guide is perfect for beginners and intermediate sewists who want to create clean, well-fitted collars with ease.
What You’ll Learn:
✔️ How to measure and cut different collar styles (Peter Pan, pointed, or stand-up collar)
✔️ Precision stitching techniques for smooth curves and sharp corners
✔️ Attaching the collar neatly to the neckline without puckering
✔️ Pro tips for interfacing and finishing for durability
Materials Needed:
Fabric of your choice (cotton, linen, or poplin works well)
Matching thread
Scissors / rotary cutter
Pins or fabric clips
Sewing machine (or hand-sewing needle)
Interfacing (for structure)
Measuring tape & fabric marker
Easy Steps:
Draft the Collar Pattern – Measure the neckline and sketch your desired collar shape.
Cut Fabric & Interfacing – Layer fabric with interfacing for stability.
Sew & Trim Seam Allowances – Stitch collar pieces, clip curves, and turn right side out.
Attach to Neckline – Pin evenly, stitch carefully, and finish with topstitching or understitching.
Bonus Tip: Experiment with contrast fabrics, lace trim, or embroidery for a unique touch!
Perfect for blouses, dresses, kids' clothing, and more—this collar tutorial will take your handmade outfits to the next level. Happy sewing! 😊
Would you like a video demo or printable pattern template? Let me know in the comments!
-
 2:21
2:21
NAG Daily
11 hours agoPOLITICAL FAMILY GAMESHOW w/ GreenMan Reports
16 -
 0:49
0:49
OfficialJadenWilliams
15 hours agoGTA 6 is downloading but you hear trumpets outside
601 -
 1:02:11
DeVory Darkins
14 hours ago $39.22 earnedDemocrats suffers ANNIHILATION during heated hearing with Bondi as Jack Smith bombshell drops
165K120 -
 57:17
57:17
Dialogue works
2 days ago $2.19 earnedAmb. Chas Freeman: Israel on the EDGE: Is TOTAL DEFEAT IMMINENT?!
31.9K16 -
 14:06
14:06
Actual Justice Warrior
1 day agoSomali Medicaid SCAMMER Says Theft Is HIS CULTURE
16.2K23 -
 10:27
10:27
itsSeanDaniel
2 days agoCBS Host INSTANTLY REGRETS Interrupting MAGA SuperStar
19.2K9 -
 1:25:01
Coin Stories with Natalie Brunell
1 day agoThe Coming Currency War: Gold, Dollar, and Bitcoin with Matthew Pines
16K2 -
 LIVE
LIVE
GritsGG
20 hours ago36 Hour Marathon Stream! Most Wins in WORLD! 3704+!
1,195 watching -
 15:10
15:10
Dr Disrespect
20 hours agoI FINALLY Beat Baby Steps
14.9K11 -
 8:38
8:38
MattMorseTV
15 hours ago $7.34 earnedThis is CATASTROPHIC for the Dems.
21.9K14
