How I made... An Aerial Twilight
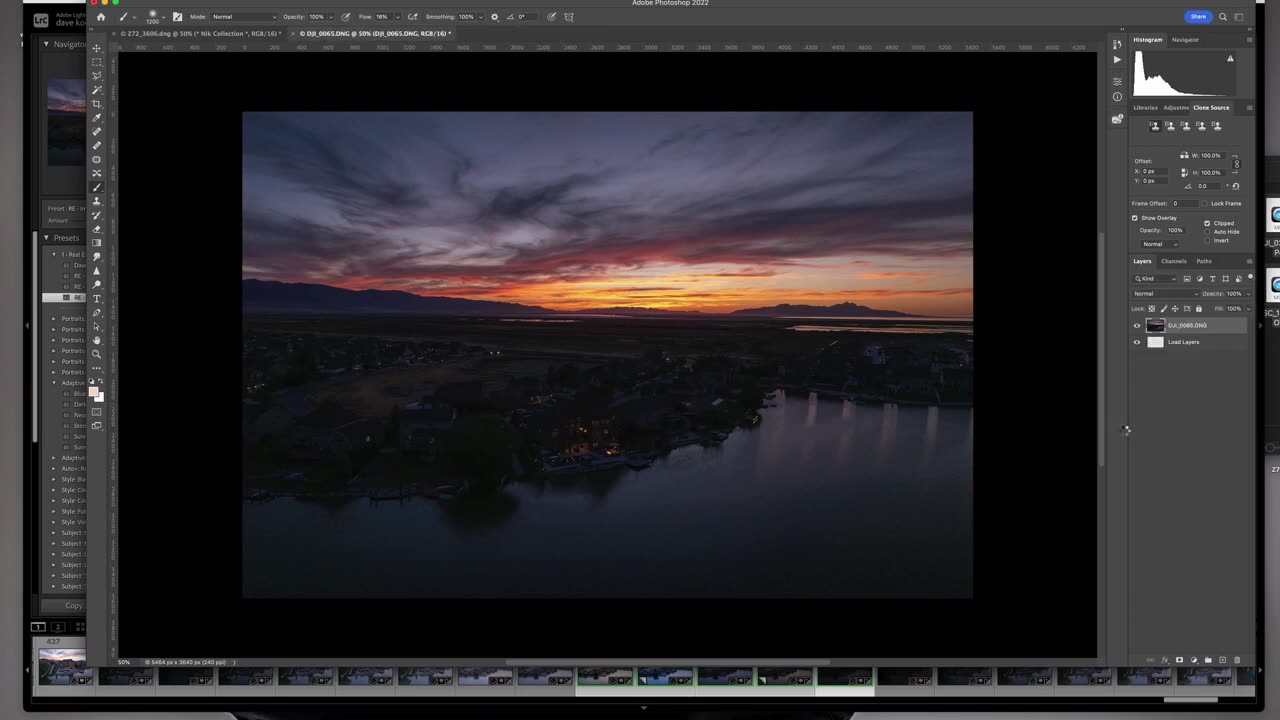
Making a multi-layer twilight edit from an aerial drone image is a skill every real estate photographer should master. A single photo is never enough to capture the full depth of a twilight scene—you need to blend multiple exposures to achieve the perfect final image.
In this video, I walk you through my full editing process for creating a stunning aerial twilight photo. From selecting the right exposures in Lightroom to layer masking and blending in Photoshop, I’ll show you step-by-step how to transform a good image into an incredible twilight masterpiece.
What You’ll Learn:
✅ Why one image isn’t enough for twilight photography
✅ How to align multiple exposures in Photoshop for aerial shots
✅ The best masking & blending techniques for twilight edits
✅ How to remove distractions & enhance details for a polished final image
✅ Final Lightroom adjustments to perfect the exposure & colors
Watch Next:
📺 Mastering Backlit Homes: [Insert Link]
📺 Photoshop Quickies – One-Click Actions to Save Time: [Insert Link]
Grow Your Photography Business
📘 Starting a Photography Business? Get the Guide: https://rephoto.net/ultimate-real-estate-photography-business-guide/
📘 Real Estate Tips for Beginners: https://rephoto.net/real-estate-photography-tips-for-beginners/
Join the Community & Get More Tips:
🔹 Facebook Group – Learn & Share with Other Photographers: https://www.facebook.com/groups/rephotonew
🔹 Follow Me on Instagram: [Insert Link]
🔹 Subscribe for More Tutorials: https://www.youtube.com/@Dave_Koch
00:00 – Introduction & why twilight edits need multiple images
00:34 – The philosophy of composite editing
01:53 – Why post-production is as important as shooting
03:39 – Selecting the best exposures for the edit
04:24 – Setting up the base twilight exposure
07:46 – Working with highlights & shadows
09:53 – Auto-aligning aerial shots in Photoshop
11:13 – Layering & masking for a natural twilight look
14:57 – Finalizing highlights, shadows & details
18:44 – Removing distractions & refining the image
22:46 – Straightening, color grading & final export
28:00 – Final thoughts & editing takeaways
#RealEstatePhotography #AerialPhotography #TwilightPhotography #PhotoshopTutorial #LightroomEditing #RealEstateEditing #RealEstateMarketing #PhotoshopLayers #PhotoshopCompositing #PhotographyEditing #PhotoshopTips #DronePhotography #TwilightEditing #PhotographyWorkflow #HDRPhotography #LuxuryRealEstate #PhotoshopMasking #PhotographyAutomation #PhotoEditingTips #TwilightRealEstate
-
 37:47
37:47
Welker Farms
1 day ago $7.87 earnedWEIGHT and COST Finally Revealed! Monster BIG BUD!
35.4K10 -
 LIVE
LIVE
Pepkilla
49 minutes agoBattlefield 6 Two Weeks Until BR
66 watching -
![I Can’t Believe How INTENSE This Got! | [REC] (2007) Reaction](https://1a-1791.com/video/fwe2/5e/s8/1/k/L/j/r/kLjrz.0kob-small-I-Cant-Believe-How-INTENSE-.jpg) 26:54
26:54
SouthernbelleReacts
2 days ago $13.44 earnedI Can’t Believe How INTENSE This Got! | [REC] (2007) Reaction
27.3K7 -
 LIVE
LIVE
DRE ONYX
8 hours ago🚨🔴LIVE - TRIPLE THREAT CHALLENGE #1 RANKED 6'10 POINT GAWD | !build !cam !join !member !psn
34 watching -
 LIVE
LIVE
xBuRnTx
1 hour agoARC Raiders - Server SLAM - Squad UP
5 watching -
 16:04
16:04
Mrgunsngear
19 hours ago $21.87 earnedMcCoy 12ga Single Shot Shotgun Test 👀
120K7 -
 10:00
10:00
It’s the Final Round
20 hours ago $2.26 earned💰NFL Week 7 Best Bets🔥Player Prop Picks, Parlays, Predictions FREE Today October 19th
20K3 -
 15:35
15:35
Demons Row
16 hours ago $3.43 earnedThe Worst Sgt-at-Arms I Ever Met 💀🔥 (and the Mistakes I Made as One)
21.6K5 -
 9:34
9:34
Sideserf Cake Studio
1 day ago $2.87 earned484 Lego Bricks. 1 Hyperrealistic Cake.
21.6K3 -
 22:42
22:42
marcushouse
1 day ago $7.86 earnedMassive Surprises From Starship Flight 11 Revealed! 🤯
24.3K15