Premium Only Content

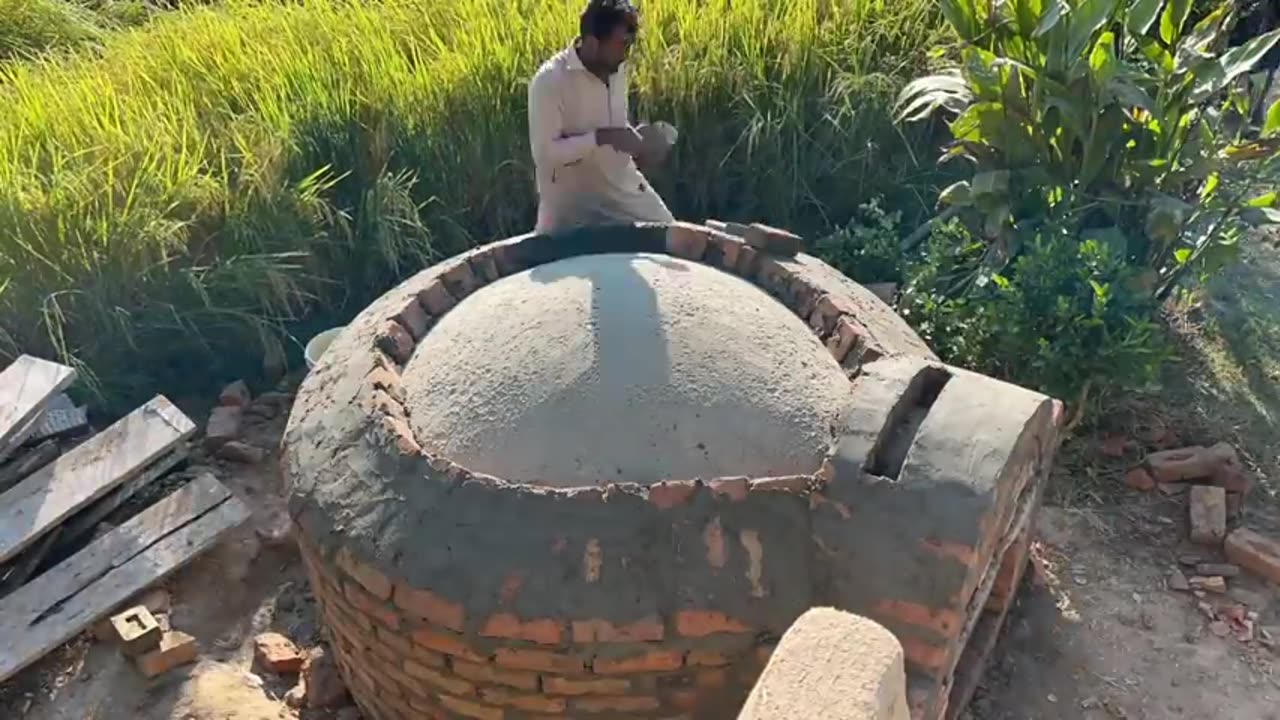
How To Build Biggest Dome Pizza Oven - Making Bricks Oven In Village - Mubashir Saddique
Building a **biggest dome pizza oven (brick oven)** in a village style, inspired by Mubashir Saddique's traditional methods, involves basic tools, natural materials, and lots of patience. Here's a step-by-step guide to making one:
---
### **Materials Needed**
#### For the Oven Structure:
- **Bricks**: Firebricks (for the interior dome) and regular bricks (for the outer layer).
- **Clay/Mud**: Locally sourced clay for mortar and insulation.
- **Sand**: For shaping and mortar mix.
- **Cement**: For the foundation (optional).
- **Gravel**: For the foundation base.
- **Straw/Hay**: For insulation (mix with clay).
- **Water**: To prepare the clay and mortar mix.
#### For Tools:
- **Trowel**: For laying bricks.
- **Shovel**: For mixing and digging.
- **Level**: To ensure even construction.
- **String**: To mark the dome's curve.
- **Wooden templates**: To shape the dome during construction.
---
### **Steps to Build the Dome Pizza Oven**
#### Step 1: Choose the Location
1. Pick a flat, open area in your yard or village that is safe and well-ventilated.
2. Ensure there’s enough space around the oven for people to work and enjoy the area.
---
#### Step 2: Build the Foundation
1. **Dig the Base**:
- Dig a circular or square foundation about 6-8 inches deep and fill it with gravel.
2. **Lay the Foundation**:
- Use a mix of cement and sand to create a strong foundation. Let it dry for at least 24-48 hours.
---
#### Step 3: Lay the Oven Floor
1. Spread a layer of sand on the foundation to level it.
2. Arrange firebricks in a flat, tight pattern to create the cooking floor. Ensure there are no gaps between the bricks.
3. Use a level to make sure the floor is even.
---
#### Step 4: Shape the Dome (Using Sand Molding)
1. Create a sand dome:
- Pile damp sand into a dome shape on the cooking floor. This will act as a temporary mold for the oven’s interior.
- Cover the sand with a wet cloth to prevent it from sticking to the clay later.
2. Use string and a stick to measure and shape the dome evenly.
---
#### Step 5: Build the Dome
1. **Lay the Firebricks**:
- Begin laying firebricks around the sand dome, using a mixture of clay and sand as mortar. Keep the gaps between the bricks minimal.
- Continue layering in a circular pattern, gradually moving inward to form the dome.
- Leave an opening at the front for the door and chimney.
2. **Chimney**:
- Use bricks to construct a short chimney above the door opening for proper airflow.
---
#### Step 6: Add Insulation Layer
1. Mix clay, sand, and straw/hay to create an insulating layer.
2. Cover the entire dome with this mixture, ensuring it’s about 3-4 inches thick.
3. Let it dry for several days.
---
#### Step 7: Outer Protective Layer
1. Apply a final layer of clay and sand to smooth the surface of the oven.
2. You can decorate this layer with natural paints or patterns, if desired.
---
#### Step 8: Cure the Oven
1. Allow the oven to dry completely, which can take up to a week.
2. Start small curing fires inside the oven to gradually harden the clay and bricks. Increase the fire intensity over several days.
---
#### Step 9: Build a Door
1. Make a wooden or metal door for the oven opening to retain heat when cooking.
---
### **Tips**
- Use fire-resistant materials for the cooking floor and dome interior to withstand high temperatures.
- For large ovens, ensure proper airflow with a chimney for even heating.
- Maintain a consistent dome shape for optimal heat retention and circulation.
---
Once completed, you’ll have a large and efficient pizza oven, ideal for baking pizzas, bread, or even traditional desi dishes like naan and roasted meats! The entire process is sustainable and community-friendly, as seen in Mubashir Saddique's village-style creations.
-
 1:35
1:35
HSESafetyInformation
6 months agoMutton Chops two ways- baked & grilled Recipe by Food Fusion (Eid Recipe)
67 -
 1:06:37
Sean Unpaved
3 hours agoCincinnati's Sack King Stays: Decoding the Deal & the NFL's Open-Ended Questions
26.3K -
 LIVE
LIVE
StoneMountain64
3 hours agoWARZONE LEGEND RETURNS. GHILLIE SUIT $20k TOURNEY.
203 watching -
 2:11:17
Side Scrollers Podcast
5 hours agoINSANE Illegal Migrant Propaganda Xbox Game + Paypal REFUSES To Pay Dev + More | Side Scrollers
28.9K -
 LIVE
LIVE
SportsPicks
2 hours agoCrick's Corner: Episode 72
80 watching -
 30:39
30:39
ROSE UNPLUGGED
1 hour agoMore of Less: Purpose, Discipline & the Minimalist Mindset
6.36K -
 1:02:18
Timcast
3 hours agoDemocrat States Ignore English Language Mandate For Truckers, DoT Vows Crackdown Amid Trucker Mayhem
151K41 -
 1:57:04
Steven Crowder
6 hours agoAdios & Ni Hao: Trump Sends Abrego Garcia to Africa But Welcomes 600K Chinese to America
335K278 -
 3:54:14
The White House
6 hours agoPresident Trump Participates in a Cabinet Meeting, Aug. 26, 2025
54.2K28 -
 1:18:51
Rebel News
3 hours agoCarney's flawed LNG deal, Libs keep mass immigration, Poilievre's plan to fix it | Rebel Roundup
24.9K10