Premium Only Content

follow my channel
Here’s a step-by-step guide to creating a channel on Rumble:
1. Sign Up or Log In
Visit Rumble's website or open the Rumble app.
If you don’t have an account, click Sign Up and create one using your email or social media accounts.
If you already have an account, log in.
2. Access the Channel Creation Page
Once logged in, click on your profile icon (usually at the top-right corner of the page).
From the dropdown menu, select Channels or My Content.
Look for the option to Create a Channel and click it.
3. Fill in Channel Details
Enter your Channel Name: This is what your audience will see, so make it clear and relevant.
Write a Description: Briefly describe the type of content you plan to share. For example, "Tech reviews and tutorials" or "Fitness and lifestyle tips."
Upload a Channel Image/Logo: Use a high-quality image that represents your brand or theme.
Select a Category: Choose a category that aligns with your content (e.g., News, Sports, Gaming).
4. Customize Your Channel
You can customize additional settings like a banner or social links (if applicable).
If available, set up monetization options like Rumble’s revenue-sharing model to start earning from your content.
5. Save and Publish
Once all fields are complete, click Save or Create Channel.
Your channel is now live! You can begin uploading videos to it.
6. Upload Videos
To upload, navigate to the Upload or My Videos section.
Select your video file, add a title, description, tags, and choose the channel you just created.
Submit the video, and once it’s approved or processed, it will appear on your channel.
You can now share your channel link with others and grow your audience!
-
 DVR
DVR
Bannons War Room
10 days agoWarRoom Live
2.58M436 -
 16:06
16:06
The Rubin Report
8 hours agoProof the Islamist Threat in England Can No Longer Be Ignored | Winston Marshall
34.3K24 -
 2:07:07
Robert Gouveia
5 hours agoFBI Files Coverup! Bondi FURIOUS; SCOTUS Stops Judge; Special Counsel; FBI Does
40.5K32 -
 56:15
56:15
Candace Show Podcast
5 hours agoBREAKING: My FIRST Prison Phone Call With Harvey Weinstein | Candace Ep 153
107K69 -
 LIVE
LIVE
megimu32
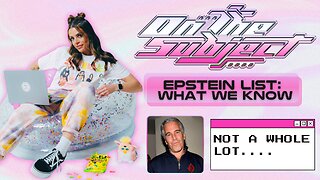
1 hour agoON THE SUBJECT: The Epstein List & Disney Channel Original Movies Nostalgia!!
207 watching -
 9:06
9:06
Colion Noir
10 hours agoKid With Gun Shoots & Kills 2 Armed Robbers During Home Invasion
16.9K3 -
 54:28
54:28
LFA TV
1 day agoUnjust Man | TRUMPET DAILY 2.27.25 7PM
19.7K2 -
 20:10
20:10
CartierFamily
7 hours agoAndrew Schulz DESTROYS Charlamagne’s WOKE Meltdown on DOGE & Elon Musk!
36.8K45 -
 1:36:39
Redacted News
5 hours agoBOMBSHELL EPSTEIN SH*T SHOW JUST DROPPED ON WASHINGTON, WHAT IS THIS? | Redacted w Clayton Morris
145K243 -
 2:03:31
Revenge of the Cis
6 hours agoEpisode 1453: Fat & Fit
48.6K8