Flashforge Guider II - Installing a Removable Flexible Build Plate & Setting Z-axis Height
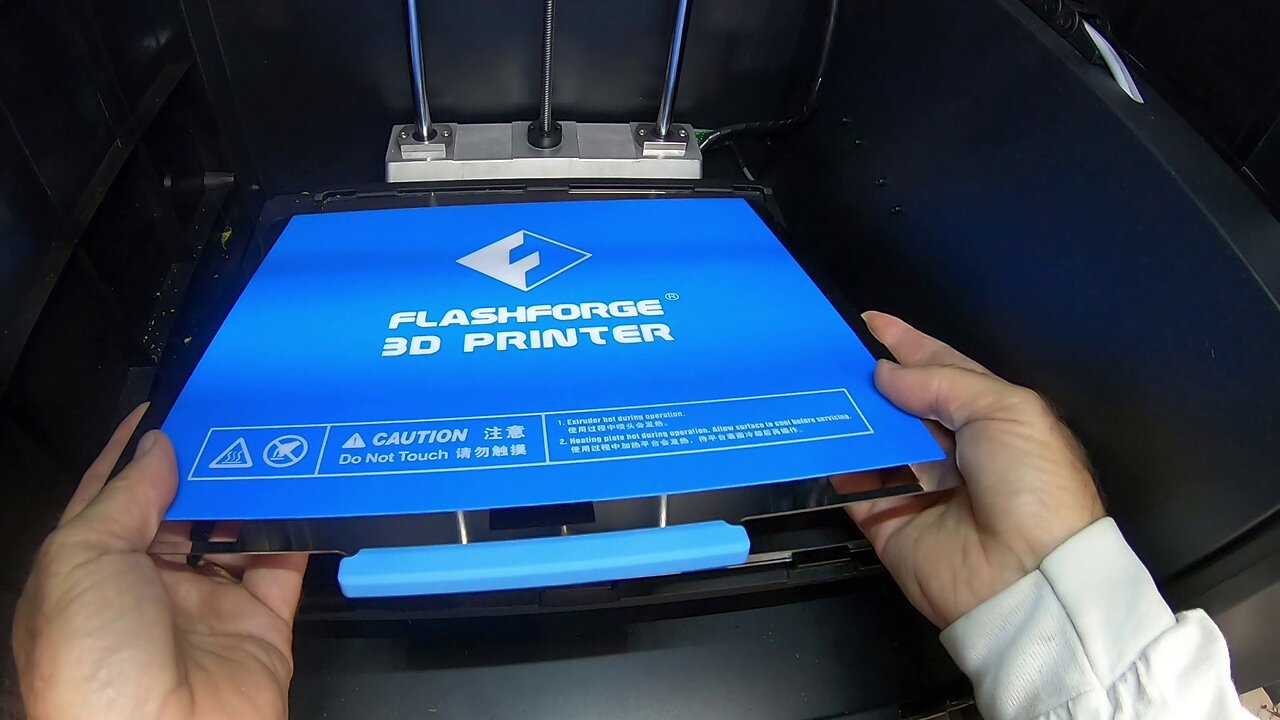
In this video I show how to install a removeable flexible build plate on my 3d printer.
A removeable plate makes it easier to get the parts off the build surface because you can flex it and also put it on a table to get access to all sides of the print surface to assist in removing parts.
Once you change the print bed, you need to re-calibrate the zero point for Z-axis. This video shows you how to do that.
Flashforge Guider II on Amazon:
https://www.amazon.com/gp/product/B077QLTFF4/
Link to the bed leveling test I used:
https://www.thingiverse.com/thing:4713227
NOTE: I don't really like this test because it only puts 1 layer on the print bed which if everything doesn't print perfectly, is very hard to get off!
These are the spatulas I used to help remove the pieces from the print bed:
https://smile.amazon.com/gp/product/B075SLTY8B/
These are the tweezers I used to help remove dripping filament from the print head:
https://smile.amazon.com/gp/product/B0845SKD7Z/
This is the wire brass brush I use to clean the nozzle tip:
https://smile.amazon.com/gp/product/B01J2BS92S/
These are the 0.4mm needles I use to clean the nozzle:
https://www.amazon.com/gp/product/B0797XV8ZK/
OpenSCAD website:
https://www.openscad.org/
I used Simplify3D slicer software for the test:
https://www.simplify3d.com/
-------------------
Link to my Etsy Store:
https://www.etsy.com/shop/BetaCygniDesigns
---------------------
End Screen Video Acknowledgement: Cosmic Reef Video produced by NASA and the Space Telescope Science Institute (STScI).
https://hubblesite.org/contents/media/videos/2020/16/1277-Video
-
 2:14:13
FreshandFit
14 hours agoShe Was Given Extravagant Gifts And STILL Friendzoned Him +EXPOSED
188K36 -
 1:16:07
Man in America
11 hours agoOperation Gladio: The CIA, Mossad & City of London’s Plan for a New World Order
25.5K28 -
 2:11:41
Badlands Media
13 hours agoDEFCON ZERQ Ep. 016: Shadow Governments, Ancient Tech & the Spiritual War for Humanity
81.9K59 -
 2:09:24
Inverted World Live
7 hours agoRats Have Learned to Hunt Bats | Ep. 135
31.2K15 -
 2:48:01
TimcastIRL
8 hours agoLIVE Election Coverage: Polling Stations SWATTED, Bomb Threats Called In | Timcast IRL
254K177 -
 3:30:07
Barry Cunningham
8 hours agoBREAKING NEWS: COUNTDOWN TO COMMUNISM! ELECTION RESULTS SHOW!
59.5K48 -
 2:11:28
DeVory Darkins
8 hours agoLIVE NOW: 2025 Election results and Exit Polls AMA
70K46 -
 2:34:04
DLDAfterDark
6 hours ago $0.08 earnedJust Another Tuesday - In Virginia - The Governor's Race & Glock Talk
29.3K7 -
 3:21:38
The Charlie Kirk Show
9 hours agoJUDGMENT DAY 2025: The Election Results Stream
200K82 -
 3:51:07
MattMorseTV
10 hours ago $0.82 earned🔴Election Day LIVE COVERAGE.🔴
99.2K49