Premium Only Content

Adding an image and links to a web page - HTML Tutorial Series
In today’s tutorial, I’ll show you how to add an image inside a paragraph of your HTML page, and how to create a text link to a web page. Next we will upload the updated file using FileZilla, and preview the changes on your website. Let’s get started!
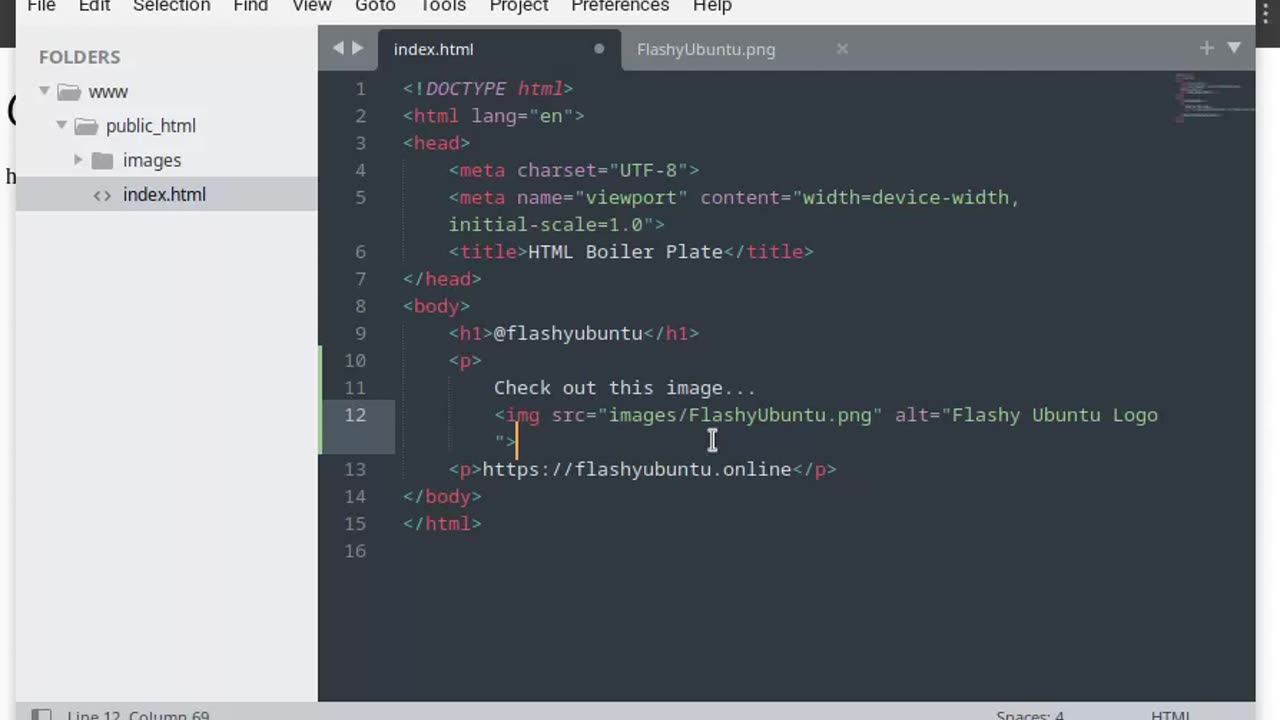
Our updated HTML will include an "img" tag inside the first paragraph. The image is stored in the "images" folder, and we’ve added alternative text for accessibility. The image file "FlashyUbuntu.png" is located in the images directory, which is a sub-folder of our main website directory.
In our second paragraph we are going to add a link to our home page. Using the "a" tag. We provide the "href=https://flashyubuntu.online" to direct the link where to point and then add our link clickable text.
Now that we’ve updated our HTML file, let’s upload it to our server using FileZilla. Open FileZilla and connect to your remote server. If you haven’t already set it up, make sure to download FileZilla from the FileZilla website and enter your server credentials.
Navigate to the directory where your website files are stored, which in this case is /var/www/flashyubuntu.online/public_html/.
On the left side of FileZilla, find and select the updated "index.html" file and new "images" folder. Drag and drop them into the public_html directory on the right side.
Once both files are uploaded, let’s check out the changes on our website.
And that’s it for today’s tutorial! You’ve successfully added an image to your HTML file and updated your server using FileZilla. If you enjoyed this video, please like, subscribe, and hit the bell icon for more tutorials. Thanks for watching!
-
 LIVE
LIVE
Badlands Media
9 hours agoBadlands Daily: November 4, 2025
3,500 watching -
 LIVE
LIVE
Wendy Bell Radio
6 hours agoBUSTED.
7,178 watching -
 LIVE
LIVE
The Big Mig™
3 hours agoDing Dong The Wicked Witch Pelosi Is Gone
23 watching -
 LIVE
LIVE
Daniel Davis Deep Dive
2 hours agoFast Tracking Weapons to Ukraine, Close to $3 Billion /Lt Col Daniel Davis
102 watching -
 LIVE
LIVE
The State of Freedom
4 hours ago#347 Relentlessly Pursuing Truth, Transparency & Election Integrity w/ Holly Kesler
35 watching -
 1:34:34
Graham Allen
3 hours agoThe MAGA “Civil War” Will LOSE The Midterms! Is A Fracture Coming? ALL Eyes On Key Races!
69.6K40 -
 20:28
20:28
Real Estate
1 month agoMILLIONS of Homeowners ARE LOSING MONEY NOW...
5.04K2 -
 22:35
22:35
Jasmin Laine
20 hours ago"They're Rude and Dismissive"—Poilievre Gets CBC To CONFESS On Camera
5.37K34 -
 12:26
12:26
Adam Does Movies
1 day ago $0.51 earnedIT: Welcome To Derry Episode 2 - Review + Recap
3.69K1 -
 1:09:24
The Mike Schwartz Show
14 hours agoTHE MIKE SCHWARTZ SHOW with DR. MICHAEL J SCHWARTZ 10-04-2025
4.02K3