Premium Only Content
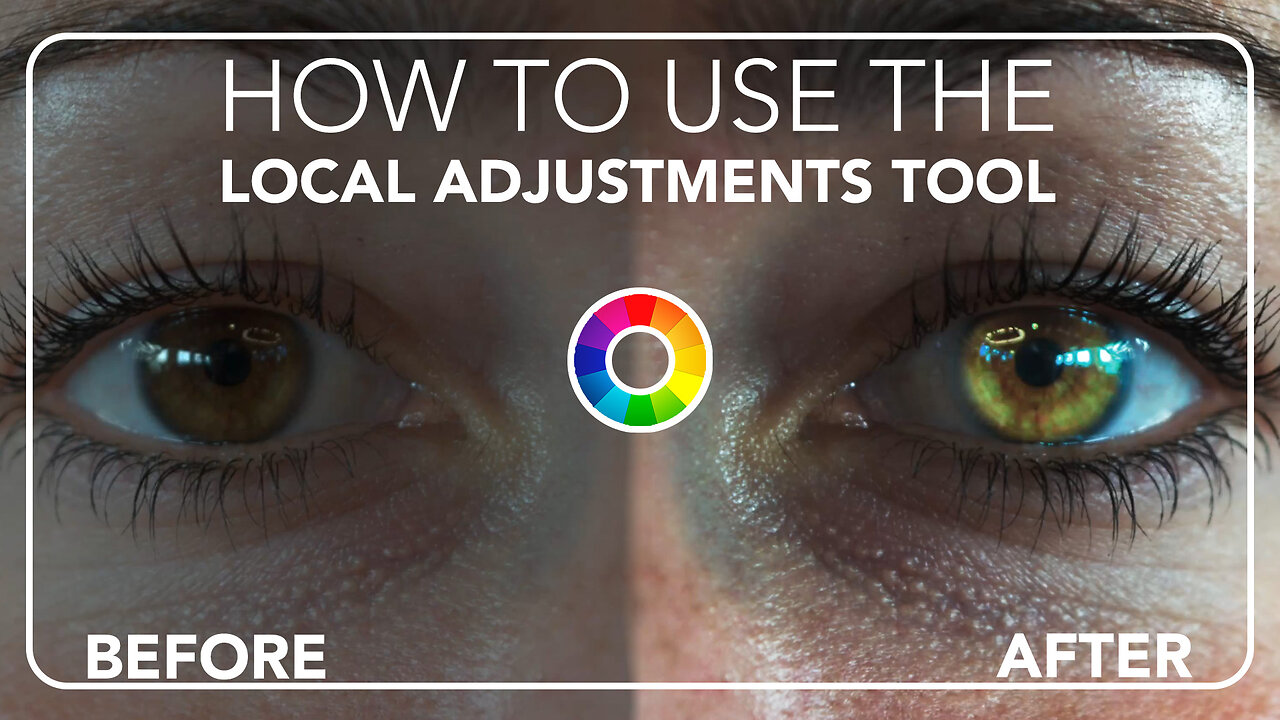
The MOST POWERFUL Tool in Rawtherapee: Local Adjustments!
The Local Adjustments tool is new in Rawtherapee 5.10. It allows the user to add a mask, and then apply adjustment tools within that mask to affect certain user defined parts of the image rather than the entire image. This tutorial covers the basics of this tool and shows you how to use the Local Adjustments tool to change the eye color of your model.
My Gear:
Camera - Sony a7iii: https://amzn.to/3LvokH2
Lens - Meike 50mm f/1.8: https://amzn.to/4cyyZgd
Lens Meike 85mm f/1.8: https://amzn.to/4cENWxt
Lens Filter - K&F Concept: https://amzn.to/3LqCglW
Memory Card - Sandisk 128GB: https://amzn.to/4cYpGpA
Sound Recorder - Zoom: https://amzn.to/4cIn67B
Tripod - Victiv: https://amzn.to/3xZ1GDY
BEST FREE SOFTWARE ON THE NET:
Download Darktable: https://www.darktable.org/
Download Rawtherapee: https://rawtherapee.com/
Download GIMP: https://www.gimp.org/
Download Blender 3D: https://builder.blender.org/download/
Download Krita: https://krita.org/en/
Download Inkscape: https://inkscape.org/
Download LMMS: https://lmms.io/
Download Audacity: https://www.audacityteam.org/
Chapters:
0:00 - Introduction
0:21 - Basic Image Adjustments
0:52 - Adding Clarity with the Tone Curve
2:02 - Introduction to the Local Adjustments Tool
2:15 - Adding a Mask
2:37 - Additional Mask Settings
5:16 - Adding a Tool (Color and Light)
5:46 - Adjusting the Mask Points
6:39 - Transition Gradient Settings
7:46 - Shape Detection Settings
10:01 - Changing the Eye Color
11:29 - Mask Refinement
11:45 - Adding a Denoise Tool
12:21 - Final Thoughts
12:49 - Outro
-
 2:17:54
Side Scrollers Podcast
17 hours agoAsmongold vs DSP + Metroid Prime 4 CONTROVERSY + Disney DROPS DEI? + More | Side Scrollers
57.8K8 -
 22:26
22:26
GritsGG
12 hours ago4000th Warzone Victory! Most Winning Warzone Player!
4.18K2 -
 11:47
11:47
XDDX_HiTower
15 hours agoGZW LEVELS UP HARD WITH A PERFORMANCE AND GOL BULLSEYE
4.94K2 -
 31:59
31:59
Stephen Gardner
8 hours ago🔥TOP Dems CAUGHT in Epstein Payoff Scandal + Trump $2000 Check UPDATE!
11.3K58 -
 2:25:05
The Pascal Show
1 day ago $2.21 earned'THERE'S NOTHING TO HIDE?!' Trump SUDDENLY Urges House Republicans To Vote Release Epstein Files
5.6K1 -
 1:45:20
The Michelle Moore Show
19 hours ago'A Jaw-dropping Prophetic Word From the UFC Brawl On Saturday Night' Guest, Lt. Mark Taylor: The Michelle Moore Show (Nov 17, 2025)
20K40 -
 LIVE
LIVE
Lofi Girl
3 years agolofi hip hop radio 📚 - beats to relax/study to
332 watching -
 2:08:23
FreshandFit
13 hours agoDeVory Darkins Realizes Women Aren't Even TRYING To Get Married
192K73 -
 5:40:05
Drew Hernandez
1 day agoTRUMP DOES DAMAGE CONTROL AFTER MTG FALLOUT & DEFENDS TUCKER CARLSON!
28K16 -
 27:05
27:05
Robbi On The Record
8 days ago $20.94 earnedThe Secret to Aging Strong: What Your Body’s Been Trying to Tell You
73.4K6