Step by Step Process /How to Create Express Entry Profile |
Creating an Express Entry profile is the first step in applying for permanent residence in Canada through the Express Entry system. Here's a step-by-step guide on how to create your Express Entry profile:
Check your eligibility: Before creating your profile, make sure you meet the eligibility criteria for one of the Express Entry programs (Federal Skilled Worker Program, Federal Skilled Trades Program, or Canadian Experience Class). You can do this by completing the eligibility questionnaire on the Government of Canada's official website.
Gather required documents: Before you start the profile creation process, gather all the necessary documents such as passport, language test results (IELTS, CELPIP, or TEF), Educational Credential Assessment (ECA) report (if applicable), proof of work experience, and any other supporting documents.
Create an account on the Government of Canada website: Visit the official website of Immigration, Refugees and Citizenship Canada (IRCC) and create an account if you haven't already. You'll need to provide basic information such as your name, email address, and password to create an account.
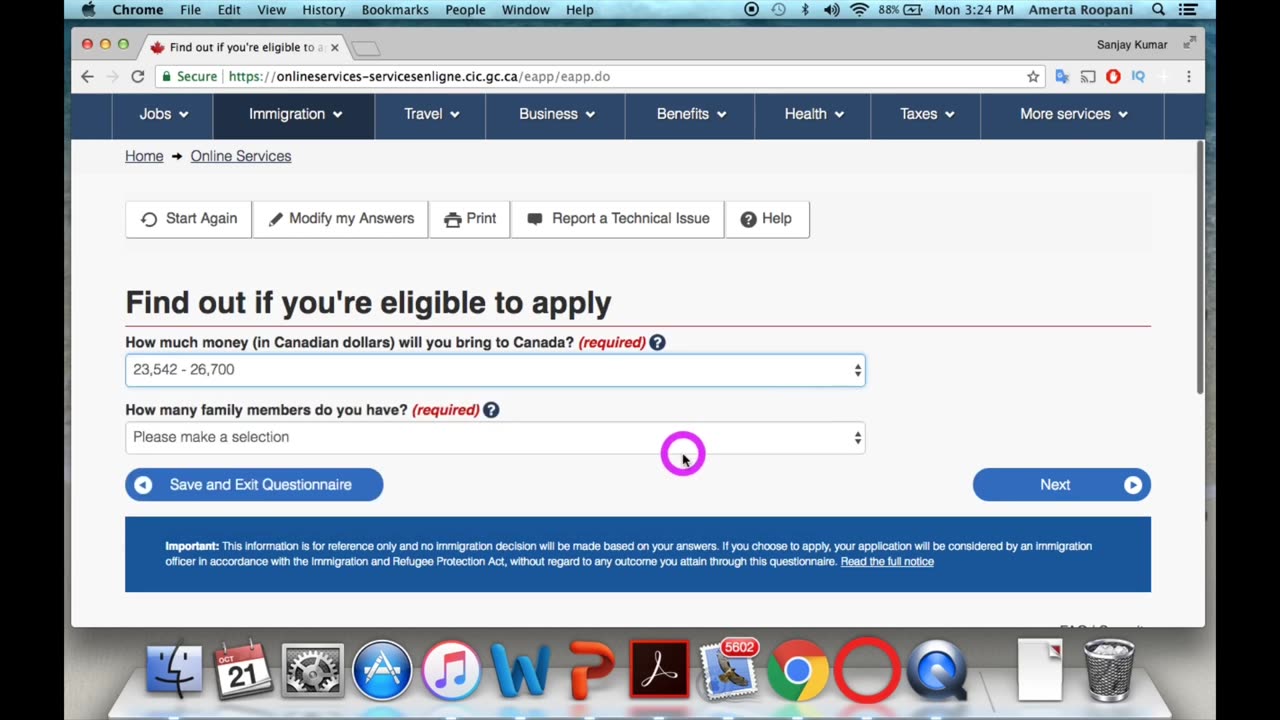
Complete the Come to Canada tool: Once you've created an account, log in to your account and complete the Come to Canada tool. This tool will ask you questions about your age, education, work experience, language skills, and other factors to determine if you're eligible for Express Entry.
Get your Personal Reference Code: At the end of the Come to Canada tool, you'll receive a Personal Reference Code (if you're eligible). Make sure to note down or save this code as you'll need it to create your Express Entry profile.
Start your Express Entry profile: After completing the Come to Canada tool and obtaining your Personal Reference Code, navigate to the Express Entry section on the IRCC website and start your Express Entry profile.
Provide personal information: Fill out all the required fields in your Express Entry profile, including personal information such as your name, date of birth, nationality, marital status, contact information, and details of any accompanying family members.
Enter your language test results: Provide information about your language test results (IELTS, CELPIP, or TEF). You'll need to enter your test scores for each language skill (reading, writing, listening, and speaking) and upload a copy of your test results.
Enter your education and work experience: Provide details of your education history, including your highest level of education completed, field of study, and any additional degrees or diplomas. Also, enter information about your work experience, including job titles, duties, dates of employment, and employer details.
Calculate your Comprehensive Ranking System (CRS) score: After entering all the required information, the system will automatically calculate your CRS score based on the information provided in your profile. Your CRS score determines your rank in the Express Entry pool.
Review and submit your profile: Review all the information you've entered in your Express Entry profile carefully to ensure it's accurate and up-to-date. Once you're satisfied with your profile, submit it to the Express Entry pool.
Wait for an Invitation to Apply (ITA): After submitting your profile, you'll be placed in the Express Entry pool, where you'll be ranked based on your CRS score. If you're among the highest-ranked candidates, you may receive an Invitation to Apply (ITA) for permanent residence during one of the regular draws conducted by IRCC.
It's essential to keep your Express Entry profile updated with any changes to your personal information, work experience, or language test results. Additionally, regularly check the Express Entry draw results to see if you've been issued an ITA.
-
 LIVE
LIVE
The Bubba Army
22 hours agoIs Killing The New Trend??! - Bubba the Love Sponge® Show | 10/31/25
1,883 watching -
 2:25:16
Demons Row
12 hours ago $3.17 earnedEx Hells Angels MC President: Charles “Peewee”Goldsmith (Full Interview)
8.52K3 -
 3:35
3:35
Gamazda
11 hours ago $4.13 earnedThe Darkest Piano Theme?
13.6K18 -
 13:42
13:42
Nate The Lawyer
19 hours ago $3.07 earnedINSANE Judge REMOVED For Lying Under Oath, Insurance Fraud & Stolen Valor
10.3K14 -
 38:32
38:32
Code Blue Cam
1 day agoHow Police Stopped a Potential Church Massacre...
42.8K12 -
 24:26
24:26
Actual Justice Warrior
1 day agoWelfare Queens RAGE OUT Over Food Stamp Cuts
16.5K55 -
 3:05:11
Inverted World Live
11 hours agoThe Halloween Special with Drea De Matteo and Sam Tripoli | Ep. 133
365K16 -
 2:57:52
Laura Loomer
14 hours agoEP154: Naturalized US Navy Medic From GAZA Exposed For Ties To Hamas
50.2K29 -
 35:45
35:45
Stephen Gardner
17 hours ago🔴BREAKING: Election Auditor EXPOSES Democrat Election Fraud Evidence!
57.4K75 -
 15:48
15:48
Sponsored By Jesus Podcast
21 hours agoHow to Stop Being JEALOUS | When Comparison Steals Your Joy
24.8K13