Electric plane angle adjustment jig - Rig System Part.4
For Part 4 of your electric plane angle adjustment jig rig system project, you could focus on the construction and installation of the angle adjustment mechanism. Here's a rough outline for the video:
Introduction:
Briefly recap the purpose of the project and the progress made in previous parts.
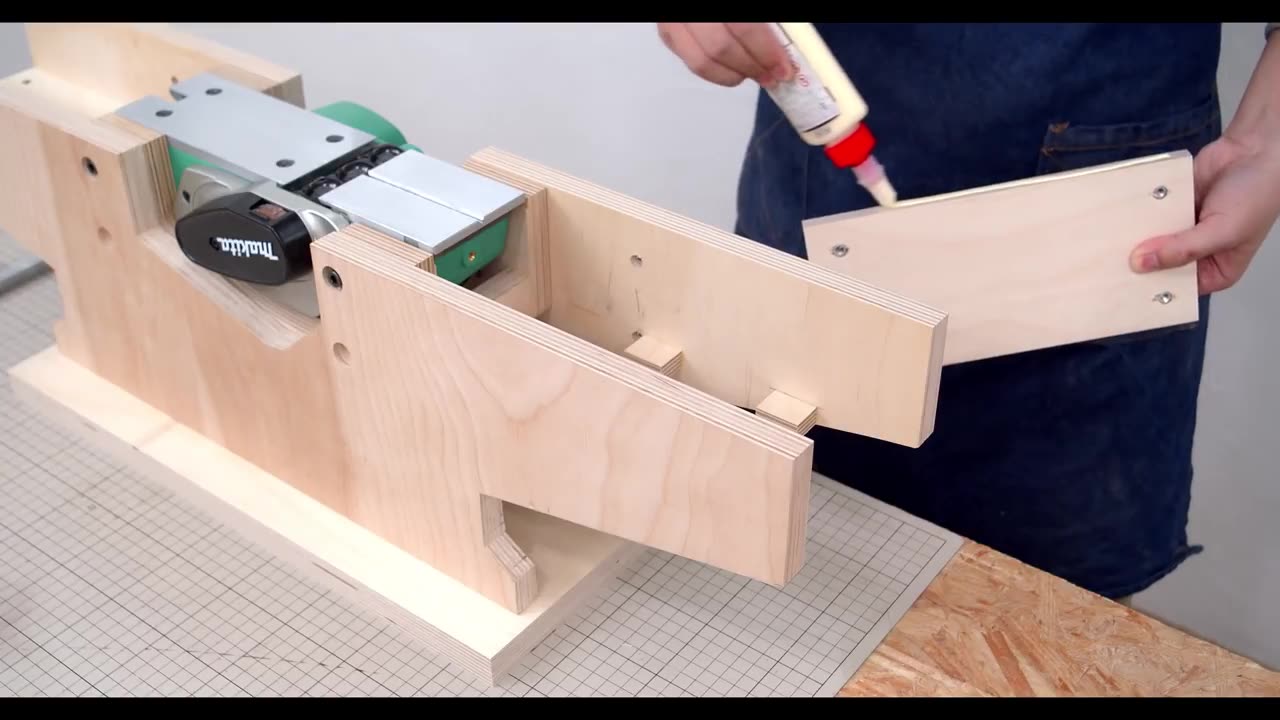
Introduce the focus of Part 4: building the angle adjustment mechanism for the electric plane.
Materials Needed:
List the materials required for this part of the project, such as:
Angle brackets or hinges
Screws, bolts, and nuts
Wing nuts or knobs for adjusting
Drill and drill bits
Measuring tape and pencil
Tools Needed:
Provide a list of tools necessary for the construction process, including:
Drill and drill bits for making holes
Screwdriver or wrench for assembly
Saw (if modifications are needed)
Measuring tape and pencil for marking
Construction Steps:
Designing the Angle Adjustment Mechanism:
Discuss the design considerations for the mechanism, such as range of adjustment and ease of use.
Sketch out the design and explain how it will function.
Preparing the Components:
Cut or modify the angle brackets or hinges as needed to fit the dimensions of the electric plane and the rig system.
Installing the Mechanism:
Attach the angle brackets or hinges to the base of the rig system using screws or bolts.
Ensure that the mechanism is securely mounted and allows for smooth adjustment of the angle.
Adding Adjustment Controls:
Install wing nuts or knobs on the angle brackets or hinges to provide a means of adjusting the angle of the electric plane.
Test the adjustment mechanism to ensure that it functions properly and allows for precise angle control.
Safety Precautions:
Remind viewers to exercise caution when working with power tools and sharp materials.
Emphasize the importance of following safety guidelines and manufacturer instructions throughout the construction process.
Conclusion:
Summarize the key steps covered in Part 4 of the project.
Preview the next part of the series, where you will demonstrate the completed electric plane angle adjustment jig in action.
By following this outline, you can create an informative and engaging Part 4 video for your electric plane angle adjustment jig rig system project.
-
 LIVE
LIVE
FreshandFit
10 hours agoAfter Hours w/ Girls
13,363 watching -
 LIVE
LIVE
Badlands Media
10 hours agoBaseless Conspiracies Ep. 161
6,011 watching -
 1:56:01
Inverted World Live
3 hours agoHome is Where The Great Pacific Garbage Patch is | Ep. 148
35.5K6 -
 LIVE
LIVE
Drew Hernandez
22 hours agoTHE CURRENT STATE OF MAGA 2025 W/ GUEST: OWEN SHROYER
951 watching -
 34:21
34:21
Stephen Gardner
4 hours agoThey have NO IDEA what they just UNLEASHED!!
12.1K46 -
 3:08:15
Decoy
4 hours agoFinally
34.2K10 -
 2:55:01
TimcastIRL
4 hours agoTrump Calls Democrat RETARDED, Whistleblower EXPOSES Democrat FRAUD | Timcast IRL
177K51 -
 LIVE
LIVE
Akademiks
3 hours agoMeg Thee Stallion spent $2 mil on lawyers to win $59k vs Milagro! 50 Cent BURIES Diddy. SNAKES HIM!
1,030 watching -
 LIVE
LIVE
SpartakusLIVE
4 hours agoI'M BACK from Florida || The RETURN to the Spartan Stronghold
441 watching -
 1:38:45
Joker Effect
3 hours agoWhy is everything so DIFFICULT?! Cuffem, Gypsy Crusader, WVAGABOND is getting SUED?! IDuncle is mad!
16.1K1