Electric plane angle adjustment jig - Rig System Part.4
For Part 4 of your electric plane angle adjustment jig rig system project, you could focus on the construction and installation of the angle adjustment mechanism. Here's a rough outline for the video:
Introduction:
Briefly recap the purpose of the project and the progress made in previous parts.
Introduce the focus of Part 4: building the angle adjustment mechanism for the electric plane.
Materials Needed:
List the materials required for this part of the project, such as:
Angle brackets or hinges
Screws, bolts, and nuts
Wing nuts or knobs for adjusting
Drill and drill bits
Measuring tape and pencil
Tools Needed:
Provide a list of tools necessary for the construction process, including:
Drill and drill bits for making holes
Screwdriver or wrench for assembly
Saw (if modifications are needed)
Measuring tape and pencil for marking
Construction Steps:
Designing the Angle Adjustment Mechanism:
Discuss the design considerations for the mechanism, such as range of adjustment and ease of use.
Sketch out the design and explain how it will function.
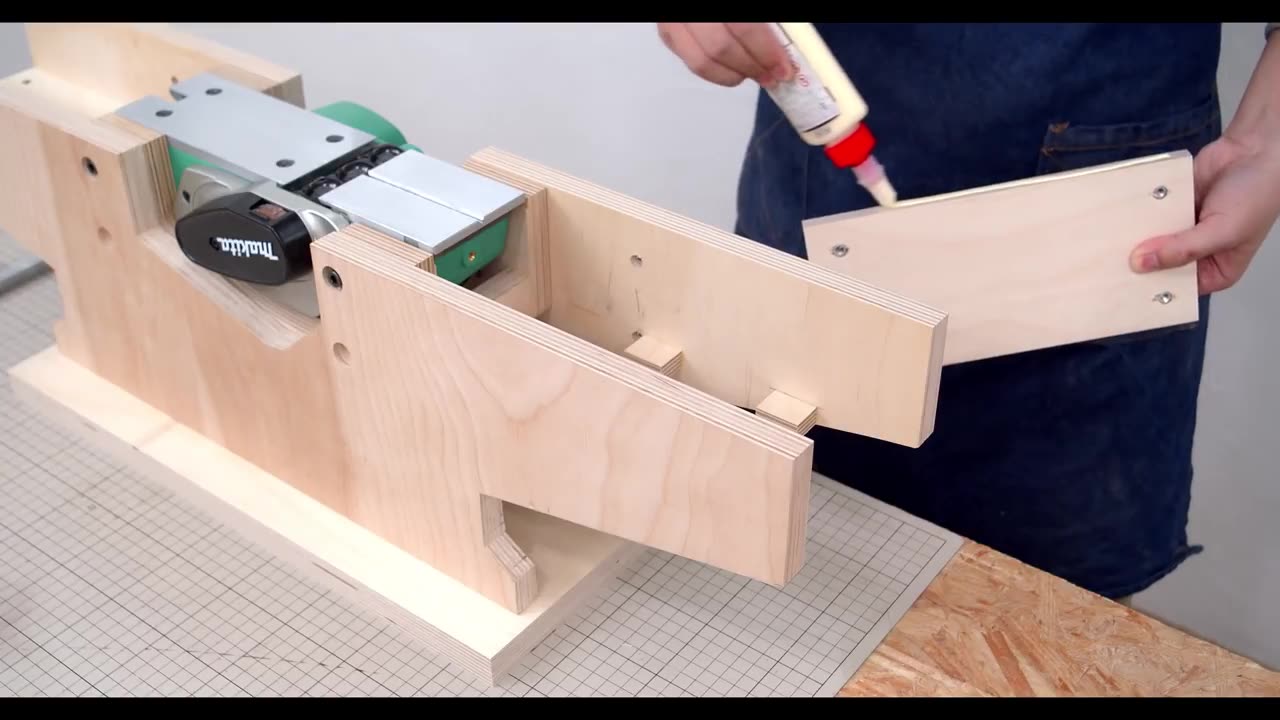
Preparing the Components:
Cut or modify the angle brackets or hinges as needed to fit the dimensions of the electric plane and the rig system.
Installing the Mechanism:
Attach the angle brackets or hinges to the base of the rig system using screws or bolts.
Ensure that the mechanism is securely mounted and allows for smooth adjustment of the angle.
Adding Adjustment Controls:
Install wing nuts or knobs on the angle brackets or hinges to provide a means of adjusting the angle of the electric plane.
Test the adjustment mechanism to ensure that it functions properly and allows for precise angle control.
Safety Precautions:
Remind viewers to exercise caution when working with power tools and sharp materials.
Emphasize the importance of following safety guidelines and manufacturer instructions throughout the construction process.
Conclusion:
Summarize the key steps covered in Part 4 of the project.
Preview the next part of the series, where you will demonstrate the completed electric plane angle adjustment jig in action.
By following this outline, you can create an informative and engaging Part 4 video for your electric plane angle adjustment jig rig system project.
-
 2:01:37
MG Show
17 hours agoTrump Says Soros Should be Charged with RICO; Bill Gates Pulls Out of Arabella Advisors
8.79K13 -
 1:14:00
Steve-O's Wild Ride! Podcast
6 days agoLilly Singh Talks S*x Education With Steve-O | Wild Ride #264
3.09K2 -
 52:48
52:48
Futures Edge: Finance Unfiltered with Jim Iuorio and Bob Iaccino
1 day ago $0.01 earnedTrump’s Latest Initiatives Explained
14.8K -
 4:36:31
FreshandFit
8 hours agoAfter Hours w/ Girls
61.5K72 -
 10:32
10:32
Nikko Ortiz
13 hours agoFunniest Fails Of The Month
20.6K3 -
 2:04:11
Side Scrollers Podcast
17 hours agoCracker Barrel CANCELS Rebrand + OG YouTuber Has Brain Tumor + More | Side Scrollers IN STUDIO
28.5K4 -
 19:26
19:26
GritsGG
9 hours agoChat Picked My Hair Color! All Pink Loadout & Operator Challenge!
5.6K3 -
 1:27:34
TruthStream with Joe and Scott
3 days agoArchitect Richard Gage: 911 truths and more #482
11.4K3 -
 3:47:17
The Pascal Show
18 hours ago $1.47 earnedBREAKING! Mass Shooting At Annunciation Church In Minneapolis Multiple Shot
21.5K7 -
 LIVE
LIVE
Lofi Girl
2 years agoSynthwave Radio 🌌 - beats to chill/game to
207 watching