Making a Machinist Screw Jack Pt2
Check out last week's video if you missed part 1!
If you would like to download the drawings for this project and make one for yourself, you can find them on my Patreon.
Support My Work and get access to drawings, cad files, and more on my Patreon: https://www.patreon.com/HERSCHToolRoom
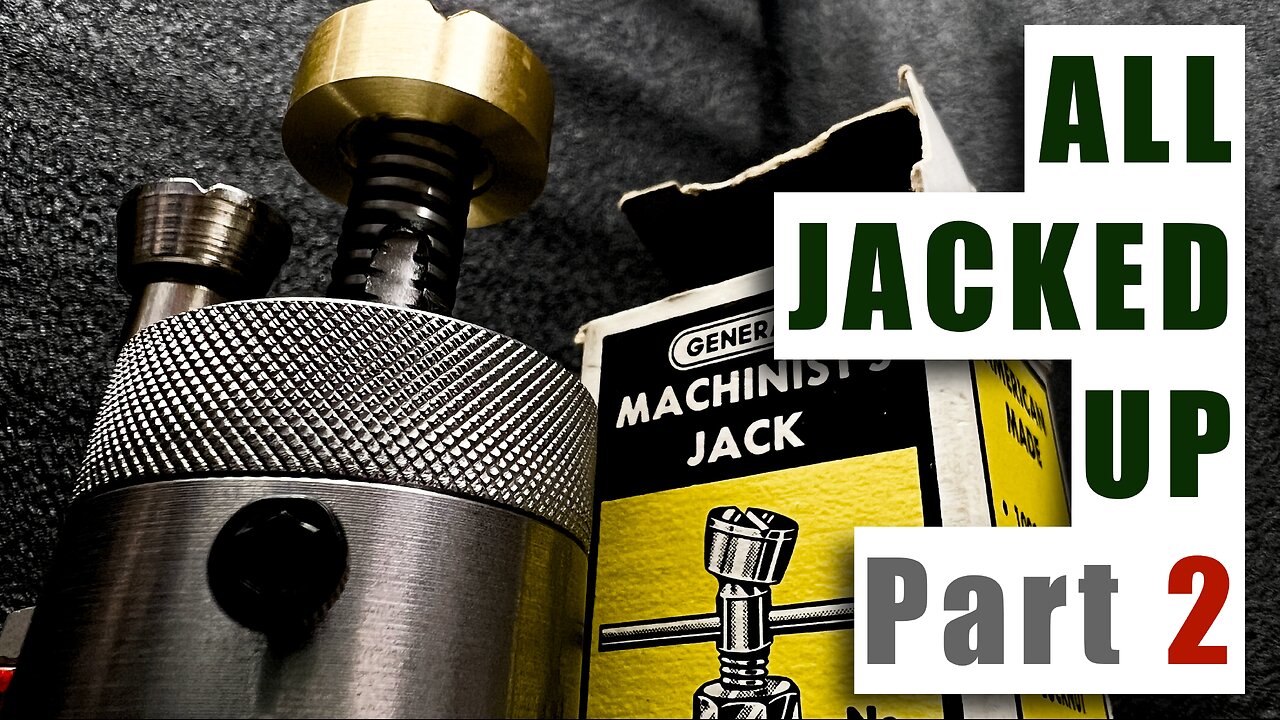
For today's project, we will be finishing up the shop made machinist's jack build.
Last week we completed the main body of the jack, as well as the adjustment bushing, used for adjusting the jack-screw up and down.
This week we will be making the main jack-screw and the work support platform.
To the make the main jack-screw we will turn down stock on the lathe and then single point cut a 7/16-10tpi left handed acme thread.
The work support platform will be made from 360 free machining brass.
The brass will be turned down in the lathe, and drilled and counterbored for the screw that will be used to fasten the platform to the main jack-screw.
I will demonstrate how an integrated arbor can be turned directly into a part when there is sufficient stock, and how that arbor can be used to hold onto a small or odd shaped part that might otherwise be difficult to hold and machine.
I will demonstrate the use of a collet block for work holding in the milling machine and show how a surface plate can be used to locate and align features with work a holding fixture.
This all demonstrates how a bit of forethought and some simple "old school" tricks can be used to hold onto, fixture, and machine small or odd shaped parts and features.
If you have any questions, comments, or criticisms, please don't hesitate to put them in the comment section down below!
My Lathe: MSC / Prince 9517350 - 13x40 Manual Metal Lathe
My Milling Machine: Bridgeport Variable Speed Series 1 "J Head"
My other Milling Machine: Brown & Sharpe No. 2 Plain "light type" Universal Milling Machine
CREDITS:
Music and Sound Effects courtesy of www.epidemicsound.com
-
 LIVE
LIVE
BonginoReport
2 hours agoJake Tapper Profits Off Of LIES - Nightly Scroll w/ Hayley Caronia (Ep.48) - 05/14/2025
16,449 watching -
 UPCOMING
Dad Dojo Podcast
2 hours agoEP32: WHAT IS LOVE?
9 -
 DVR
DVR
Kim Iversen
2 hours agoRFK Jr TORCHES Big Pharma Libs In Congress "You Tried For 20 Years, I Did It In 100 Days"
53.6K27 -
 1:45:35
Redacted News
2 hours agoMexico's cartel are the GREATEST threat to America and it's getting worse by the day
120K38 -
 LIVE
LIVE
Wayne Allyn Root | The Root Reaction
5 hours agoThe Root Reaction LIVE | 14 May 2025
77 watching -
 49:46
49:46
The Dr. Ardis Show
4 hours agoThe Dr. Ardis Show | How to Heal Psoriasis Naturally | Episode 05.14.2025
1.08K1 -
 57:00
57:00
BEK TV
17 hours agoFIRE MISMANAGEMENT, BEEF TRADE WITH BRITAIN, AND A MIDWESTERN POPE: ISSUES IMPACTING HEARTLAND
1.27K1 -
 1:21:34
vivafrei
4 hours agoDerek Chauvin to get Pardoned? WSJ Hit Piece on Roger Ver Pardon? AND MORE!
123K53 -
 1:30:29
Untamed Nation
2 hours agoDISTURBING FOOTAGE FROM A DIDDY FREAK OFF ⚠ Joe Oltmann and Matt Wallace | 14 May 2025
22.1K13 -
 LIVE
LIVE
LFA TV
21 hours agoLFA TV LIVE STREAM - WEDNESDAY 5/14/25
2,332 watching