Reloading Press Setup (Part 3)
1 year ago
23
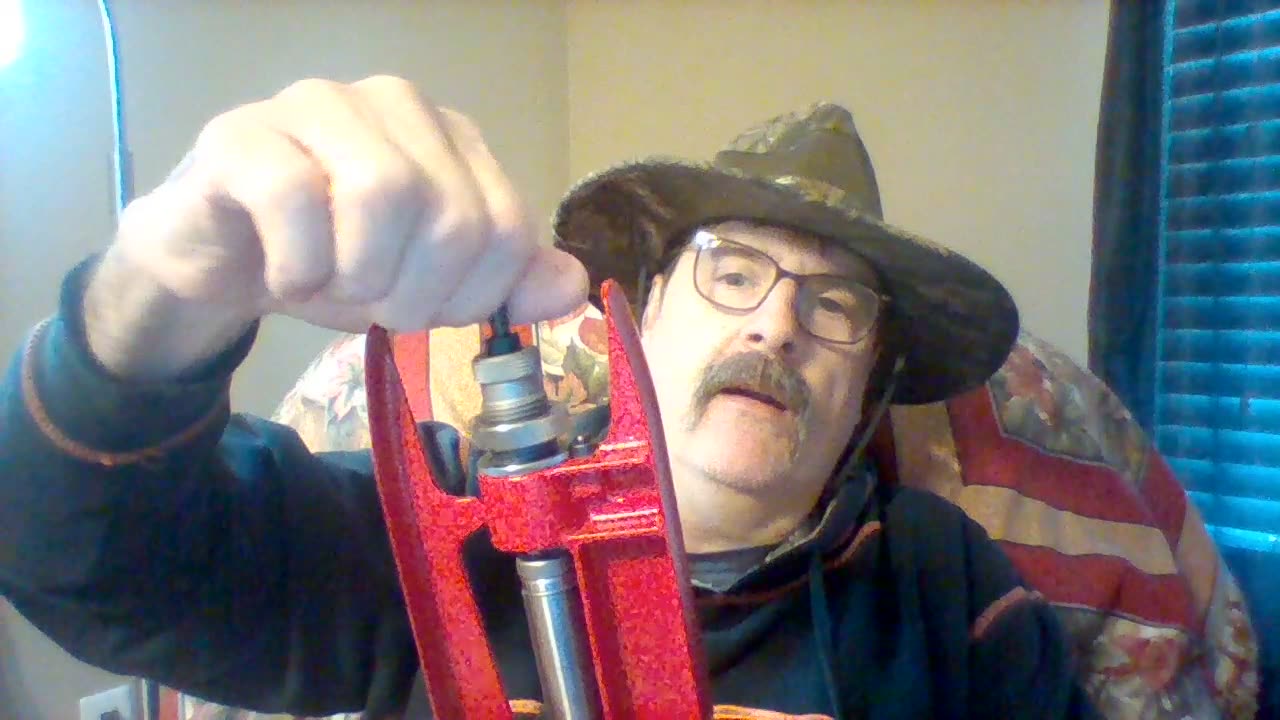
As I pointed out in part 1 of my Reloading Setup video, I use a Lee Hand-Press to reload my ammunition. In case anyone else is wondering how a Hand-Press works, I thought I would make a short video showing you how.
I can reload from anywhere with my Hand-Press, I've even been known to do my reloading while sitting in my recliner.
Loading comments...
-
 1:06:09
Man in America
14 hours agoExposing HAARP's Diabolical Mind Control Tech w/ Leigh Dundas
61K47 -
 1:47:16
Tundra Tactical
10 hours ago $101.50 earnedGlock Interview From Beyond The Grave//Whats the Future of Home Training??
45.2K7 -
 2:16:35
BlackDiamondGunsandGear
8 hours agoEBT Apocalypse? / Snap Down SHTF / After Hours Armory
17.4K8 -
 14:05
14:05
Sideserf Cake Studio
20 hours ago $14.45 earnedHYPERREALISTIC HAND CAKE GLOW-UP (Old vs. New) 💅
52.1K9 -
 28:37
28:37
marcushouse
22 hours ago $8.06 earnedSpaceX Just Dropped the Biggest Starship Lander Update in Years! 🤯
24.2K8 -
 14:54
14:54
The Kevin Trudeau Show Limitless
3 days agoThe Hidden Force Running Your Life
104K23 -
 2:16:35
DLDAfterDark
9 hours ago $7.98 earnedIs The "SnapPocalypse" A Real Concern? Are You Prepared For SHTF? What Are Some Considerations?
25.1K10 -
 19:58
19:58
TampaAerialMedia
20 hours ago $8.87 earnedKEY LARGO - Florida Keys Part 1 - Snorkeling, Restaurants,
41.6K17 -
 1:23
1:23
Memology 101
2 days ago $7.93 earnedFar-left ghoul wants conservatives DEAD, warns Dems to get on board or THEY ARE NEXT
33.2K66 -
 3:27:27
SavageJayGatsby
10 hours ago🔥🌶️ Spicy Saturday – BITE Edition! 🌶️🔥
58.9K7