make a marking gauge
Materials Needed:
Hardwood stock (such as maple or beech) for the body
Steel rod or screw for the marking point
Small brass or steel knob
Wood glue
Sandpaper
Finish (such as oil or wax)
Tools Needed:
Saw (hand saw or table saw)
Drill and bits
Chisel
Mallet
File
Screwdriver
Step-by-Step Guide:
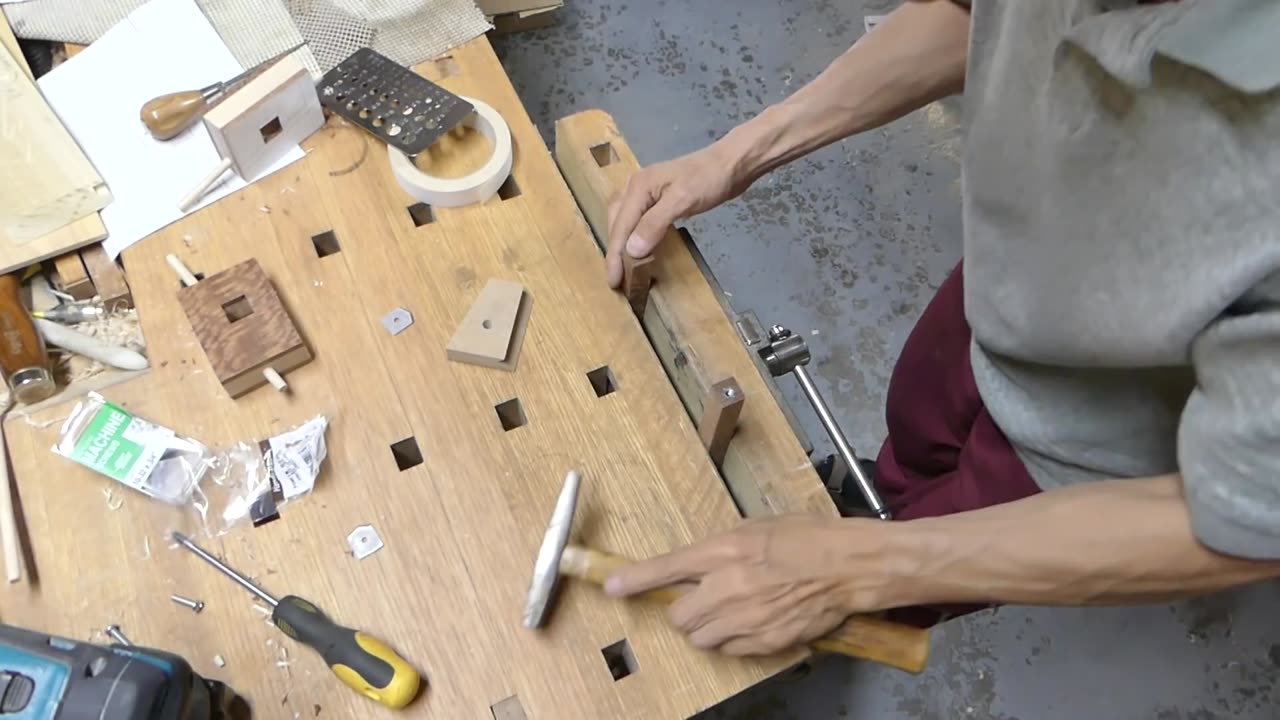
Prepare the Stock:
Begin by cutting your hardwood stock to the desired length for the marking gauge body. A length of around 8 to 10 inches should be sufficient for most projects.
Shape the Body:
With the stock cut to length, shape it into a rectangular or oval shape, depending on your preference. You can use a saw and chisel to remove excess material and refine the shape.
Drill Holes:
Next, drill two holes near one end of the body: one for the marking point and one for the knob. The hole for the marking point should be drilled perpendicular to the face of the body, while the hole for the knob can be drilled at a slight angle to provide clearance.
Insert the Marking Point:
Insert the steel rod or screw into the hole drilled for the marking point, leaving a small amount protruding from the face of the body. Secure it in place with wood glue, and allow it to dry thoroughly.
Add the Knob:
Insert the small brass or steel knob into the hole drilled for it, and secure it in place with a screw. This will serve as the locking mechanism for the marking gauge.
Shape the Marking Point:
Once the glue has dried, shape the marking point to a sharp tip using a file or sharpening stone. This will ensure clean and accurate marking lines.
Sand and Finish:
Sand the entire marking gauge body to smooth out any rough edges or surfaces. Apply a finish of your choice, such as oil or wax, to protect the wood and enhance its appearance.
Test and Adjust:
Before using the marking gauge on your woodworking projects, test it to ensure that the marking point moves smoothly and locks securely in place. Make any necessary adjustments to the knob or marking point to achieve the desired tension.
Use and Enjoy:
With your marking gauge complete, you're ready to start using it in your woodworking projects! Whether you're laying out joinery or marking dimensions, your homemade marking gauge will provide accurate and reliable results for years to come.
-
 22:27
22:27
The White House
5 hours agoPresident Trump and The First Lady Participate in the National Christmas Tree Lighting
7.36K17 -
 LIVE
LIVE
OFFICIAL Jovan Hutton Pulitzer Rumble
2 hours agoThey Are Weaponizing The Existing Cracks In America
52 watching -
 LIVE
LIVE
LFA TV
22 hours agoLIVE & BREAKING NEWS! | THURSDAY 12/04/25
782 watching -
 1:40:10
Kim Iversen
3 hours agoThe UK Has Covered Up THOUSANDS Of Grooming Gang Rapes | IDF Soldiers Are Killing Themselves At Record Levels
80.1K57 -
 25:05
25:05
Nick Shirley
3 hours ago $1.26 earnedConfronting The Deported Migrant Scammers in NYC
7.68K8 -
 LIVE
LIVE
Quite Frankly
8 hours agoMalachi Martin: Miracles, Exorcisms, and The Deep Church | Robert Marro Jr & Timothy Gordon 12/4/25
545 watching -
 LIVE
LIVE
The Daily Signal
2 hours ago🚨BREAKING: SUPREME COURT SIDES w/ TEXAS GOP, Jan. 6 Pipe Bomber Arrested, Jack Smith Subpoenaed
308 watching -
 1:02:49
TheCrucible
3 hours agoThe Extravaganza! EP: 70 (12/04/25)
47.8K10 -
 2:59:04
Redacted News
4 hours agoBREAKING! PIPE BOMB SUSPECT BRIAN COLE ARRESTED, FBI COVER-UP GOES NUCLEAR | Redacted News
139K44 -
 35:24
35:24
Stephen Gardner
3 hours ago🔥Tucker's BOMBSHELL warning + Trump FBI Makes BIG ARREST!!
31.5K37