Premium Only Content
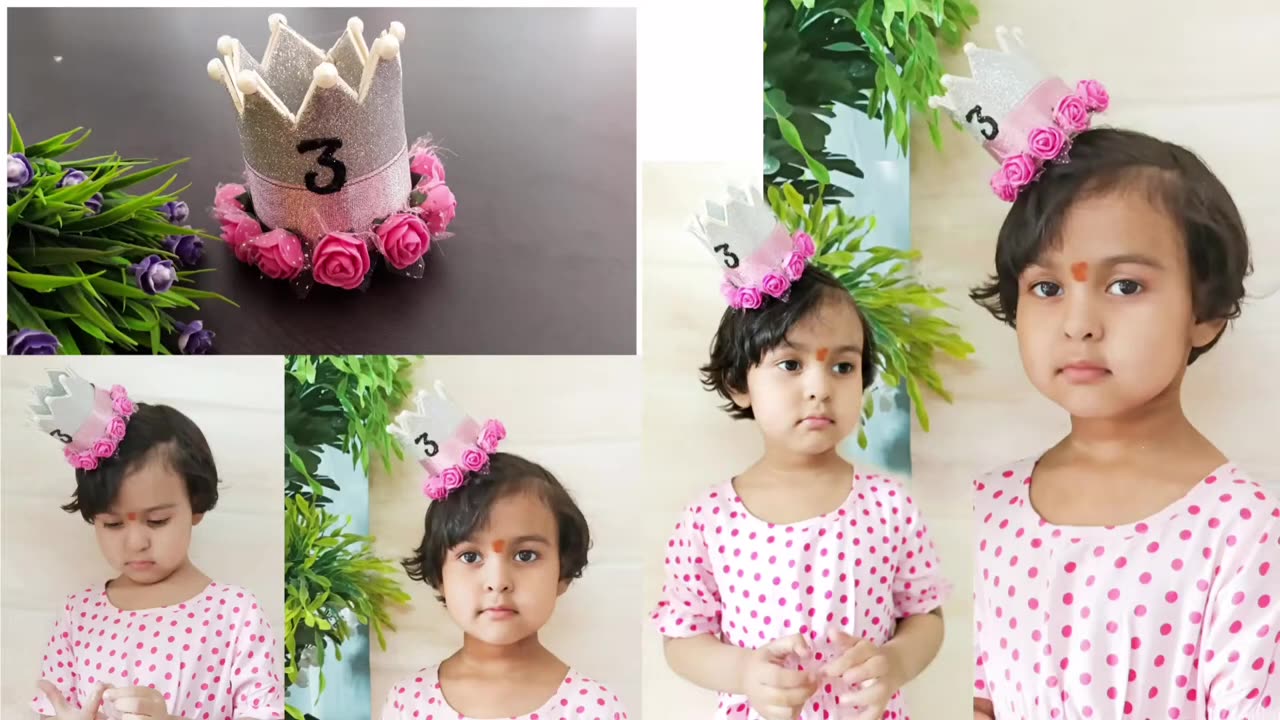
👑 Birthday Crown || Diy crown headband numeric for birthday Girl || Super Easy
Creating a DIY Birthday Crown Headband for the birthday girl is a delightful and straightforward project. Here's a super easy description for making a numeric birthday crown headband:
Materials Needed:
Cardstock paper or foam sheet (color of your choice)
Glitter, stickers, or markers for decoration
Elastic cord or ribbon
Scissors
Pencil
Glue
Instructions:
Choose Your Material:
Select a vibrant cardstock paper or foam sheet that complements the birthday girl's preferences or the party theme.
Design the Numeric Shape:
Sketch the birthday girl's age or a significant numeric representation on the cardstock or foam sheet. Ensure the size is appropriate for a headband.
Cutting:
Carefully cut out the numeric shape using scissors. Make sure to create a smooth and even outline.
Decoration:
Get creative! Decorate the numeric shape with glitter, stickers, or markers. Add a touch of sparkle to make it festive and personalized.
Prepare the Headband Base:
Cut a piece of elastic cord or ribbon to the desired length. It should comfortably fit around the birthday girl's head.
Attach the Numeric Shape:
Glue the ends of the elastic cord or ribbon to the back of the numeric shape. Ensure it is securely attached, forming a circular headband.
Reinforce the Connection:
For added durability, reinforce the attachment point of the elastic cord or ribbon with additional glue. Allow it to dry completely.
Personalize Further:
Add any extra embellishments or personal touches to make the birthday crown headband truly special.
Try It On:
Once the glue is fully dried, invite the birthday girl to try on her custom crown headband and celebrate in style!
This super easy DIY Birthday Crown Headband is not only a fun activity but also adds a charming and personalized touch to the birthday celebration. Let the festivities begin! 👑🎉
-
 37:46
37:46
Stephen Gardner
8 hours ago🔥Trump NEVER expected THIS WIN as Schumer has EPIC MELTDOWN!
12.3K24 -
 2:02:41
Inverted World Live
5 hours agoNASA Engineer Says Trillions of Shape-Shifting, Cloaked Devices are Hidden on Earth| Ep. 83
15.9K4 -
 3:12:37
TimcastIRL
5 hours agoGOP Councilman DOUSED IN GAS, Set ON FIRE In Virginia, Suspect In Custody | Timcast IRL
215K75 -
 2:32:23
The Quartering
4 hours agoOn To The Big Bosses! Act 2 Of Expedition 33
44.9K4 -
 LIVE
LIVE
SpartakusLIVE
6 hours agoTiger Blood RESTOCKED and 30% off w/ code SPARTAKUS30
504 watching -
 24:58
24:58
Law&Crime
7 hours ago $1.38 earnedSecond Note Leaves Disturbing Clues in New York City Killings
22.3K5 -
 1:36:57
Badlands Media
23 hours agoAltered State S3 Ep. 39: Earthquakes, Energy Games & the Fall of the Narrative
52.6K13 -
 2:04:07
Due Dissidence
12 hours agoCharlie Kirk's GAZA LIES, Caitlin Clark Stalker, Palantir Goes Hollywood - w/ Kyle Matovcik | TMWS
27K7 -
I_Came_With_Fire_Podcast
13 hours agoAmerica First, Trump Threatens China, Your Friendly Neighborhood Illegal, EPA Gets a "W"
29.1K4 -
 LIVE
LIVE
Geeks + Gamers
4 hours agoGeeks+Gamers Play- MARIO KART WORLD
147 watching