quick and easy woodstove door gasket replacement. fiberglass wood burner rope gasket #woodstove
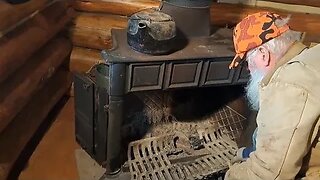
quick and easy woodstove door gasket replacement. Replacing a wood stove door gasket is a straightforward yet crucial task that enhances the efficiency and safety of your heating appliance. Over time, the door gasket can wear out, leading to heat loss and decreased performance. Here's a step-by-step description to guide you through the process:
Materials Needed:
New wood stove door gasket
Screwdriver
Wire brush
Adhesive (specifically designed for high-temperature applications)
Scissors or utility knife
Gloves and safety glasses
Step 1: Ensure Safety
Before beginning the replacement process, ensure that the wood stove is completely cooled down. This minimizes the risk of burns and makes handling the stove components safer.
Step 2: Remove the Old Gasket
Use a screwdriver to carefully remove the screws holding the old gasket in place. Gently peel off the old gasket, and use a wire brush to clean any remaining adhesive or debris from the gasket channel. Thoroughly clean the surface to ensure proper adhesion for the new gasket.
Step 3: Measure and Cut the New Gasket
Unroll the new door gasket and measure it against the length of the gasket channel. Use scissors or a utility knife to cut the gasket to the appropriate size. Make sure to leave a slight overlap to ensure a tight seal when the door is closed.
Step 4: Apply Adhesive
Apply a thin and even layer of high-temperature adhesive to the gasket channel. Be sure to use an adhesive specifically designed for wood stoves to withstand the intense heat. Follow the manufacturer's instructions for the adhesive application.
Step 5: Install the New Gasket
Carefully press the new gasket into the adhesive-lined channel, ensuring it sits securely in place. Press down along the entire length to guarantee proper adhesion. If necessary, use a screwdriver to help tuck the gasket securely into corners and edges.
Step 6: Allow Adhesive to Cure
Allow the adhesive to cure according to the manufacturer's recommendations before closing the wood stove door. This ensures a strong and durable bond between the gasket and the stove.
Step 7: Test the Seal
Once the adhesive has fully cured, close the wood stove door and check for any gaps or unevenness. A proper seal is essential for the stove's efficiency and safety.
By following these steps, you can replace the wood stove door gasket effectively, ensuring optimal performance and heat retention from your wood-burning stove. Regular maintenance of components like the door gasket contributes to the longevity and efficiency of your heating appliance.
Disclaimer: DIY projects featured in this channel are undertaken at your own risk. Prioritize caution, follow safety guidelines, and consult professionals for complex or hazardous projects. The creators are not liable for any loss, damage, or injury resulting from the content. Additionally, this channel may include tool or product reviews. While these reviews aim to provide helpful insights, viewers should conduct their own research and make informed decisions before purchasing any reviewed tools or products. Affiliate links or sponsorships support the channel, but it is important to independently evaluate the suitability and reliability of the recommended tools or products before making a purchase.
Due to factors beyond the control of Heterogeneity Rocks, I cannot guarantee against improper use or unauthorized modifications of this information. I assumes no liability for property damage or injury incurred as a result of any of the information contained in this video. Use this information at your own risk. We recommends safe practices when working on vehicles and or with tools seen or implied in this video.
-
 9:26
9:26
Forest Escape a chosen path
3 months agoForest Escape Cleaning the Wood Stove Ashes and Door Glass
371 -
 5:25
5:25
ALLCHECKOUT
3 years ago $0.01 earnedBabyltrl Wok Pan - 13" Woks and Stir Fry Pans, Carbon Steel Wok with Wooden Handle FULL REVIEW
871 -
 6:24
6:24
4Crawler
1 year agoGE Advantium 120 Speedcook Oven: Door Handle Repair
10 -
 2:10
2:10
MrEnergy511
6 months agoRepairing a FireBox on an Old WoodBurning Cookstove
12 -
 12:52
12:52
Peter von Panda
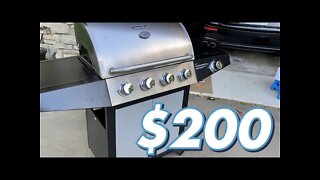
3 years agoCheapest 4 Burner Propane BBQ Grill Review
25 -
 13:49
13:49
How to by Ahsan Khan
9 months agoHow To Fix A Cracked Oven Door Glass DIY
32 -
 6:24
6:24
Alexander Bros Woodworking
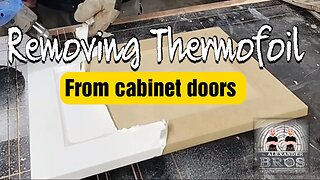
1 year agoRemoving Thermofoil From Cabinet Doors #DIY #Howto #Woodworking
49 -
 13:10
13:10
Ben's Appliance Tutorials and More
2 years ago $0.03 earnedFrigidaire Gas Oven Won't Heat - How to Troubleshoot and Fix a Gas Stove in Easy Steps
33 -
 4:05
4:05
PrepYourStead
3 years ago $0.01 earnedUsing an Old Wood Cook Stove
971 -
 8:19
8:19
RoughCutHomestead
1 year agoFireplace/Woodstove Custom Fit Firewood Grate Replacement
8