1 (One) Point Perspective Staircase | How to Draw Stairs Perspective |
This tutorial is about 1 (one) point perspective staircase or 1 (one) point perspective stairs. Learn how to draw stairs steps in perspective or Stairs 1 (one) point perspective step by step easily from this art lesson.
Drawing stairs in one-point perspective can be a bit tricky, but I'll guide you through the process step by step. One-point perspective means that all lines converge to a single vanishing point on the horizon. Here's how you can draw stairs using one-point perspective:
Materials you'll need:
Drawing paper
Pencil
Ruler
Eraser
Step-by-step guide:
Setting up your paper:
Begin by drawing a horizontal line across the middle of your paper. This line will represent the horizon. This is where the vanishing point will be located.
Vanishing Point:
Choose a point along the horizon line as your vanishing point. This is where all the lines in your drawing will converge.
Draw the Horizon Line:
Draw a straight horizontal line across the paper to represent the ground or floor.
Base of the Stairs:
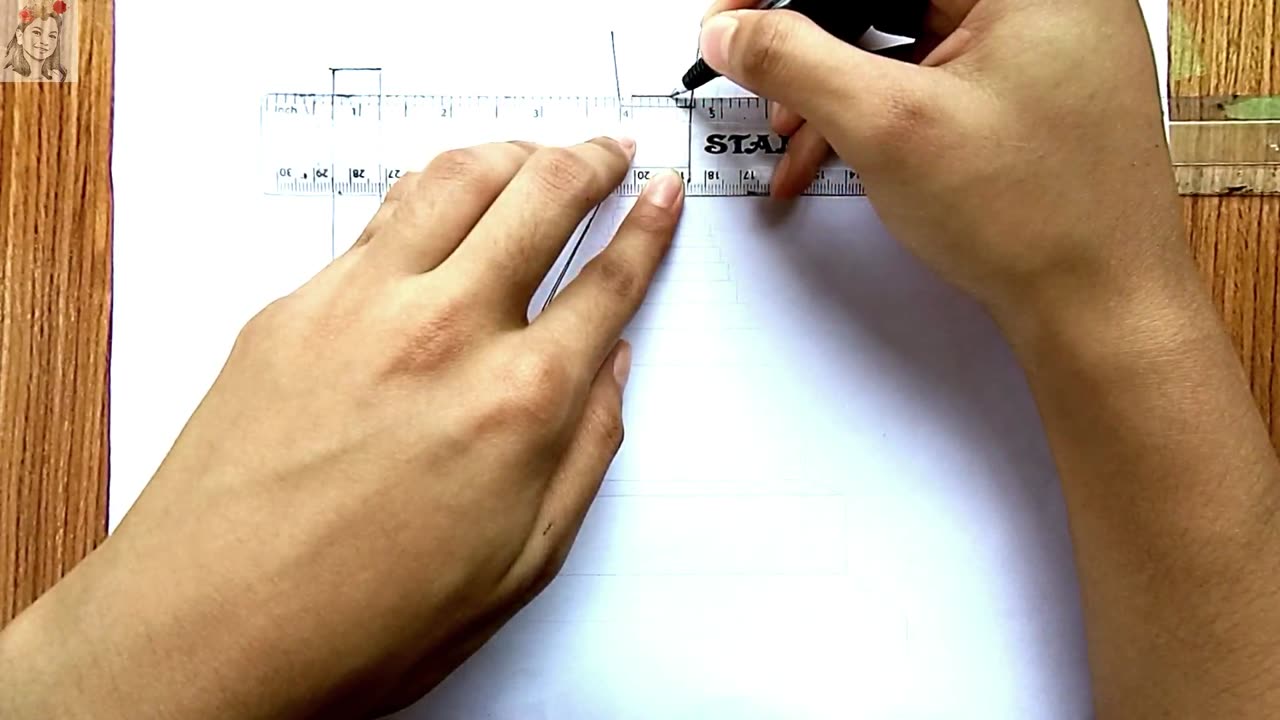
Decide where you want the base of your stairs to be. Draw a vertical line from this point down to the bottom of the page. This will be the first edge of your staircase.
Number of Steps:
Determine how many steps you want in your staircase. Divide the vertical line you just drew into equal segments to represent the risers (vertical parts) of the stairs. Each segment will be one step.
Connecting Lines:
From the top of each segment, draw lines extending towards the vanishing point. These lines will represent the front edges of each step. These lines will converge at the vanishing point.
Depth of Steps:
Draw horizontal lines from the bottom corners of the vertical lines to the nearest diagonal line. This creates the back edge of each step. These lines should be parallel to the horizon line.
Complete the Steps:
Connect the top ends of the diagonal lines to the vanishing point. This creates the back edge of the stairs. Now, connect the ends of the horizontal lines from step 7 to the corresponding diagonal lines. This completes the steps.
Handrail (Optional):
If you want a handrail, you can draw it by adding vertical lines along the side of the staircase. Connect the top ends of these lines with a horizontal line parallel to the horizon line.
Finishing Touches:
Go over your drawing, refining lines as needed. Erase any unnecessary construction lines. Add shading to create depth and volume to your stairs.
Practice makes perfect. Drawing in perspective can take some time to master, but with patience and practice, you'll improve over time. And don't hesitate to experiment and add your own creative touches to the drawing!
🛡️ LIKE ✅ COMMENT ❇ SHARE✅ SUBSCRIBE 🛡️
✅꧁𝓢𝓾𝓫𝓼𝓬𝓻𝓲𝓫𝓮:
/ farinkhanartacademy
📌 Pinterest:
/ farinkhan2007
📌 Facebook: https://fb.me/HowToDrawingTutorialFor...
📌 Twitter:
/ sweetdhaka
📌 Instagram:
/ farinkhan2007
#perspectives_in_education
#PerspectiveDrawing
#DrawingTutorials
#OnePointPerspective
#DrawingTechniques
#ArtTips
#LearnToDraw
#DrawingBasics
#ArtFundamentals
#DrawingSkills
#ArtEducation
#ArtistOnYouTube
#perspectivesoneducation
#perspective_knowledge
-
 5:01
5:01
BIG NEM
9 hours agoInside the Albanian Mob... As a Serb.
6.15K1 -
 1:40:14
TheConnieBryanShow
4 days agoGAIN OF FUNCTION: MRNA, D.A.R.P.A. & THE PFIZER PAPERS
5.89K4 -
 2:14:01
Fresh and Fit
6 hours agoDr. Disrespect Moves To Rumble!
54.9K27 -
 6:14:53
Akademiks
8 hours agoDrake Sued his Label for Botting Kendrick Lamar Streams to 'End Him'. Kendrick Drops new video!
54.2K11 -
 0:46
0:46
Dr Disrespect
14 hours agoIt's not just a stream... it's an experience
324K1.71K -
 5:45:38
80sKiid
9 hours ago $28.47 earnedFirst stream on RUMBLE!!!!!
95.2K5 -
 3:56:31
JakeParker
9 hours ago $14.17 earnedJakeParker is LIVE on Rumble
54K -
 8:09:23
SpartakusLIVE
10 hours ago $26.20 earnedThe Duke rallies squad for LAUGHS into the night with a SMATTERING of TOXIC banter
87.5K17 -
 1:03:51
Flyover Conservatives
1 day agoGeneration Z’s Revolution: 17 Year Old Author on the Return of Faith, Family, and the End of Feminism - Hannah Faulkner; Economic Update - Dr. Kirk Elliott | FOC Show
49.1K2 -
 1:12:43
Adam Does Movies
12 hours ago $20.91 earnedMoviegoers Are Singing Now! + Lilo & Stitch + Sonic 3 - LIVE!
83.8K7