How to Successfully Grow Garlic at Home in Containers
Zoom 5-10 EST daily https://us02web.zoom.us/j/6945489985?pwd=UllwRmwzRUhWS2pXUWNQODNEbnhSZz09 SwT80SwT80C
How to Successfully Grow Garlic at Home in Containers
May be an image of seedlings
Garlic is a versatile and flavorful addition to many dishes, and growing it at home in containers can be both enjoyable and rewarding. This method involves beginning with whole garlic heads, cutting the top around the hard neck, and then placing the entire head in water to encourage growth. Once the garlic head has sprouted, you can divide it into individual cloves and plant them in containers filled with soil. Container gardening allows those with limited space or less-than-ideal outdoor conditions to enjoy a bountiful harvest of homegrown garlic. In this article, we’ll guide you through the process of successfully growing garlic in containers using this unique method.
Materials You’ll Need
Before you get started, gather the following materials:
Garlic heads (bulbs)
A container or pot with drainage holes
High-quality potting soil
Watering can or spray bottle
Sunlight or a grow light
A sunny and well-ventilated spot
Step 1: Select Your Garlic Heads
Choose healthy garlic heads from a reliable source or your local nursery. Look for bulbs that are plump, firm, and free from mold or disease. Varieties with larger cloves are generally recommended for home growing.
Step 2: Prepare the Garlic Heads
Take each garlic head and cut the top around the hard neck, ensuring not to damage the cloves during this process. This step will encourage the garlic to sprout.
Step 3: Start
Step 3: Start the Sprouting Process
Fill a shallow
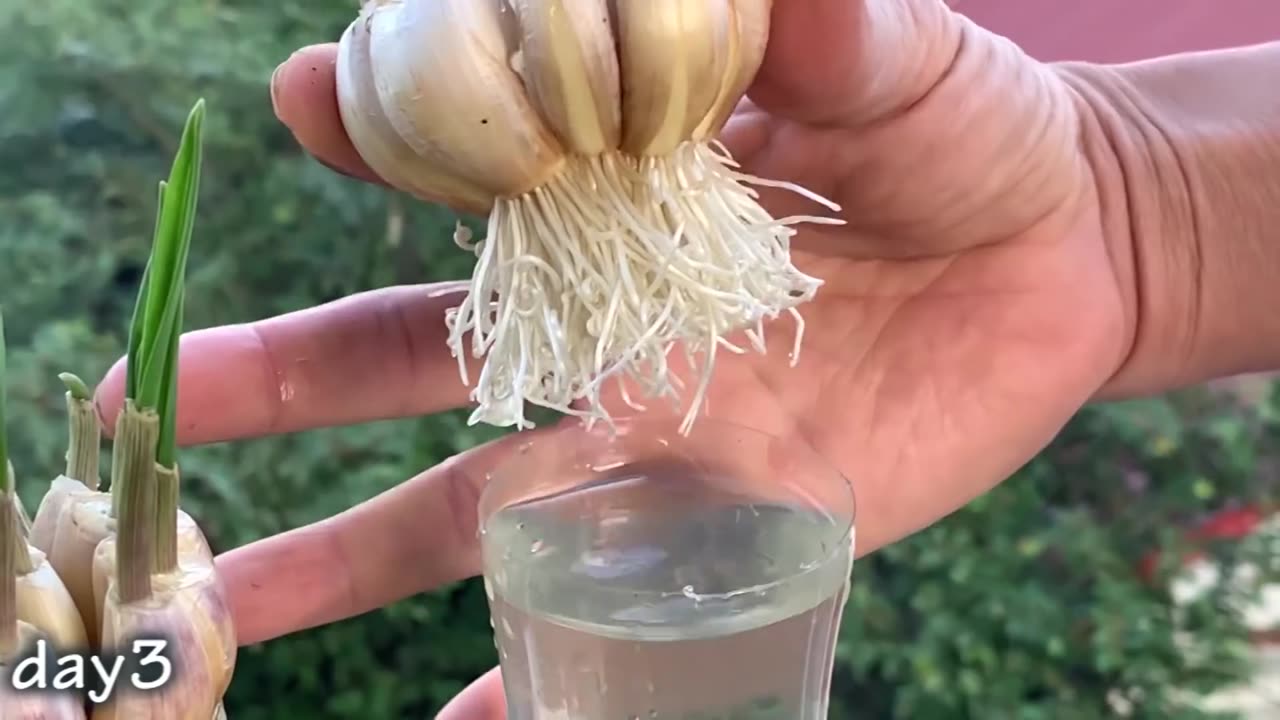
Fill a shallow container or tray with water, just enough to cover the bottom of the garlic head without submerging it. Place the cut garlic head in the container with the top (cut) side facing upward. Position the container in a sunny spot or under a grow light. Change the water regularly to prevent rot and encourage healthy sprouting. After a few weeks, you should see green shoots emerging from the top.
Step 4: Transplanting into Containers
Once the sprouts are around 3 to 4 inches tall, it’s time to transplant them into containers. Choose a container that is at least 6-8 inches deep and has drainage holes to prevent waterlogged soil.
Fill the container
Fill the container with high-quality potting soil, leaving about 2 inches of space from the rim.
Carefully separate the garlic head into individual cloves, ensuring that each clove has a healthy sprout. Place these cloves in the container, with the sprouted tip just below the soil’s surface.
Cover the cloves
Cover the cloves with soil and water gently.
Step 5: Caring for Your Garlic Plants
Follow the care instructions mentioned in the previous version of this article (Step 5) to provide your garlic plants with the necessary sunlight, water, fertilizer, and care.
Step 6: Harvestin
Garlic is typically ready for harvest when the lower leaves begin to turn yellow and die back, usually in late spring or early summer. Gently dig up the bulbs, being careful not to damage them. Allow the bulbs to cure by drying them in a cool, well-ventilated area for a few weeks.
Conclusion
Growing garlic at home in containers using the water sprouting method is a rewarding and relatively simple process. With the right care and attention, you can enjoy fresh, flavorful garlic bulbs that you’ve nurtured from start to finish. Whether you have limited garden space or simply want to try your hand at container gardening, this method allows you to savor the taste of homegrown garlic in your favorite dishes. Happy gardening!
-
 1:03:49
We The People - Constitutional Conventions
10 days agoClaim your name for peace and protection
509 -
 DVR
DVR
Nikko Ortiz
48 minutes agoLive - Reaction Time, News, Politics, and More!
3.87K -
 1:02:26
VINCE
3 hours agoTragedy In Minneapolis | Episode 113 - 08/28/25
143K118 -
 LIVE
LIVE
Reidboyy
43 minutes agoHow To Make $$$ in Delta Force Console Operations!
51 watching -
 LIVE
LIVE
JuicyJohns
3 hours ago $0.26 earned🟢#1 REBIRTH PLAYER 10.2+ KD🟢
34 watching -
 LIVE
LIVE
Major League Fishing
6 days agoLIVE! - Fishing Clash Team Series: Challenge Cup - Day 5
146 watching -
 LIVE
LIVE
LFA TV
4 hours agoLFA TV ALL DAY STREAM - THURSDAY 8/28/25
4,977 watching -
 LIVE
LIVE
Total Horse Channel
14 hours ago2025 URCHA Futurity | Derby & Horse Show | Thursday
112 watching -
 LIVE
LIVE
The Big Mig™
2 hours agoThe War Powers Resolution w/ David Clements
5,137 watching -
 LIVE
LIVE
Badlands Media
7 hours agoBadlands Daily: August 28, 2025
4,239 watching