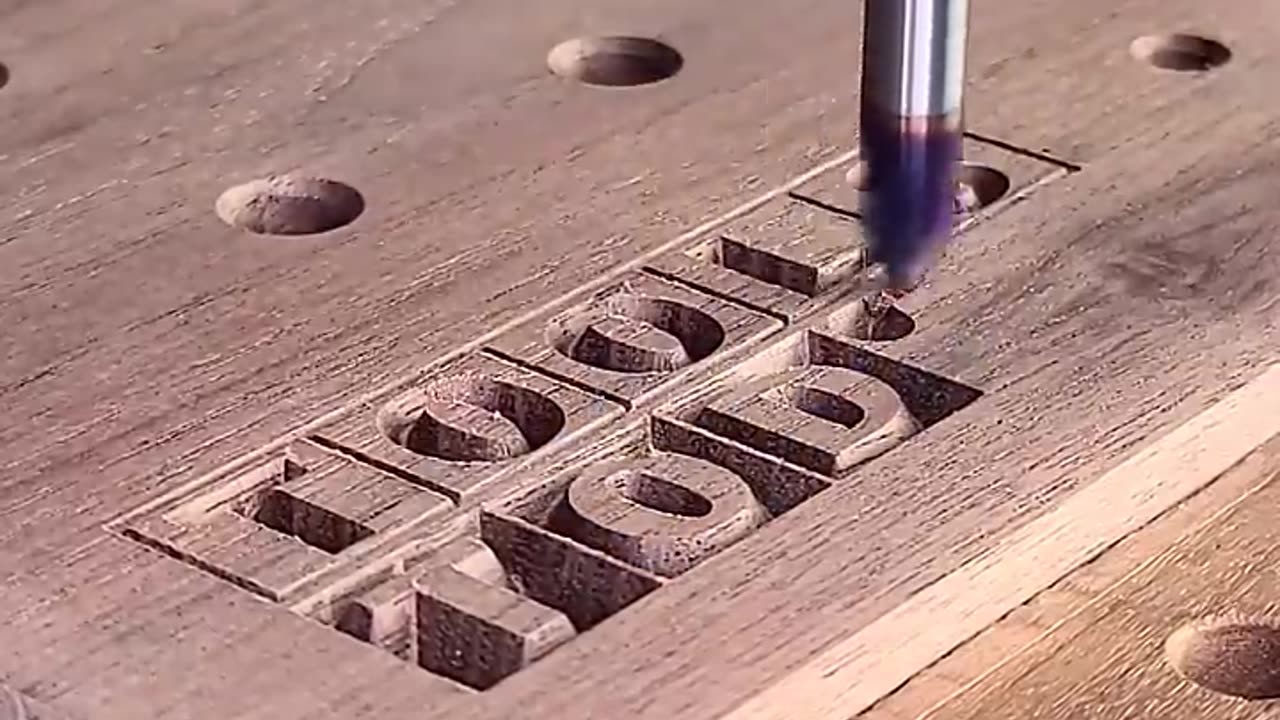
Carving Logo and Filling With Epoxy. #Carving #Logo #Filling #Epoxy #Curing #Finishing #Crafting
### Materials Needed:
1. **Carving Material:** Wood, resin, or any material of your choice.
2. **Carving Tools:** Chisels, carving knives, rotary tools for intricate details.
3. **Epoxy Resin Kit:** Includes resin and hardener.
4. **Mixing Cups:** Graduated cups for accurate measurements.
5. **Stir Sticks:** Wooden or plastic sticks for mixing epoxy.
6. **Pigments/Dyes:** Optional for adding color to epoxy.
7. **Mold Release:** If using a mold for epoxy filling.
8. **Safety Gear:** Gloves, safety goggles, and a respirator mask for fume protection.
9. **Sanding Tools:** Sandpaper or sanding machine for smoothing the surface.
### Steps:
1. **Design Carving:**
- Sketch your logo/design on the material's surface.
- Use carving tools to carefully remove excess material, shaping the design.
- Start with broader tools for rough shaping and switch to finer tools for detailing.
2. **Preparing for Epoxy:**
- Ensure the carved area is clean and free of dust or debris.
- If using a mold, apply mold release agent to ease removal later.
3. **Mixing Epoxy:**
- Follow the instructions on your epoxy resin kit for the right resin-to-hardener ratio.
- Add pigments or dyes if you want a colored design.
- Mix the epoxy thoroughly but avoid creating air bubbles.
4. **Filling the Carved Area:**
- Slowly pour the epoxy into the carved area, ensuring it covers the entire design.
- Use a stir stick to guide the epoxy into intricate details.
- Pop any visible bubbles using a heat gun or a torch (carefully!).
5. **Curing:**
- Let the epoxy cure in a dust-free, well-ventilated area.
- Follow the recommended curing time provided by the epoxy manufacturer.
- Avoid touching or disturbing the curing epoxy.
6. **Finishing:**
- Once cured, the epoxy surface might have a slight dome. You can sand it flat using sandpaper or a sanding machine.
- Gradually move to finer grits of sandpaper for a smooth finish.
- Polish the surface with a polishing compound or wax for a glossy shine.
7. **Final Touches:**
- Clean the surface to remove any dust or residue.
- Inspect the carved logo for any imperfections and touch up if necessary.
Remember, practicing on small pieces before attempting complex projects can improve your skills. Always follow safety guidelines and work in a well-ventilated area.
.
.
.
.
.
Follow For more updates
1. #EpoxyArt
2. #ResinCrafts
3. #DIYCarving
4. #Craftsmanship
5. #WoodworkingArt
6. #EpoxyDesign
7. #HandmadeCrafts
8. #ArtisticCarving
9. #CustomEpoxy
10. #CreativeCrafting
11. #CarvedArtwork
12. #ResinInlay
13. #CraftersCommunity
14. #EpoxyMasterpiece
15. #WoodArtistry
-
 1:57:04
Steven Crowder
4 hours agoAdios & Ni Hao: Trump Sends Abrego Garcia to Africa But Welcomes 600K Chinese to America
248K198 -
 LIVE
LIVE
The White House
4 hours agoPresident Trump Participates in a Cabinet Meeting, Aug. 26, 2025
2,592 watching -
 LIVE
LIVE
Rebel News
1 hour agoCarney's flawed LNG deal, Libs keep mass immigration, Poilievre's plan to fix it | Rebel Roundup
310 watching -
 27:39
27:39
Crypto.com
4 hours ago2025 Live AMA with Kris Marszalek, Co-Founder & CEO of Crypto.com
54.2K4 -
 DVR
DVR
TheAlecLaceShow
2 hours agoMAGA Pushback Against Flag Burning EO & 600K Chinese Students | Cashless Bail | The Alec Lace Show
6K -
 1:09:18
SGT Report
16 hours agoBIOHACKING 101: MAKING BIG PHARMA IRRELEVANT -- Dr. Diane Kazer
27.1K20 -
 4:58:31
JuicyJohns
5 hours ago $1.49 earned🟢#1 REBIRTH PLAYER 10.2+ KD🟢
47.6K -
 1:42:52
The Mel K Show
2 hours agoMORNINGS WITH MEL K - The Future of the Constitutional Republic: Local Action for National Impact 8-26-25
19.6K14 -

The Shannon Joy Show
4 hours ago🔥🔥TACO Trump Rug Pulls AGAIN - Deploying His Fascist Police State In Red States NOT Blue.🔥🔥
13K4 -
 29:43
29:43
Grant Stinchfield
3 hours ago $0.38 earnedBig Pharma’s Dirty Secret: It Writes the Medical School Curriculum
6.01K5