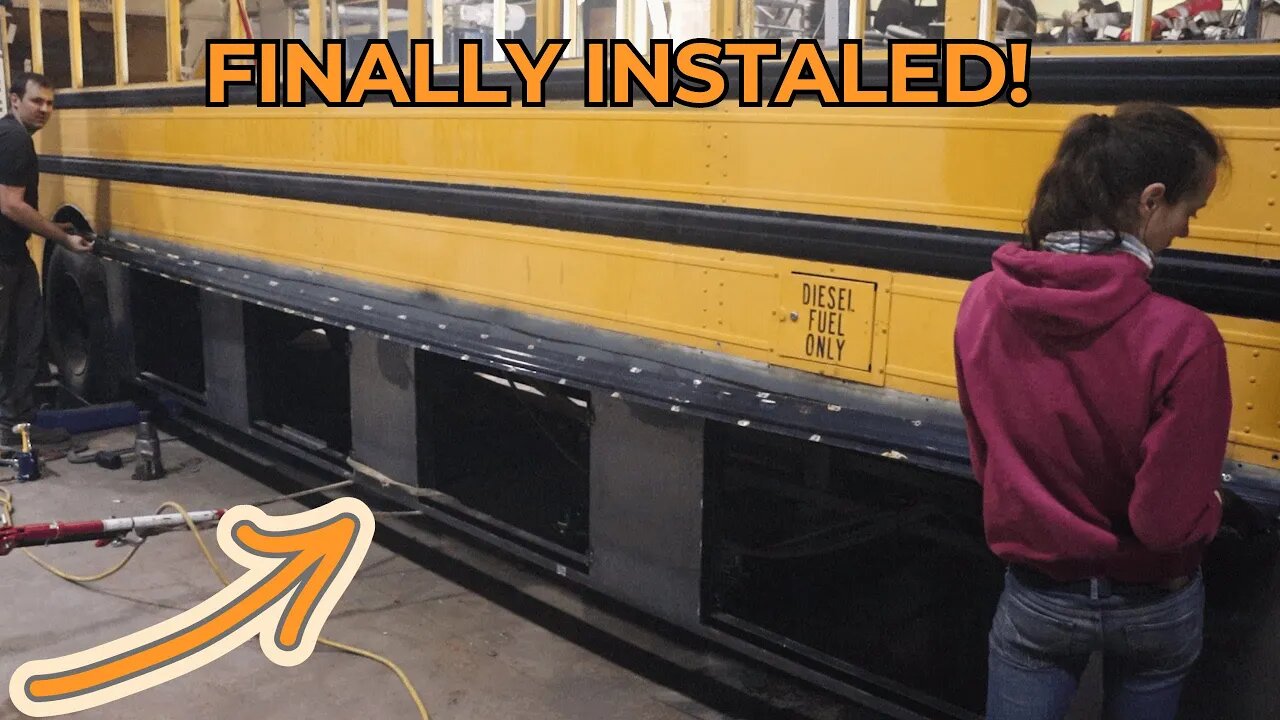
Installing Our Underbay Walls! Skoolie Build Series
Now that the Underbay walls are finished, its time to install them! I made sure to prime any bare metal between the underbay walls and the skin of the bus to avoid future rusting. After we got them into place, we bolted them up, welded them to the body of the bus, and riveted the rub rails back into place.
We are a husband and wife team that loves to take on hard projects. We finished our bus project after 2 years of hard work and are now enjoying life on the road. We plan to travel for a year or two more while we prepare to homestead in northern Idaho. Come join us as we document our journey. Our goal is to inspire you and your fellow viewers to go out and life life the Hard Way.
►Subscribe for weekly videos!
https://www.youtube.com/channel/UCqajQ15EGtfPLSMmkFpDPQw
►Follow us on Instagram, Facebook, Pinterest, and Spotify!
https://linktr.ee/aurora.theadventurebus
► Check out our website!
https://thehardway.works/
#diy #welding #skoolieconversion
00:00 Intro
00:18 Removing Side Door
00:50 Installing Driver's Side Wall
03:32 Installing Passenger Side Wall
06:25 Caulking the Seam
06:57 Installing the Rub Rail
08:50 Next Time
Music from #Uppbeat (free for Creators!):
https://uppbeat.io/t/the-lakes/gold
Music from #Uppbeat (free for Creators!):
https://uppbeat.io/t/zimpzon/country
#Metalworking #DIY #diy #busconversion #skoolieconversion #metalworkingtools #welding #metalworking #vanlife #skoolie #skoolielife #nomad #nomadlife #travel #rv #rvlife #adventure #husbandwifeteam #busbuildseries #busconversionbuildseries #diy #homemade #howto #skoolielife #fixingitright
-
 8:45
8:45
Millionaire Mentor
18 hours agoDevin Nunes SHOCKED Everyone After EXPOSING The Deep State’s Dirty Secret
10.8K5 -
 LIVE
LIVE
BEK TV
23 hours agoTrent Loos in the Morning - 10/15/2025
175 watching -
 2:53
2:53
OfficialJadenWilliams
16 hours agoWhen GTA 6 is TOO detailed...
11K1 -
 LIVE
LIVE
FyrBorne
11 hours ago🔴Battlefield 6 Live M&K Gameplay: Finding The Real GOATs of Battlefield 6
79 watching -
 50:14
50:14
Coin Stories with Natalie Brunell
23 hours agoUptober, Q4, and Bitcoin’s Next Leg with Mark Moss
79.9K9 -
 LIVE
LIVE
Lofi Girl
2 years agoSynthwave Radio 🌌 - beats to chill/game to
156 watching -
 2:03:38
Midnight In The Mountains™
2 hours agoMorning Coffee w/ Midnight & The Early Birds | Musks Starlink Falling from Heaven... Internet Heaven
7.34K -
 42:12
42:12
PudgeTV
2 hours ago🔴 The Forever Winter | The 3 Rumskateers Adventure into Darkness
4.59K1 -
 31:05
31:05
Liberty Hangout
1 day agoAnti-Fascists Can't Define Fascism
137K163 -
 2:35:27
FreshandFit
9 hours agoThe Biggest Debt Problem in America
111K15