Simple DIY Solar Dehydrator
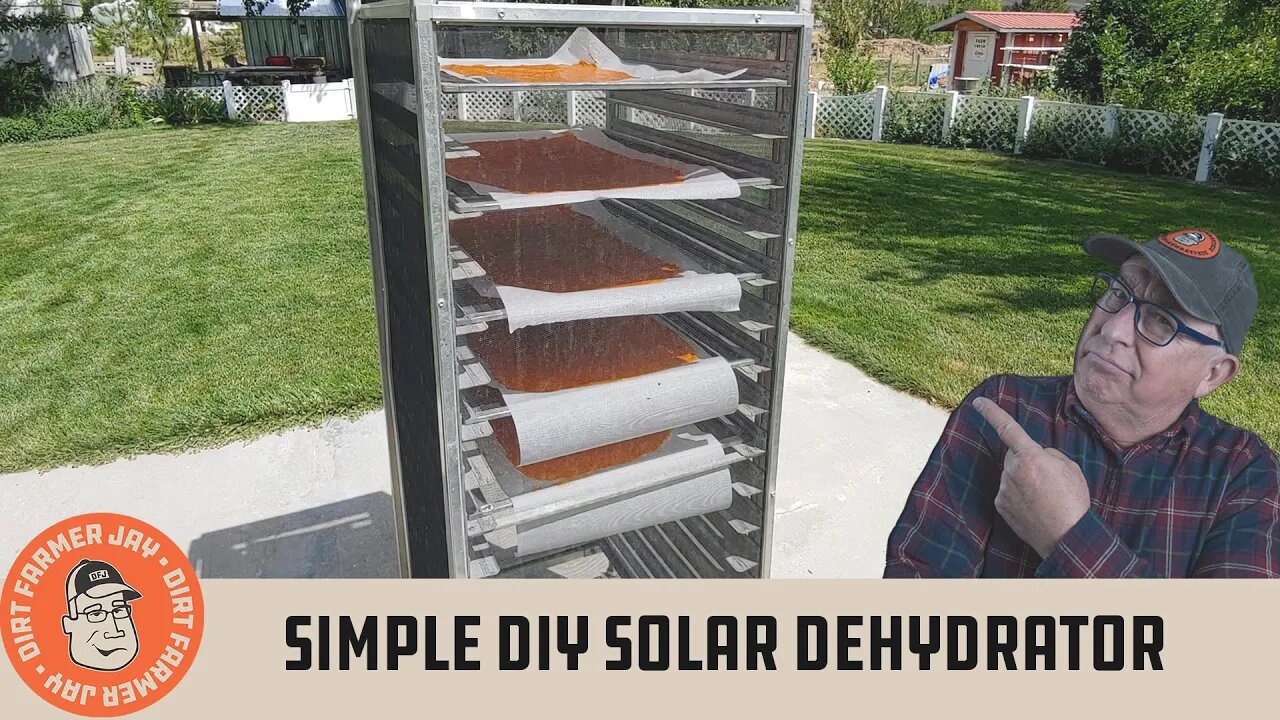
Old bakery racks make fantastic solar dehydrators! With simple window screen panels, trays, and a door, you’ll be churning out all sorts of dried foods!
#dehydrating #driedfruits #raisins #solardryer
Buy your DFJ T-Shirt, Cap, or Coffee Mug at https://www.dirtfarmerjay.com/shop
We repurposed a bakery rack that our friends Jesus and Kim gave us. With 18 rack spaces, it was an easy jump from holding cooking sheets to dehydrator screens. Two of the spaces were utilized at the top and bottom for screen enclosures, leaving 16 tray spaces. We like the capacity!
There are various manufacturers and models of these types of racks, so the one you obtain is likely to be different than ours. For that reason, we will give you a construction overview, not specific plans. Don’t worry, this is pretty simple stuff!
You’ll be constructing screened panels for this project, and here is an episode we did that shows you how to do that. You’ll be using off-the-shelf components from your favorite hardware retailer. You’ll use aluminum screen frame material (we like to use 5/16” - which is about 8mm), spline, connector corners, and fiberglass screen material. You’ll need a spline roller, a utility knife, a hacksaw (or fine-toothed saw blade on your miter saw) and scissors are good too.
Here’s the link to our screen construction episode:
You’ll be constructing both exterior screens that will enclose your dehydrator (to keep flies, wasps, bees, and other “visitors” off what is being dried), as well as the interior frames that you’ll dry food products on.
The overall dimensions of our unit (including the wheels) are about 68” tall, 23” wide, and 27” deep (173 cm tall, 58 cm wide, and 69 cm deep).
We have a few enhancements in mind. While the magnet catches hold the door shut okay, a hook and eye arrangement may be better. I think we’ll add a door pull to the door frame too. The wheels that came from the factory are pretty worn and they don’t roll without a bit of resistance. I may build a platform with higher-grade urethane wheels to make it easier to roll.
As far as enclosing the unit, you’ll need to make 5 screen frames that are sized to your unit - top, bottom, both sides, and the back.
Next, you’ll need to construct a door frame. You could do this with wood, but if you want something that is durable and will last as long as the rest of the unit, use aluminum square tubing. Construction is simple - cut the pieces with 45° angles. I use my miter saw to do this (yes - you can cut aluminum - but not ferrous metal - on your power saw!). Make sure the pieces are secured as you slowly cut the material and make sure that both sides are the same length, as well as the paired top and bottom. Then secure the 4 pieces using self-tapping screws and corner angles. Install a straight reinforcement bar somewhere across the middle, and secure it with self-tapping screws and corner angles - two at each end of the bar for a total of four.
We use 3”/76 mm angles because they have two holes on each side of the angle, making for a secure attachment that won’t rotate - everything stays in line during assembly and when completed.
We then attached the door frame to the front of the rolling rack using 4 2-½”/64 mm zinc-coated flat hinges. Each leaf has 3 holes, so each hinge is attached with 6 screws
Once the front door frame is attached to the unit, then apply the front screen to it, once again using self-tapping screws. Be careful not to overdrive them, as the aluminum screen frame stock dimples quite easily.
We’re also contemplating adding a simple solar collector that will sit under the unit and out to the back to create a flow of warm air up through the racks. If we do that, we’ll show you how we did it and will post the link here.
One other caveat. When you are rolling the unit from place to place (perhaps to sunny spots), grasp it with two hands about 2/3rd of the way up from the ground. This will overcome the tendency for the unit to tip if the tires go into a crack or encounter a small rock.
When it comes time to clean the frames, it's easy to do by removing the frames and using a flexible plastic bristle brush to wash them down with soapy water and then rinse. If you’ve dried something with a strong scent (like onions or garlic), you can spritz lemon juice or vinegar on the frames and let them set for a bit. These acids will neutralize the odors and then you wash and rinse the frames as usual. Some people suggest drying potatoes after onions to absorb the scent and take advantage of the flavor. Although we’ve not done that, it sounds clever!
If you’d like a great recipe for simple and delicious apricot fruit leather, this is the recipe we use from Natasha’s Kitchen:
https://natashaskitchen.com/how-to-make-apricot-fruit-leather/
JUST DO IT YOURSELF!
Instagram: https://www.instagram.com/dirtfarmerj
Facebook: https://www.facebook.com/dirtfarmerjay
-
 5:09:25
Drew Hernandez
13 hours agoGIDEON AI THREAT DETECTION SOFTWARE PUSH & NEW EPSTEIN EMAIL LEAK?
52.1K33 -
 2:03:51
TimcastIRL
10 hours agoTrans Minneapolis Shooter BLAMED Massacre On Mom & Gender Transition | Timcast IRL
193K359 -
 47:29
47:29
Man in America
16 hours agoIT DOESN'T ADD UP: The Trans Shooter's Story Is FULL of Holes
63.4K68 -
 3:59:36
StevieTLIVE
9 hours agoFriday Night Warzone HYPE
46.7K1 -
 3:47:10
SynthTrax & DJ Cheezus Livestreams
1 day agoFriday Night Synthwave 80s 90s Electronica and more DJ MIX Livestream Michael Jackson / AI Art Compilation Edition
54.6K2 -
 1:03:57
Sarah Westall
9 hours agoMara Lago Accord Joins the Fed, Fed Waves the White Flag & more w/ Andy Schectman
36K3 -
 2:44:12
I_Came_With_Fire_Podcast
1 day ago*BREAKING* Special Guest Katarina Szulc
45.8K10 -
 3:22:20
megimu32
9 hours agoOFF THE SUBJECT: FAFO Friday! Bodycams & Mario Kart Mayhem!
30.5K6 -
 55:36
55:36
Flyover Conservatives
1 day ago4 Strategies to Create Opportunity from Nothing - Clay Clark | FOC Show
33.7K1 -
 1:49
1:49
Gaming on Rumble
15 hours agoWhat is the Rumble Creator Program!?!? (Active Premium Creators) | Lvl UP
31.1K2