How to Change and Flush the Power Steering Fluid on a Dodge Ram
How to replace and flush out old power steering fluid in a third generation Dodge Ram. This is a 2006 1500 4x4 model with a 5.7L V8, procedures may vary based on your model or engine type. A similar procedure may also apply to other Dodge vehicles as well. For this truck, I will be upgrading to synthetic. This isn’t mandatory, it’s a personal preference. Looking in the owner’s manual, make sure you refer to yours as well to be safe, this truck requires ATF +4 automatic transmission fluid. The amount required is about 3.5 quarts or litres. From what I’ve been able to find, the fluid is to be replace every 120,000 km or 75,000 miles. #dodgeram #dodge #mopar
Website: http://4diyers.com
Patreon: https://www.patreon.com/4diyers
Facebook: https://www.facebook.com/4diyers
Twitter: https://twitter.com/4DIYers
Instagram: https://www.instagram.com/4diyers/
Tumblr: http://4diyers.tumblr.com
Pintrest: https://www.pinterest.com/4diyers/
Tools/Supplies Needed:
-interlocking pliers
-new power steering fluid
-drain pan
-funnel
-jack with stands
Chapters:
00:00 Intro
00:48 Disconnecting the Lines
01:27 Draining the Fluid
02:31 Flushing the System
03:00 Draining the Fluid Again
03:22 Reconnecting the Lines
03:44 Adding New Fluid
05:52 Bleeding the System
Procedure:
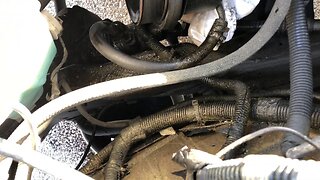
Going under the truck, make sure you have a drain pan handy. The easiest way is to remove the rubber lines off the cooler. These are held on with two crimp clamps. Using interlocking pliers, grab onto the clamps and pull them back from the connections.
Sometimes these rubber lines can stick, so you may need pliers to twist and help break them free. Having the pan close, grab onto the one line, twist and pull off. You may want to hold the steel line on the cooler so it doesn’t bend or damage it. You can just remove the lower line if you wish.
Then allow the fluid to drain. I used a strap to hold the lines down and direct them into the drain pan. To push out more fluid from the steering rack, turn the wheels full lock left to right. The front of the truck can be elevated, this will reduce drag when turning the wheels.
Another option is briefly starting the engine. Typically this is not something I like to do, however on this model of Dodge, there is no way to disable the engine starting. I started the truck and immediately turned it off. Do not run the engine any longer, no oil in the pump can cause damage.
To do a quick flush, I reconnected the lines. Reinstalled the clamps so the hoses don’t come disconnected. Make sure the area around the cap is clean on the reservoir, fill up the reservoir with new fluid. Start the truck and only let it run for about 15 seconds to circulate the fluid. And then turn the engine off.
Again disconnect the lines by removing the clamps and pulling off the hoses, then let the system full drain. You can turn the wheels or briefly start and turn off the engine if you wish. Loosening the reservoir cap can sometimes help with draining the system too.
Once the system is fully drained, reinstall the lines. Push the hoses on the connections ensuring they’re fully seated and pushed against the lips on the metal lines.
Then reinstall the clamps using the interlocking pliers. Add fluid to the system. Remove the reservoir cap and using a funnel, add fluid to the system. When the fluid no longer drops in level, with the front of the truck elevated to remove weight off the wheels, turn the steering wheel left to right, full lock to lock. Add fluid when the level drops. Again turn the wheels full lock left to right multiple times until the level stops dropping. Start the engine briefly and shut down, check the fluid level again. Add fluid again if needed.
Starting the engine again, let it run and turn the wheels full lock left to right. So no hold the steering against the lock as this can cause excessive strain on the pump. You may notice the pump whine briefly, this is normal as air is trapped in the system. Turn the wheel multiple times and keep checking the fluid level. Do this until all the air is bled from the system, so the fluid is a solid red color with no bubbling and the pump is quiet.
When done, shut the engine off and check the final level. The reservoir cap is equipped with a dipstick, it has level reading for when the system is hot and cold. The level should be half or 3/4 of the way between the low and high fill markings.
Thank you to all those who watch my videos and support my content. Don't forget to subscribe to my channel for future tutorial videos and like my video if you found it helpful. New videos are always being uploaded every week!
© 4DIYers 2013
All Rights Reserved
No part of this video or any of its contents may be reproduced, copied, modified or adapted, without the prior written consent of the author.
-
 3:02
3:02
4DIYers
8 months agoHow to Bleed the Power Steering System on a Dodge Ram
10 -
 5:35
5:35
4DIYers
8 months ago $0.03 earnedHow to Remove the Steering Knuckle on a Dodge Ram
149 -
 3:15
3:15
Garage Boys
5 years agoHow To Replace Power Steering Hose On Dodge Ram 98-04
1 -
 22:11
22:11
MKS PERFORMANCE & OFFROAD
3 years ago $0.01 earnedDonaldson/Cat Fuel Filter Relocation Kit DIY (4th Gen 2018 Ram 6.7L Cummins)
299 -
 3:04
3:04
Fix it Angel Car Repair Channel
7 years agoSIMPLE Power Steering Flush Toyota 4Runner √ Fix it Angel
10 -
 17:36
17:36
CP Steve Miller
1 year agoHow To Adjust A Steering Box One Time & Have It Perfect In 30 Minutes | Dodge Ram 2/3500
8141 -
 5:03
5:03
Endless Money Pits
1 year agoBrake Fluid Flush – Nissan Maxima 2009-2014
30 -
 4:49
4:49
AutomotiveForBeginners
1 year ago $0.01 earnedQuickest Way to Fix Leaking Power Steering Hose | Cheap N' Easy.
5 -
 37:37
37:37
DCAutoEnhancement
1 year agoDodge Chrysler 3.5L Timing Belt and Water Pump Installation I Saved a Ton of Money!!!
35 -
 8:09
8:09
PrizzaMike
2 years agoHow to Install Volvo Electric Power Steering Pump into Most Cars
16