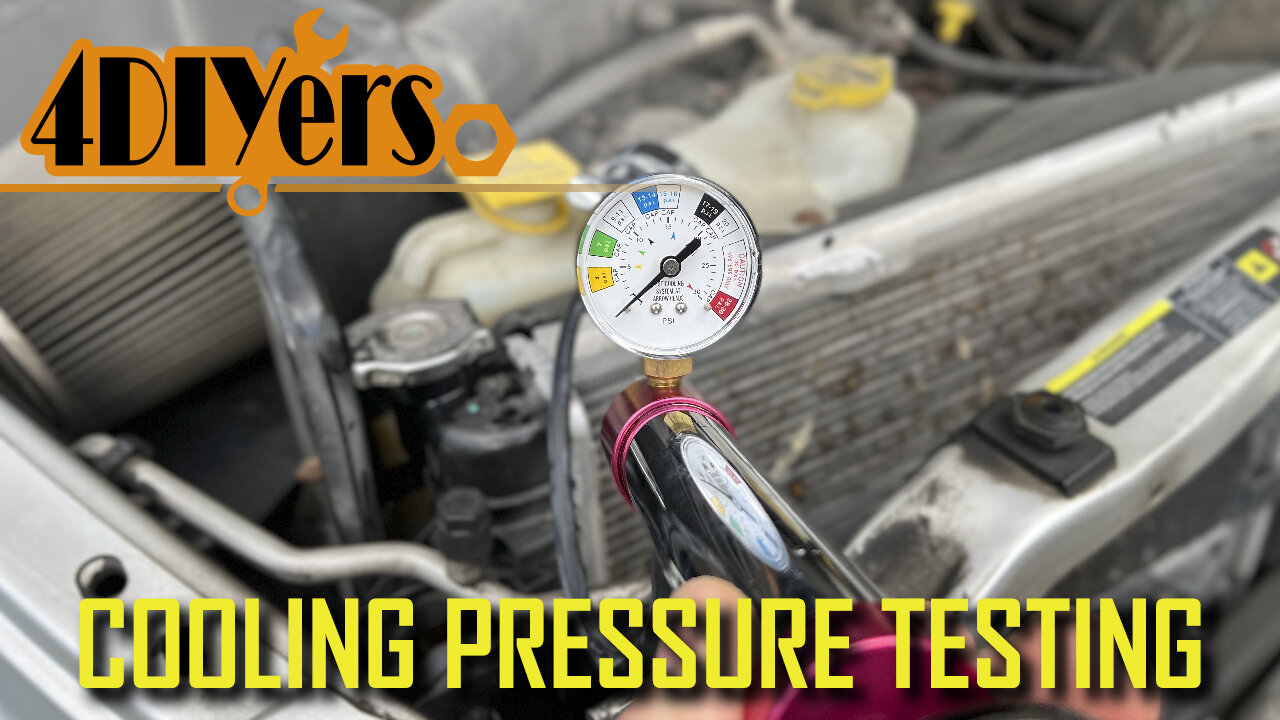
How to Pressure Test a Cooling System
How to pressure test your cooling system in your vehicle. This will help you determine if your system has a leak and potentially allow that leak to show up depending on its location. A leak in the cooling system will not only cause a loss of fluid but cause poor cooling performance too. Decreased pressure will also decrease the system’s boiling point. #oemtools #coolingsystem #autorepair
OEMTOOLS 27068 Pressure Testing: https://www.mobiledistributorsupply.com/27068-oemtools-universal-cooling-system-pressure-test-kit-oem
Website: http://4diyers.com
Patreon: https://www.patreon.com/4diyers
Facebook: https://www.facebook.com/4diyers
Twitter: https://twitter.com/4DIYers
Instagram: https://www.instagram.com/4diyers/
Tumblr: http://4diyers.tumblr.com
Pintrest: https://www.pinterest.com/4diyers/
Tools/Supplies Needed:
-pressure tester
Procedure:
For this, I’ll be using my OEMTOOLS 27068 universal cooling system pressure testing kit from Mobile Distributor Supply. This can work on most vehicles and can have extra attachments purchased to work on additional vehicles. It comes with everything you need all neatly packed in a blow mold case. This includes three expandable rubber adapters which provide a tight fit when tightened up in the radiator fill point or expansion today depending on your vehicle's cooling system design.
Simply screw on the rubber adapter to the flange attachment and this will then connect to the hand pump. There is a rotational lever on top which locks it down so it has a tight seal, this is for the removal and installation of the flange attachment.
Ensure your vehicle's cooling system is cold so we don’t risk the chance of burning yourself. Next is locating and removing your radiator cap. Here I am working on a 2006 Dodge Ram, this is one example.
As a second example, if you have a pressurized reservoir tank, then you would need to test the system here instead. This is on a 2010 BMW 335d. Again you’ll need to pick the appropriate insert, tighten it to ensure it doesn’t leak and then lock on the flange attachment. Pump the system up to the appropriate pressure rating and monitor the gauge. This particular cap doesn’t state the system pressure, however that information can be found online or in a repair manual.
Make sure the system is full of coolant or water if you will be repairing it right away. Air can compress more than water so it’ll take you longer to pressurize the system. With water in the system, you’ll also be able to spot the leak easier as the liquid will come out of the problem area instead of air.
The radiator cap will have the required system pounds, this is needed to be known for pumping up the system to the correct pressure measurement.
Next is installing the rubber adapter with one side of the flange. Once in place then tighten it up, The rubber will expand in the hole creating a tight fit allowing us to pressurize the system.
Connect the flange on the pump side, and flip the rotational latch to ensure it’s locked into place.
Using the hand pump, bring the system up to pressure which was listed on the radiator cap.
Then monitor the gauge for a pressure drop. If a leak is present, the pressure will drop and you may potentially hear or see liquid dripping.
Common areas to look for are rubber coolant hoses such as radiator or heater core hoses. It could be something as simple as a loose clamp. Other areas can include the water pump, thermostat housing, heated upper intakes, the side tanks on the radiator, around the head, frost plugs, heater core, etc. With a heater core, you may notice fluid inside the cabin of the vehicle around the footwell area or dripping from the duct drain. This could be something as complicated as a leaking head gasket or cracked block.
I would keep an eye on the gauge for about 10 minutes. If the pressure doesn’t drop over that period, then there is no leak. If a leak isn’t found, it could be in a hidden area such as a valley pan under an intake, a water jacket leaking through a head gasket inside the engine, etc. This will depend on the vehicle and how the engine is designed.
Once you have repaired the system, it’s always a good idea to re-test the system ensuring the problem has been repaired.
Thank you to all those who watch my videos and support my content. Don't forget to subscribe to my channel for future tutorial videos and like my video if you found it helpful. New videos are always being uploaded every week!
© 4DIYers 2013
All Rights Reserved
No part of this video or any of its contents may be reproduced, copied, modified or adapted, without the prior written consent of the author.
-
 LIVE
LIVE
BlackDiamondGunsandGear
3 hours agoITS MA'AM!! / After Hours Armory / The Left Want Violence?
63 watching -
 44:54
44:54
SouthernbelleReacts
8 days agoHIS RUG… I CAN’T STOP LAUGHING 🤣 | Big Lebowski Reaction
2077 -
 LIVE
LIVE
megimu32
2 hours agoOFF THE SUBJECT: Reddit Meltdowns, Music Takes & Bodycam Breakdowns
560 watching -
 LIVE
LIVE
The Rabble Wrangler
7 hours agoRedSec with Mrs. Movies | The Best in the West Carries His Wife to Victory!
159 watching -
 LIVE
LIVE
DLDAfterDark
1 hour agoTrans Man's Death Threats To Christian Conservatives - Whistlin' Diesel Tax Evasion
114 watching -
 23:42
23:42
Robbi On The Record
2 days ago $5.55 earnedWhat's happening in the republican party?? BTS of Michael Carbonara for Congress
47.8K9 -
 4:53
4:53
PistonPop-TV
2 days ago $0.02 earnedThe G13B: The Tiny Suzuki Engine That Revved Like Crazy
2.27K -
 LIVE
LIVE
GritsGG
3 hours ago#1 Most Warzone Wins 4000+!
220 watching -
 LIVE
LIVE
Joker Effect
1 hour agoSTREAMER NEWS: WHAT IS JOKER DOING?! Where is the streamer space going now?! Q & A
241 watching -
 LIVE
LIVE
Eternal_Spartan
4 hours ago🟢 Eternal Spartan Plays Arc Raiders - New Updates! | USMC Veteran
70 watching